This integration helps streamline communication by enabling your agent to send follow-ups, notifications, or real-time alerts without manual effort.
This guide walks you through setting up the Outlook connection, authorizing your account, configuring your email details, and testing the workflow.
Access the Integration Panel
- From your Phonely dashboard, click Agent Design on the left sidebar.
- Open an existing workflow or click Create New Flow to start a new one.
- Click the plus (+) icon on the right side of your selected block.
- In the menu that appears, scroll down to Post Call Actions (or Live Call Actions) and select Microsoft Outlook.
Choose an Action
Once the Microsoft Outlook integration window opens, you’ll be guided through three stages: Setup, Configure, and Test.- Under the Setup tab, open the Action dropdown menu.
- Choose Send Email - this action allows your Phonely agent to compose and send an email through your connected Outlook account.
- Click Add Connection to begin linking your Microsoft Outlook account.
Link Your Microsoft Outlook Account
When you click Add Connection, A popup window appears asking you to Connect. Once you click Connect, Phonely prompts you to authorize access to your Outlook account. If You Are Already Signed In- Phonely detects your existing Microsoft login automatically.
- Select your account or click Add Account to sign in.
- Review the permissions requested by phonely-integrations:
- Send mail as you - Allows Phonely to send emails from your account.
- Read and write access to your mail - Lets Phonely create, update, and manage emails in your mailbox.
- Maintain access to data you have given Phonely access to - Keeps the integration active even when you’re offline.
- Read your profile - Enables Phonely to identify your account and link it correctly.
- Click Accept to grant permissions.
Confirm the Connection
When authorization is successful:- The Connection dropdown will display your Outlook account.
- A green status indicator confirms the link is active.
- The Continue button becomes active, click it to move to the next step.
Configure Email Settings
In the Configure step, define exactly how your agent should send the email during or after a call. This includes setting recipients, subject, body content, and fine-tuning behavior through Advanced Settings.Recipient (To)
Enter one or more email addresses that should receive the message.
- Use Add Recipient to include multiple recipients.
- You can use dynamic variables (e.g.,
caller_email) to personalize who receives the message based on the call data. - For live calls, this might be a teammate or support inbox; for post-call workflows, it’s often the customer or lead.
Advanced Settings
Click Advanced Settings to access additional configuration options that define how your email behaves.Body Type
Select how your email content should be formatted:
- HTML – Use this for formatted or branded emails.
- Plain Text – Use this for simpler, lightweight communication.
Cc (Carbon Copy)
Add additional recipients who should receive a visible copy of the email.
- This is ideal for notifying supervisors or team members of customer interactions.
Reply To
Specify an email address for responses if you don’t want replies sent to the sender’s account.
Interim Message
Enable this option to send a short, temporary message to the caller while the email is being processed during a live call.
- Check Interim Message to activate it.
- In the Interim Message Prompt, write or generate a friendly phrase such as:
“Please hold on while I send that for you.”
Post Interim Message Delay (Optional)
If selected, Phonely will wait a few seconds before sending the interim message — useful for smoothing timing between live agent responses.
Call Outcome Tagging
Add one or more tags to categorize the result of the action or call.
- Example: _“follow-up,” “lead,” “escalated”. _
- These tags make it easier to filter and track calls in your reports or analytics dashboards.
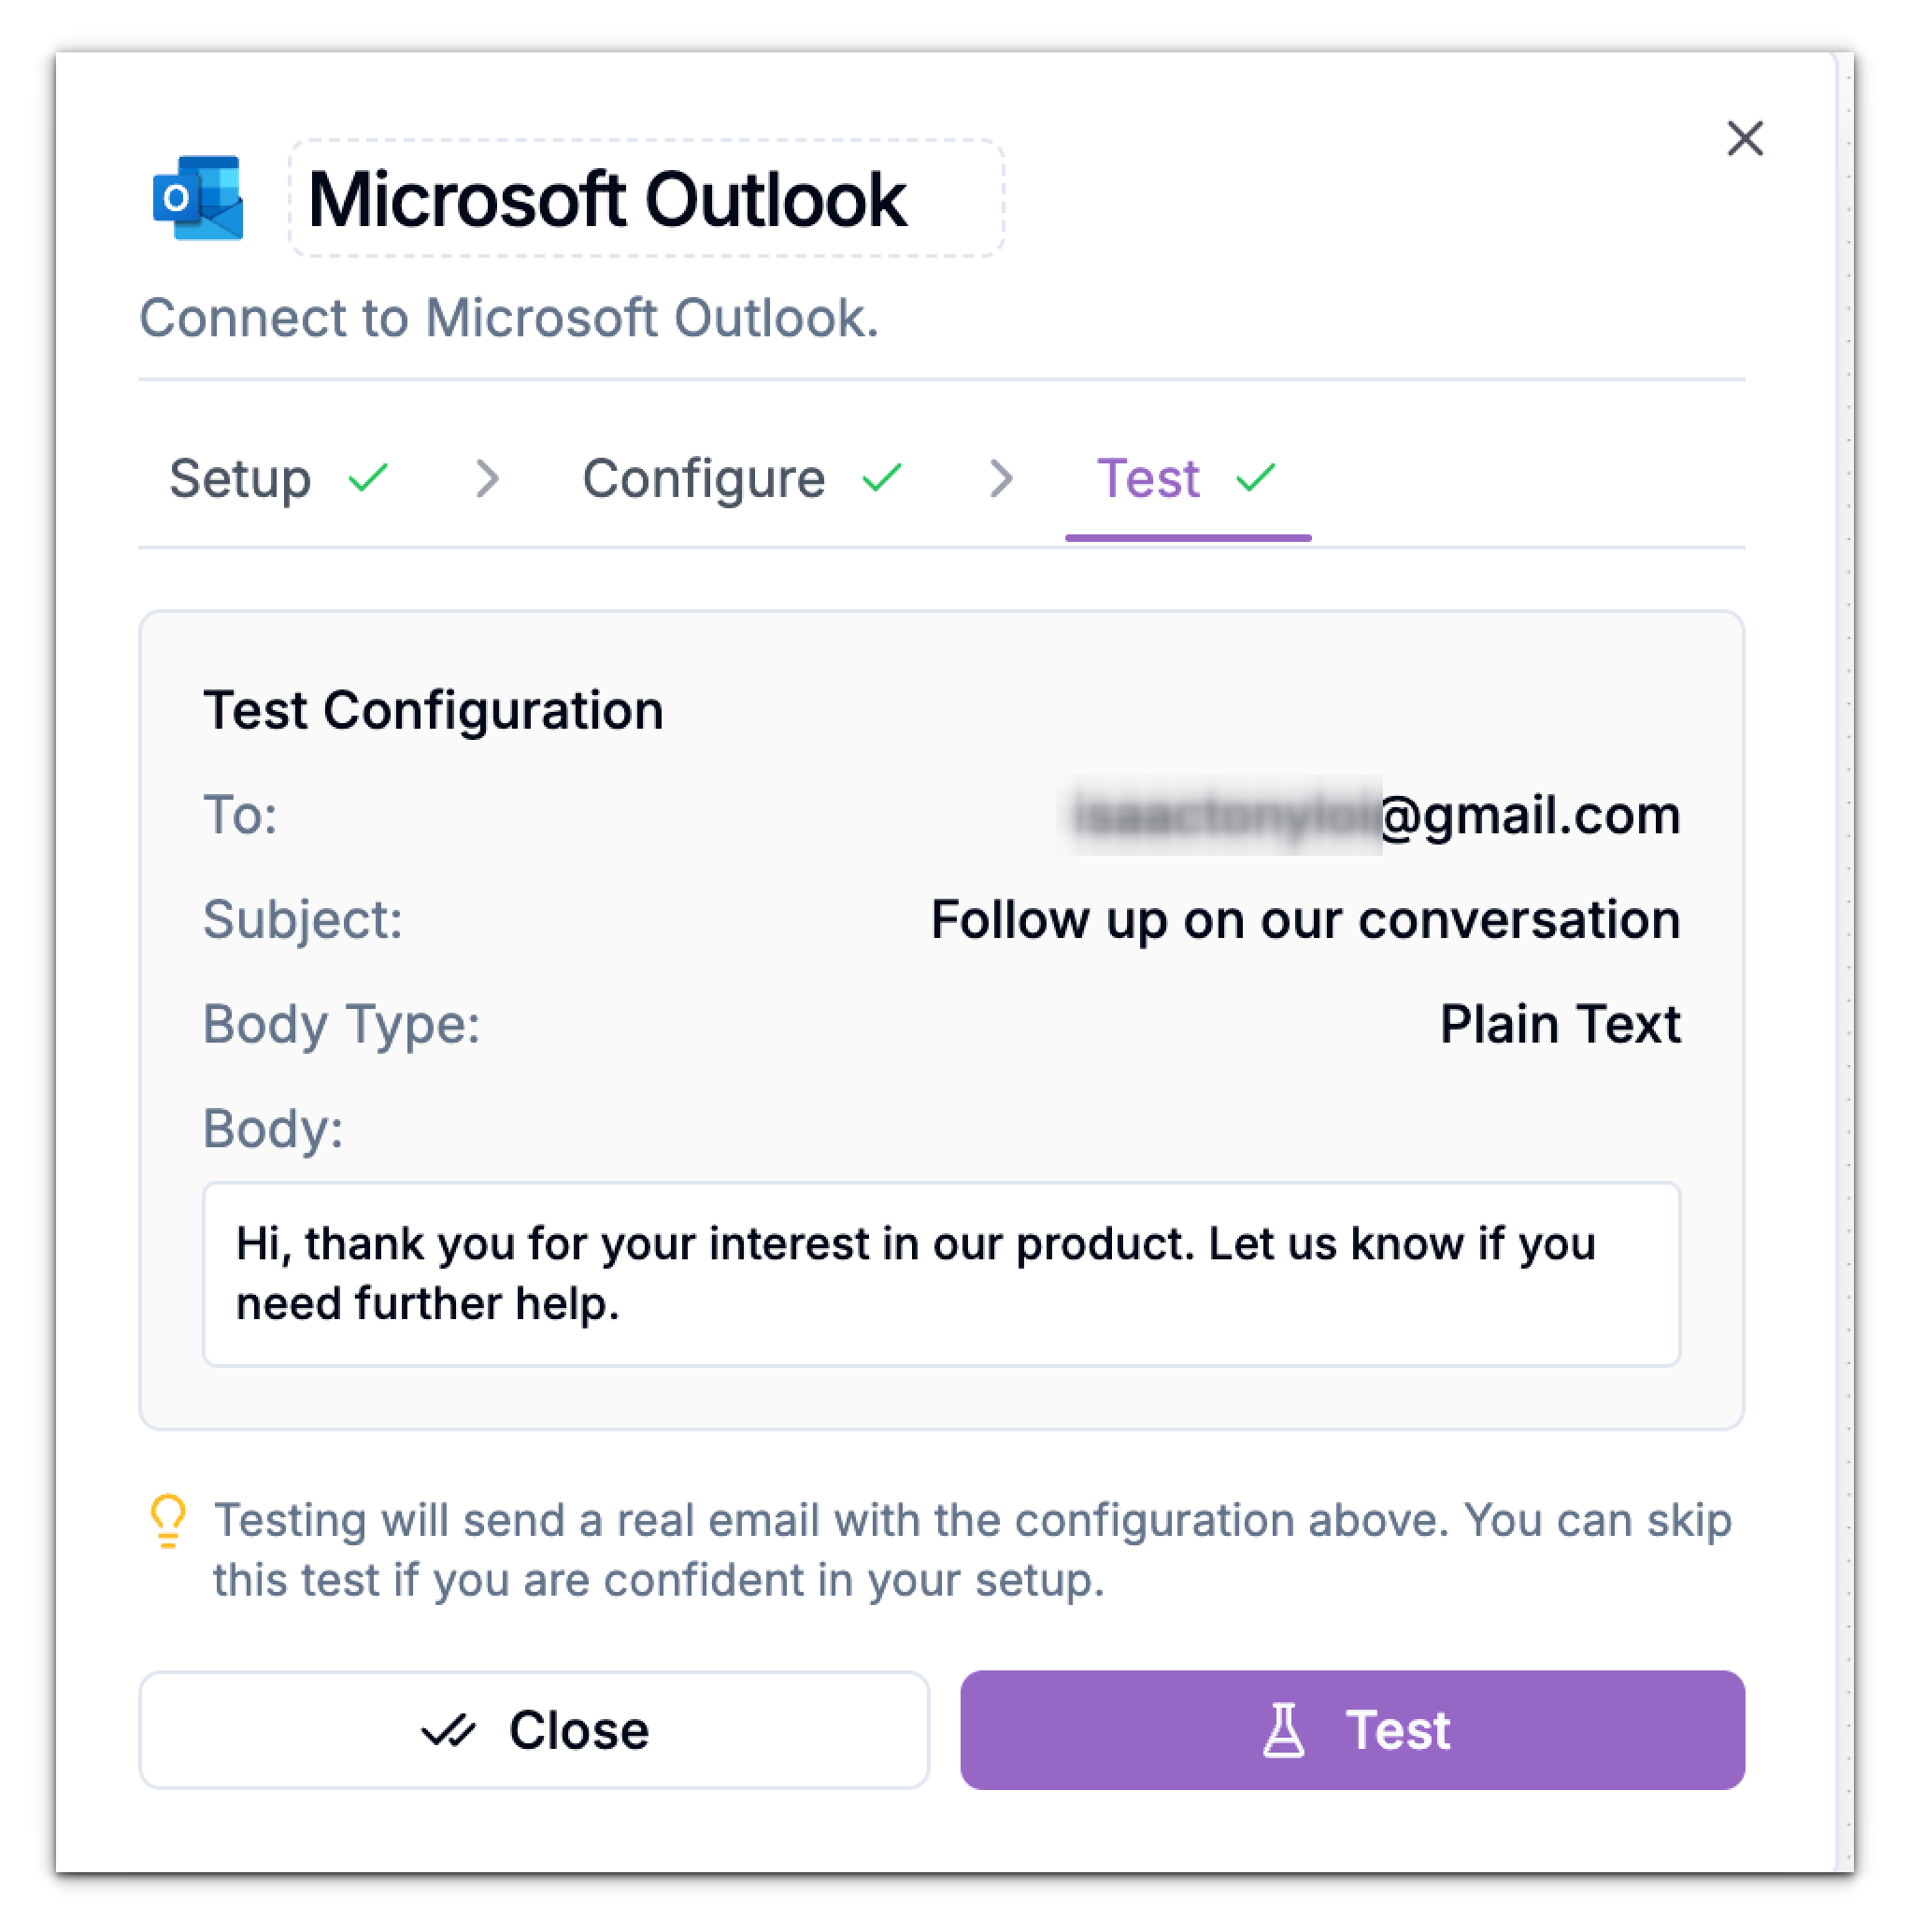
Test the Integration
Before publishing, it’s important to confirm your Outlook connection is working.- Go to the Test tab in the setup panel.
- Click Send Test Email.
- Check your Outlook inbox for a confirmation email.