
1
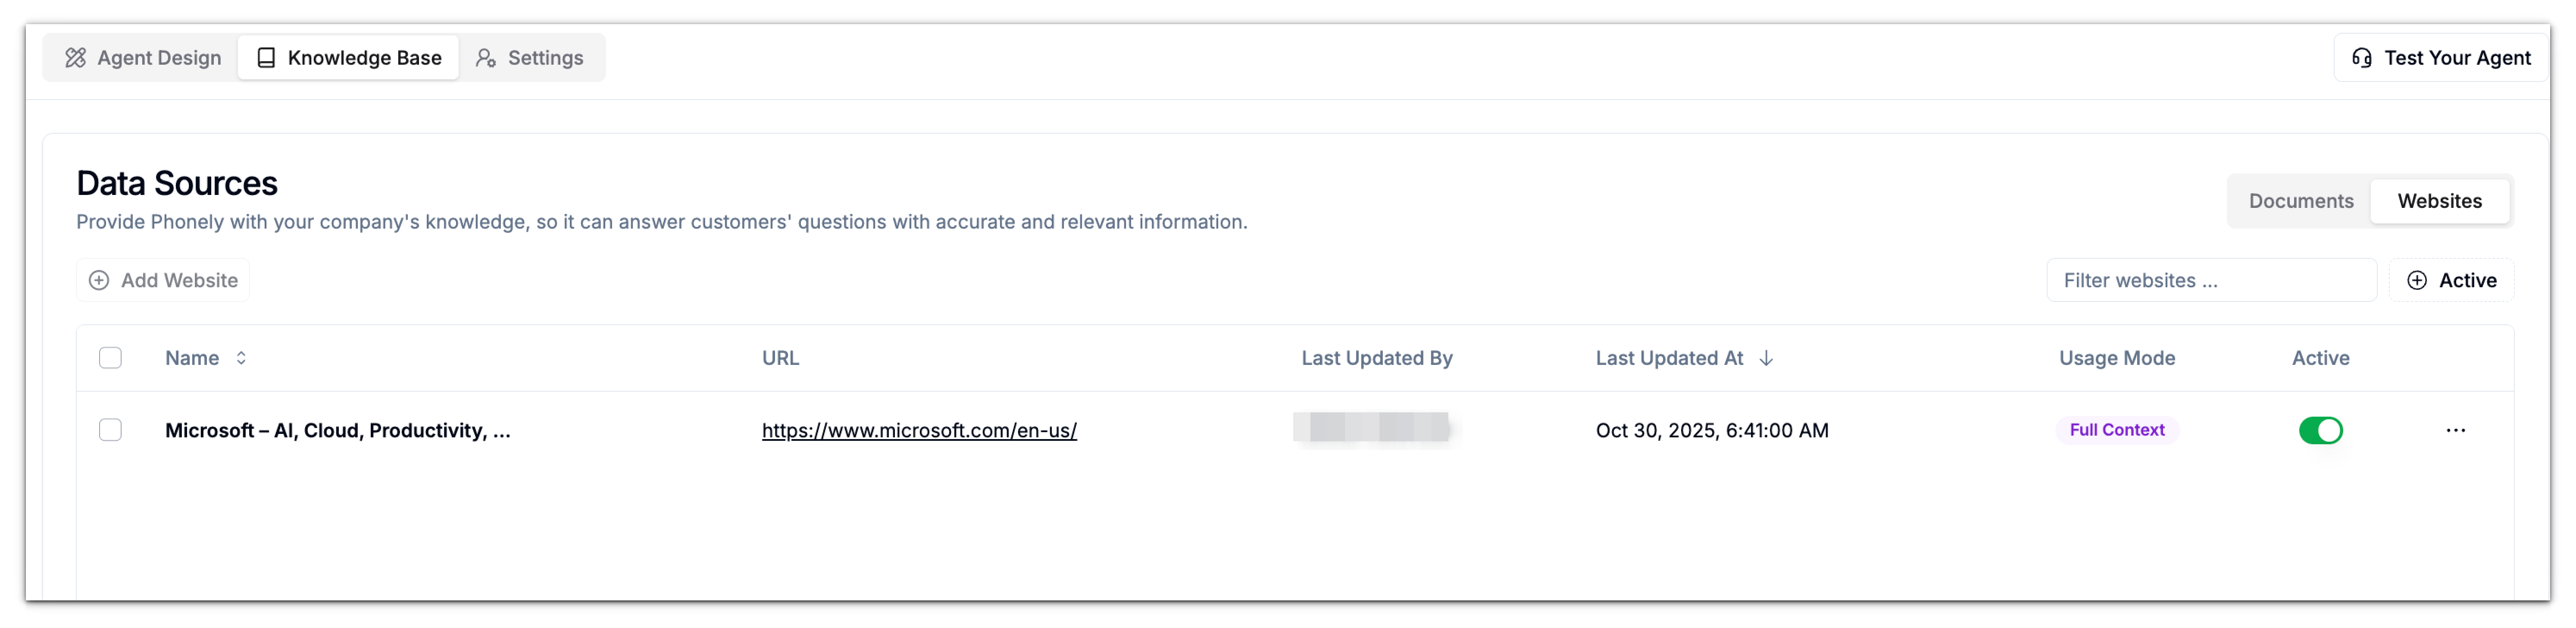
Navigate to the Knowledge Base
From the left sidebar, go to Agent Design > Knowledge Base, then switch to the Websites tab.
This section lists all websites currently connected to your knowledge base.
2
Click “Add Website”
At the top left of the Websites tab, click Add Website.
A dialog box will appear where you can add a new website source.
3
Enter the Website URL
In the URL field, type the full website address (e.g.,
Phonely will automatically crawl this URL and all accessible sub-pages.
https://example.com).Phonely will automatically crawl this URL and all accessible sub-pages.
4
Configure Advanced Options (Optional)
Click Advanced to expand additional settings. These allow you to fine-tune how Phonely crawls the website.
- Limit: Define the maximum number of pages to crawl.
- Max Depth: Control how deep the crawler goes into sub-pages (e.g., a depth of 1 includes linked pages directly under the main URL).
- Exclude Paths: Add URL patterns to skip specific sections (e.g.,
/blog/*,/products/*). - Include Paths: Specify URL patterns you want the crawler to include (e.g.,
/docs/*,/support/*).
5
Add and Activate the Website
Once all fields are set, click Add Website.
The website will appear under your Data Sources > Websites list, showing details such as:
- Name and URL
- Last Updated By / Last Updated At
- Usage Mode (Full Context or Chunked)
- Active Status

