- Look up order information in real time, such as status, shipping date, or product details.
- Automate responses to common order inquiries without human intervention.
- Leverage Google Sheets to store and organize data for seamless integration with Phonely.
Example Use Case
Let’s say a customer calls to check their order status. Instead of transferring them to a support agent, Phonely can automatically:- Ask for their order number.
- Search Google Sheets for that order.
- Retrieve and speak the live order status and shipping date back to the customer.
Start a New Flow
- From the Agent Design menu, click Create Flow.
- Add a Start Flow block to define when the flow should trigger.
- Example trigger: “When a customer asks about their order.”
- Add a Collect or Ask Exactly block to capture the order number or any variable you’ll use for lookup.
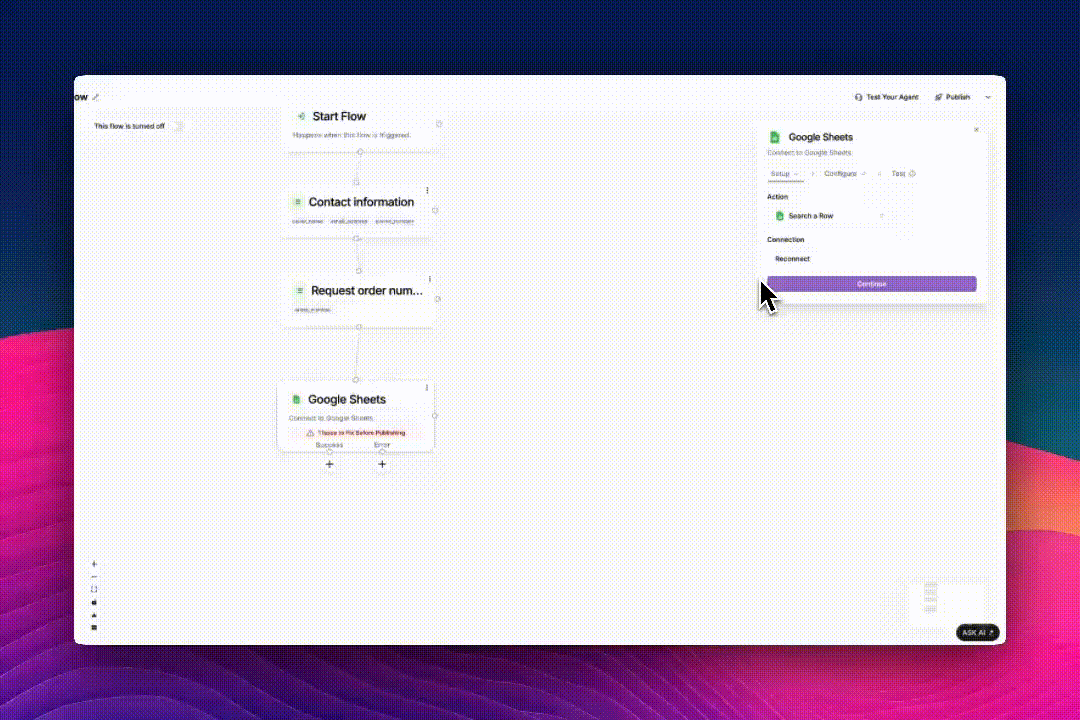
Add the Google Sheets Action
- Click the (+) icon below your block to add a new connection.
- Under Live Call Actions, select Google Sheets.
- Choose the action Search a Row from the dropdown.
- This action allows Phonely to search your sheet for a value (e.g., an order number) and return matching data.
- Click Connect to Google Sheets to begin linking your account.

Link Your Google Account
- A browser window will appear asking you to choose a Google account.
- Log in and select all permissions to allow Phonely access your Sheets**.**
Your login credentials are never stored by Phonely.
- After authorization, the Connect to Continue button will activate.
- Click it to proceed.
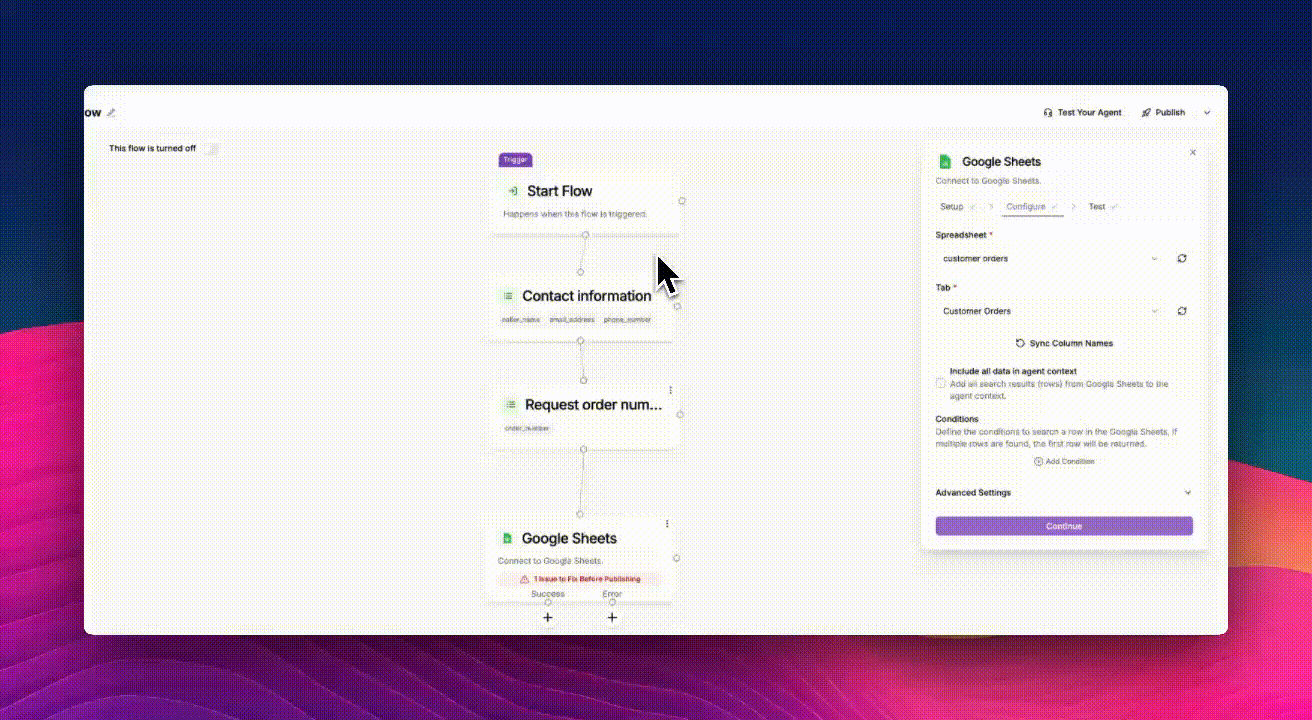
Configure the Search
- Select Spreadsheet and Tab - Choose the Google Sheet you want to connect under Spreadsheet, then select the specific Tab (worksheet) that contains your data.
- Sync Columns - Click Sync Column Names to automatically fetch all column headers from your sheet for use in conditions or variable mapping.
- Include All Data (Optional) - You can enable Include all data in agent context if you want Phonely to load all search results into the AI’s context for later use in conversation.
- Define Search Conditions - Under Conditions, specify how Phonely should search for the data:
- Click Add Condition
- Select a field (e.g.,
order_number) - Choose a comparison type (e.g., is equal to)
- Enter the matching variable or value (e.g., the caller’s provided order number)
If multiple rows match, Phonely will return the first row by default.
- Advanced Settings (Optional) — Enable Interim Message to let the caller know the agent is processing their request (e.g., “Please hold while I look that up”).
- Continue — Once everything is configured, click Continue to move to the Test step.
- Test the Connection — Click Test to confirm that Phonely can successfully find a row in your selected sheet.
- If successful, you’ll see a “Match found” message showing the returned data.
-
You can also choose Skip Test if you’re confident in your setup.
Test and Publish
- Click Test Your Agent to simulate a call and verify that the correct data is fetched.
- If everything works, click Publish to make the workflow live.
- Any time a customer calls about their order, Phonely will automatically look up the latest data in Google Sheets.
Handle Success and Error Paths
Once the search action runs, Phonely creates two possible branches:- Success — the row was found in Google Sheets.
- Error — no match was found or the sheet could not be accessed.
- Speak or message the result.
- Apologize or ask for a new input if no match is found.

- On Success → Say Exactly:
“Your order status isorder_statusand your expected delivery date isship_date.” - On Error → Say Exactly:
“I couldn’t find that order number. Could you repeat it once more?”
Common Use Cases
| Scenario | Example |
|---|---|
| Order tracking | Retrieve order status, ship date, and tracking link |
| Appointment lookup | Find next available appointment or meeting details |
| Support info | Pull troubleshooting steps or policy details from a shared sheet |
| CRM sync | Search or log caller details during inbound calls |