Understanding Outbound Call Flows
A call flow defines the logic your AI agent follows during outbound calls — what it says, how it responds to user input, and what actions (like making calls, sending an SMS, email, or API request) it performs afterward. Each call flow can be used in a campaign, and a campaign determines how and when these calls are triggered.Navigating to Outbound Call Campaigns
Creating a Call Flow Using Templates
Templates provide prebuilt logic for common outbound use cases. Each one includes predefined prompts, logic branches, and post-call actions.
Open the Template Library
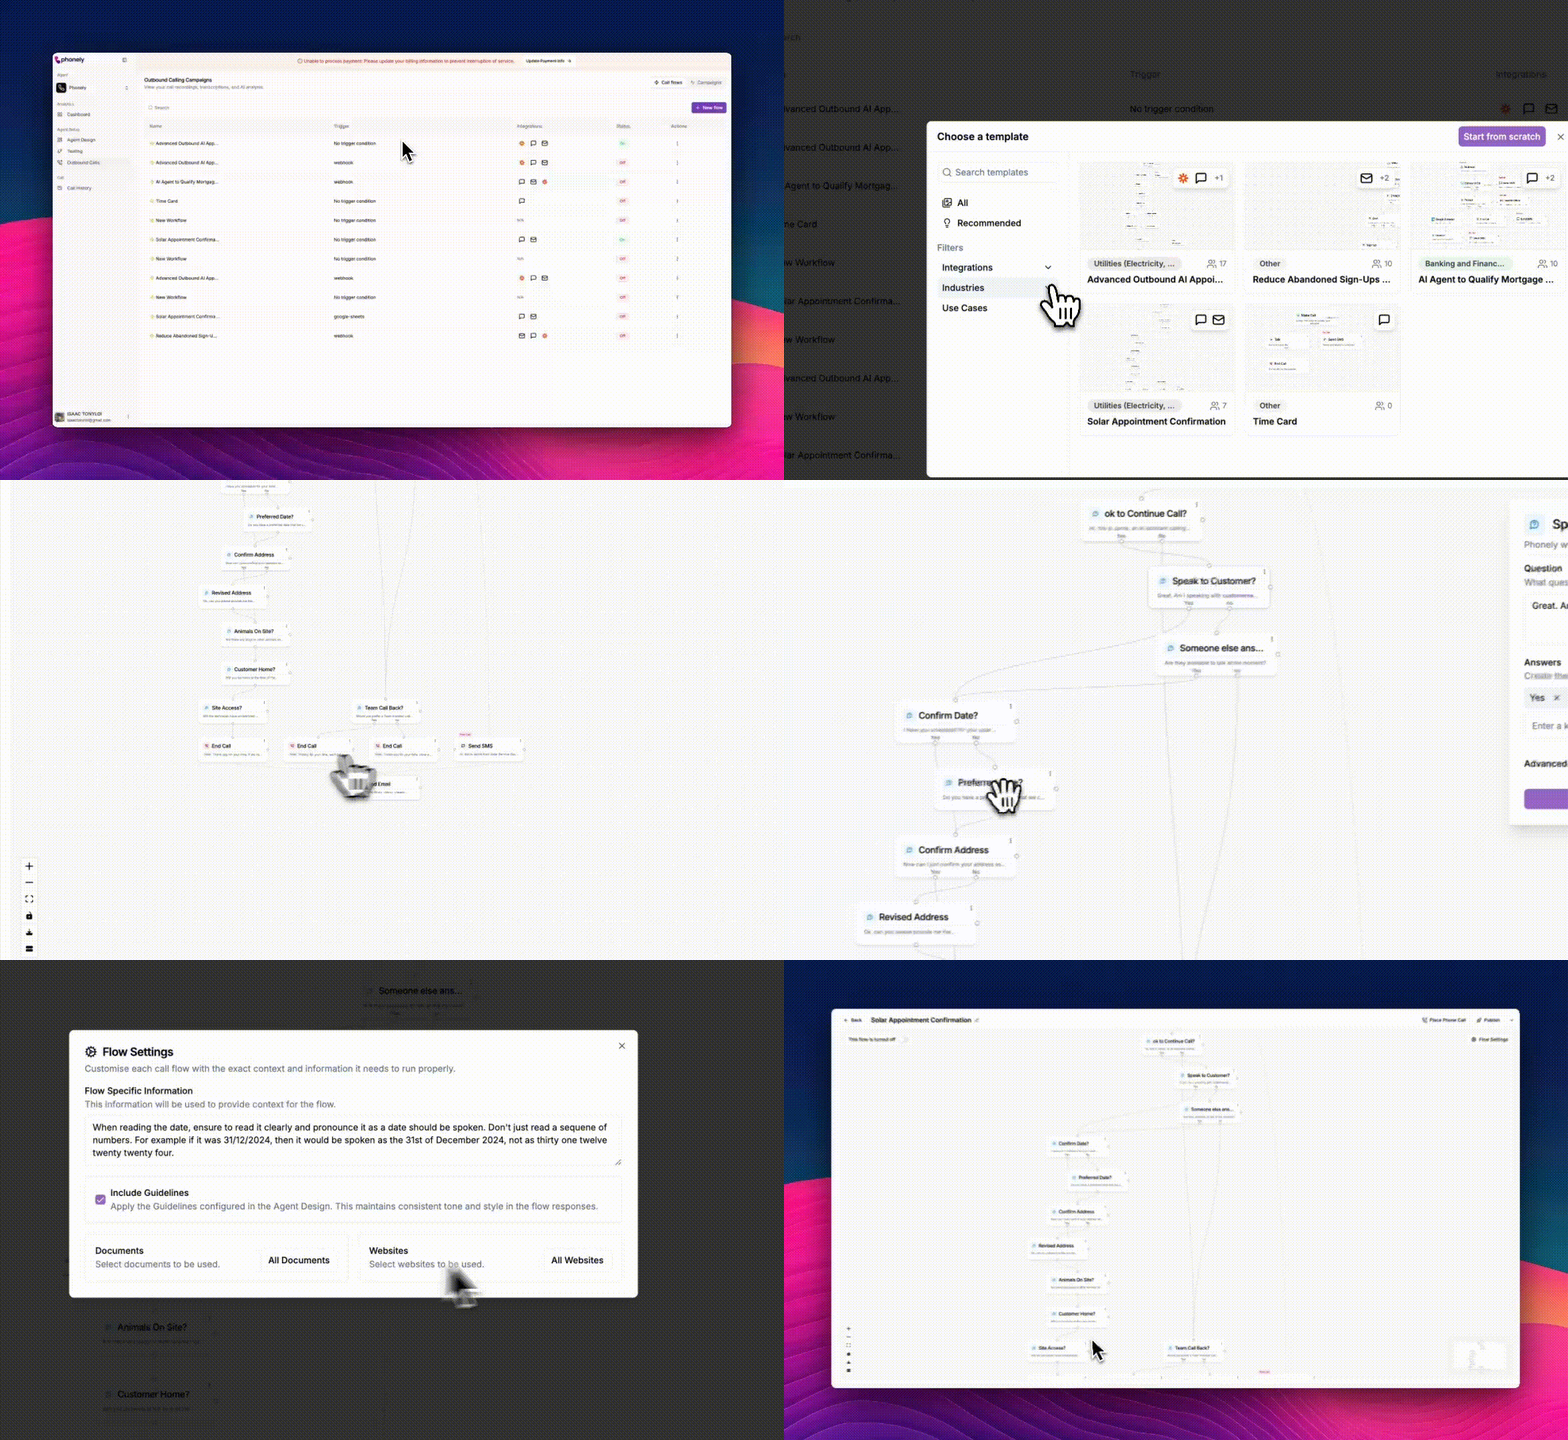
When you click New Flow, a Choose a Template window appears.
Here, you can:
Here, you can:
- Browse All templates or view Recommended ones.
- Search by keywords or filter templates by:
- Integrations – e.g., Send SMS, Zapier, Make, Send Email.
- Industries – e.g., Banking, Insurance, Healthcare.
- Use Cases – e.g., Appointment Scheduling, Payment Processing, Refund Requests.
Explore Template Details
Click on a template to preview its structure.
The preview shows:
The preview shows:
- A flow diagram outlining each step (call prompts, responses, actions).
- A left panel describing:
- About – The goal of the template (e.g., scheduling handyman appointments).
- Industry – The domain it’s suited for (e.g., utilities, healthcare).
- Use Case – The specific type of automation (e.g., appointment scheduling).
- Integrations – Services connected.
Customize the Template
Once you click Use this Template, Phonely loads the flow into the visual editor.Here you can:
- Edit each node (e.g., greeting, data collection, verification).
- Modify text prompts, logic conditions, or connected integrations.
- Add or remove actions such as:
- Send SMS
- Send Email
- Transfer Call
- API Request
- Connect to Google Sheets
- Run custom code
Test and Refine the Flow
Before publishing:
- Click Place Phone Call to simulate a test call.
- Enter dummy data like name, address, email, and phone number to verify responses.
- The system will run through the workflow so you can confirm it behaves as expected.
Creating a Call Flow from Scratch
If you prefer full control over the conversation design, you can start from scratch.
Choose “Start from Scratch”
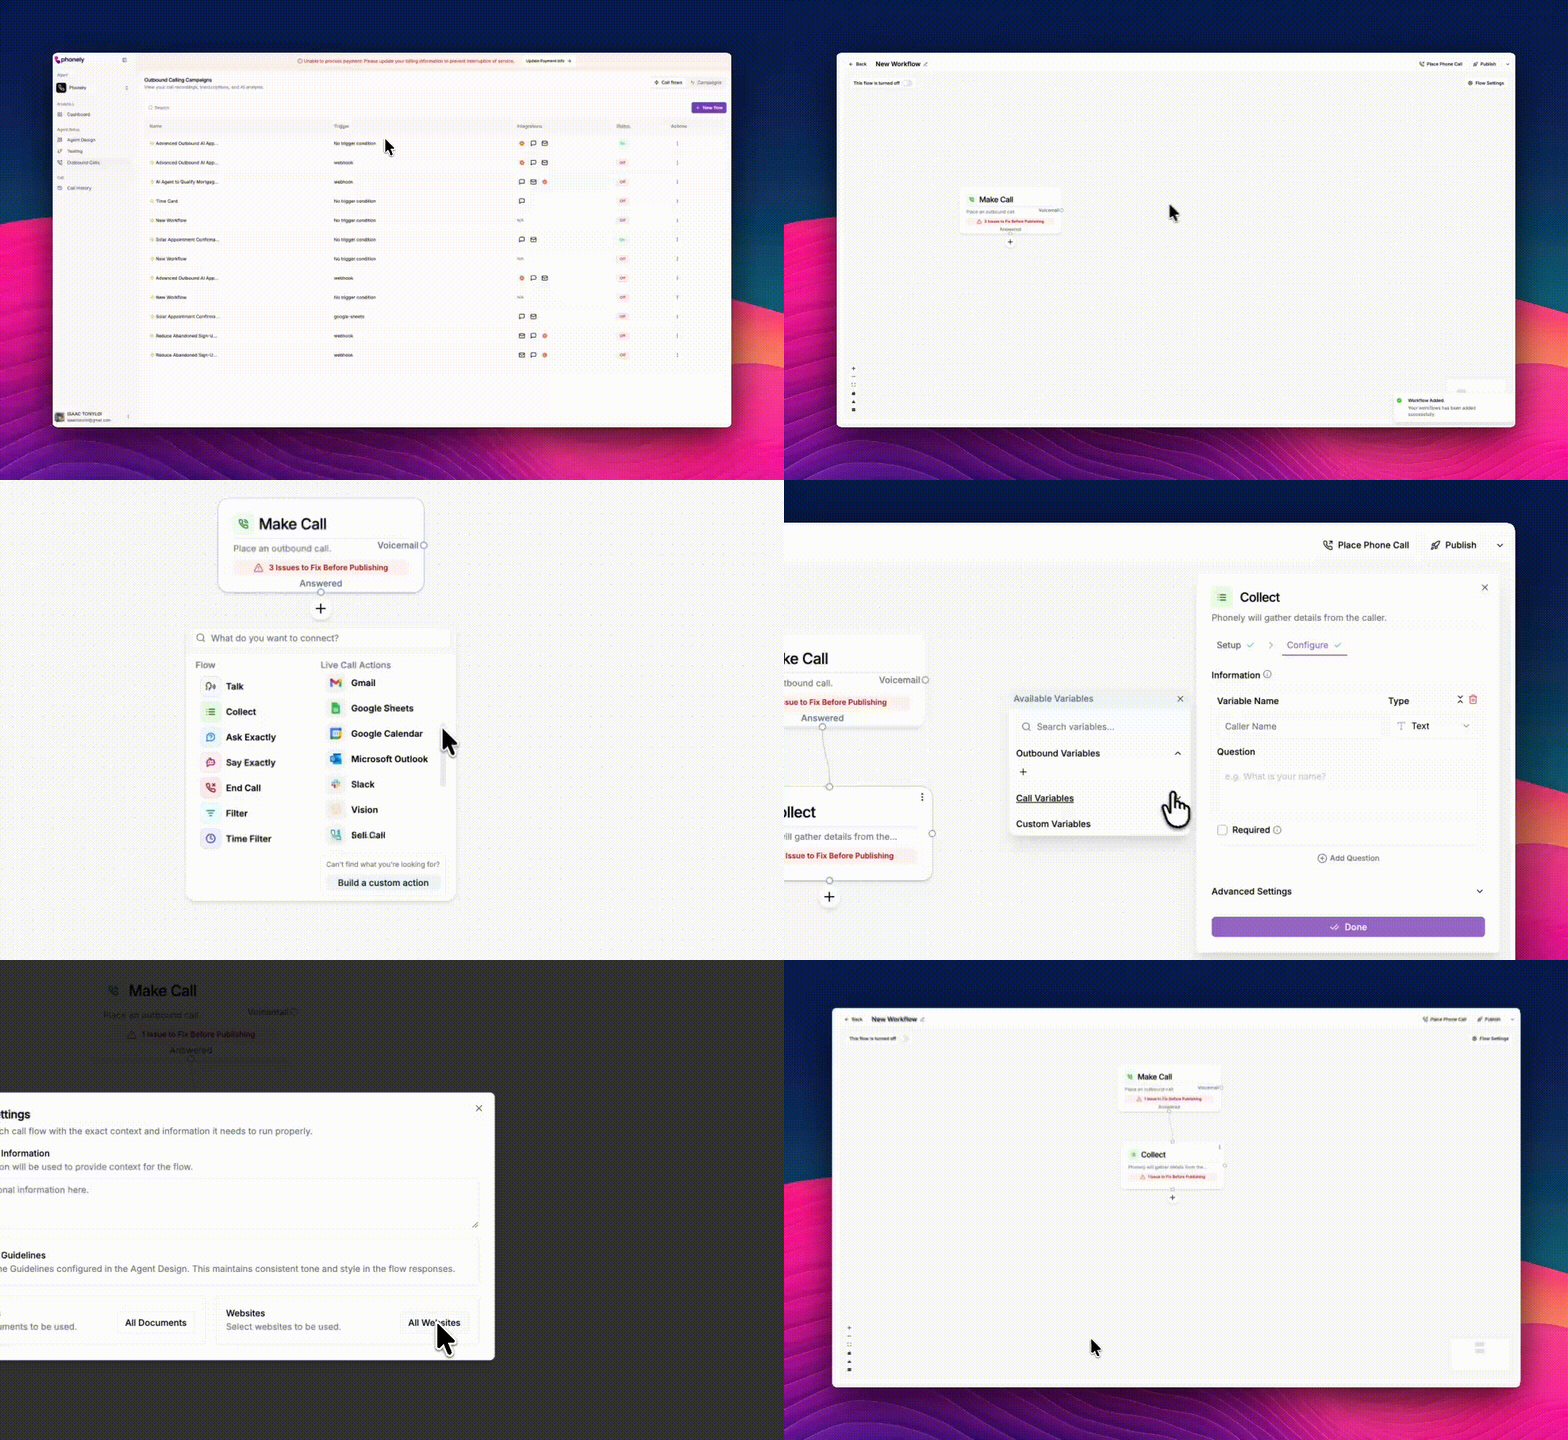
From the Choose Template window, click Start from Scratch.
You’ll see a blank canvas with a single node: Make Call.
You’ll see a blank canvas with a single node: Make Call.
Add Flow Components
Click the + icon below Make Call to add new elements.
You can select from two main categories:
You can select from two main categories:
Flow Blocks
- Talk – Add dialogue where the AI speaks to the customer.
- Collect – Capture data like name, email, or order number.
- Ask Exactly – Ask predefined questions that require specific responses.
- Say Exactly – Provide a fixed statement or message.
- End Call – Conclude the interaction.
- Filter / Time Filter – Control flow logic based on conditions (e.g., time of day, lead type).
Live Call Actions
- Send SMS – Trigger a follow-up text.
- Send Email – Send a personalized email.
- Transfer Call – Route the call to a live agent.
- API Request – Connect external apps or CRMs.
- Code – Add custom logic using scripts.
- Google Sheets / Gmail – Log data or send messages directly.
- Build a Custom Action – Create an advanced custom integration.
Connect and Configure
Drag connectors between nodes to define the call logic.
Each node can have conditions.
The visual editor lets you zoom, pan, and adjust spacing for clarity.
Each node can have conditions.
The visual editor lets you zoom, pan, and adjust spacing for clarity.
Review Flow Settings
As with templates, configure Flow Settings to add supporting context, link relevant documents, and apply agent tone guidelines.Drag connectors between nodes to define the call logic.
Each node can have conditions.
The visual editor lets you zoom, pan, and adjust spacing for clarity.
Each node can have conditions.
The visual editor lets you zoom, pan, and adjust spacing for clarity.
Test and Publish
Use Place Phone Call to run test interactions.
Once the logic and tone are verified:
Once the logic and tone are verified:
- Click Publish to activate the flow.
- Toggle the switch at the top left to turn it On.

