Add Google Calendar to Your Flow
- In your Call Flow editor, click the “+” button below your Flow.
- Under Live Call Actions, select Google Calendar.
- You can use the search bar to find it quickly.
- The Google calendar block will appear in your flow connected to the Start Flow trigger.
Choose an Action
- On the right-hand panel, you’ll see the Google Calendar setup screen.
- Under Action, choose one of the following:
- Check Availability – Allows your agent to verify open time slots in your calendar.
- Create an Appointment – Lets the agent automatically schedule a new event.
- Select your preferred option.
Connect Your Google Account
- Click “Connect to Google Calendar.”
- A pop-up will appear prompting you to link your Google account.
- Select the Google account you want to connect.
- Choose from the list of accounts or click “Use another account” if not listed.
- Review the permissions requested and click “Continue.”
- This authorizes Phonely to securely access your calendar.
- Once authenticated, Phonely will display “Reconnected” or “Connected” under the connection field.
Verify and Continue
- Once your Google Calendar is connected, the Setup step will be marked complete with a checkmark.
- Click “Continue” to proceed to the Configure stage.
- Depending on your selected action:
- For Check Availability, specify the time range and conditions for checking free/busy slots.
- For Create Appointment, define event details like title, time, and attendees.
Configure the Google Calendar.
After connecting your Google Calendar, the Configure step changes depending on the Action you selected in the Setup stage.Configuration options for “Check Availability” Action
- Calendar ID
- Open the Calendar ID dropdown and pick the calendar you authorized (personal calendar, team calendar, or a resources calendar).
- If you recently created or shared a calendar, hit the refresh icon to re-load the list.
- Tip: Use a dedicated “Bookings” calendar so customer appointments don’t mix with your personal events.
- Start Time
- Set when the search should begin (ISO timestamp is accepted, but you can click the clock icon to use now).
- Duration
- Enter the meeting length using natural units like
15m,30m,1h. - This duration defines the size of each candidate slot the agent will look for.
- Search Period
- How far into the future to scan for open times, in days.
- Longer windows increase options but also time to evaluate—keep it reasonable.
- Available Time Slots (count)
- Set how many distinct slots to retrieve and present.
- This doesn’t change your calendar- only how many options the caller hears before choosing.
- Available Times (per-day windows)
- A toggle to enable/disable that day entirely.
- A from > to time window (e.g.,
9:00 am → 5:00 pm). - + to add another window for split shifts (e.g.,
9–12and2–5). - ✕ to remove a window.
- Notes:
- These hours gate the search; if your calendar is open at 7pm but the day is disabled or outside the window, it won’t be offered.
- Timezone respects your agent/project settings, ensure your business hours align with the intended timezone.
7) Advanced Settings
- Interim Message
When enabled, the agent narrates what it’s doing (“One moment while I check availability…”), which reduces dead air. - Post Interim Message Delay
Adds a short pause after the interim message to avoid talking over the API response on slower networks. - Interim Message Prompt
- Fixed – always use the text you provide verbatim.
- Promptable – let the LLM vary the phrasing while keeping your intent (good for more natural conversations).
- Call Outcome Tagging
- Add keywords (e.g.,
booking_created,no_availability,calendar_error) to tag call analytics when this block completes. - These tags help reporting and downstream automation.
- Add keywords (e.g.,
Configuration options for “Create Appointment” Action
Choose this action when the Phonely agent should book an event directly in Google Calendar.This setup shares some base fields (like Calendar ID, Start Time, and Advanced Settings) but also includes unique fields specific to appointment creation.
- End Time
- Defines when the scheduled event ends.
- Must be later than the start time.
- Email
- Required field where you enter the attendee’s email.
- The system automatically sends a Google Calendar invitation to this address once the booking is created.
- You can use dynamic variables (e.g., caller email) if captured earlier in the flow.
- Appointment Name
- The event title as it appears in your calendar and the attendee’s invite.
- Appointment Description
- A short summary of what the appointment is about.
- Appears inside the calendar event’s description field.
- Advanced Settings
- Here you can add an optional Interim Message, Post Message Delay, and Call Outcome Tagging.
Test the configuration
Once configuration is complete, move to the Test tab to confirm that your Google Calendar connection and parameters work correctly.The behavior of the test depends on which Action you chose earlier, Check Availability or Create Appointment.
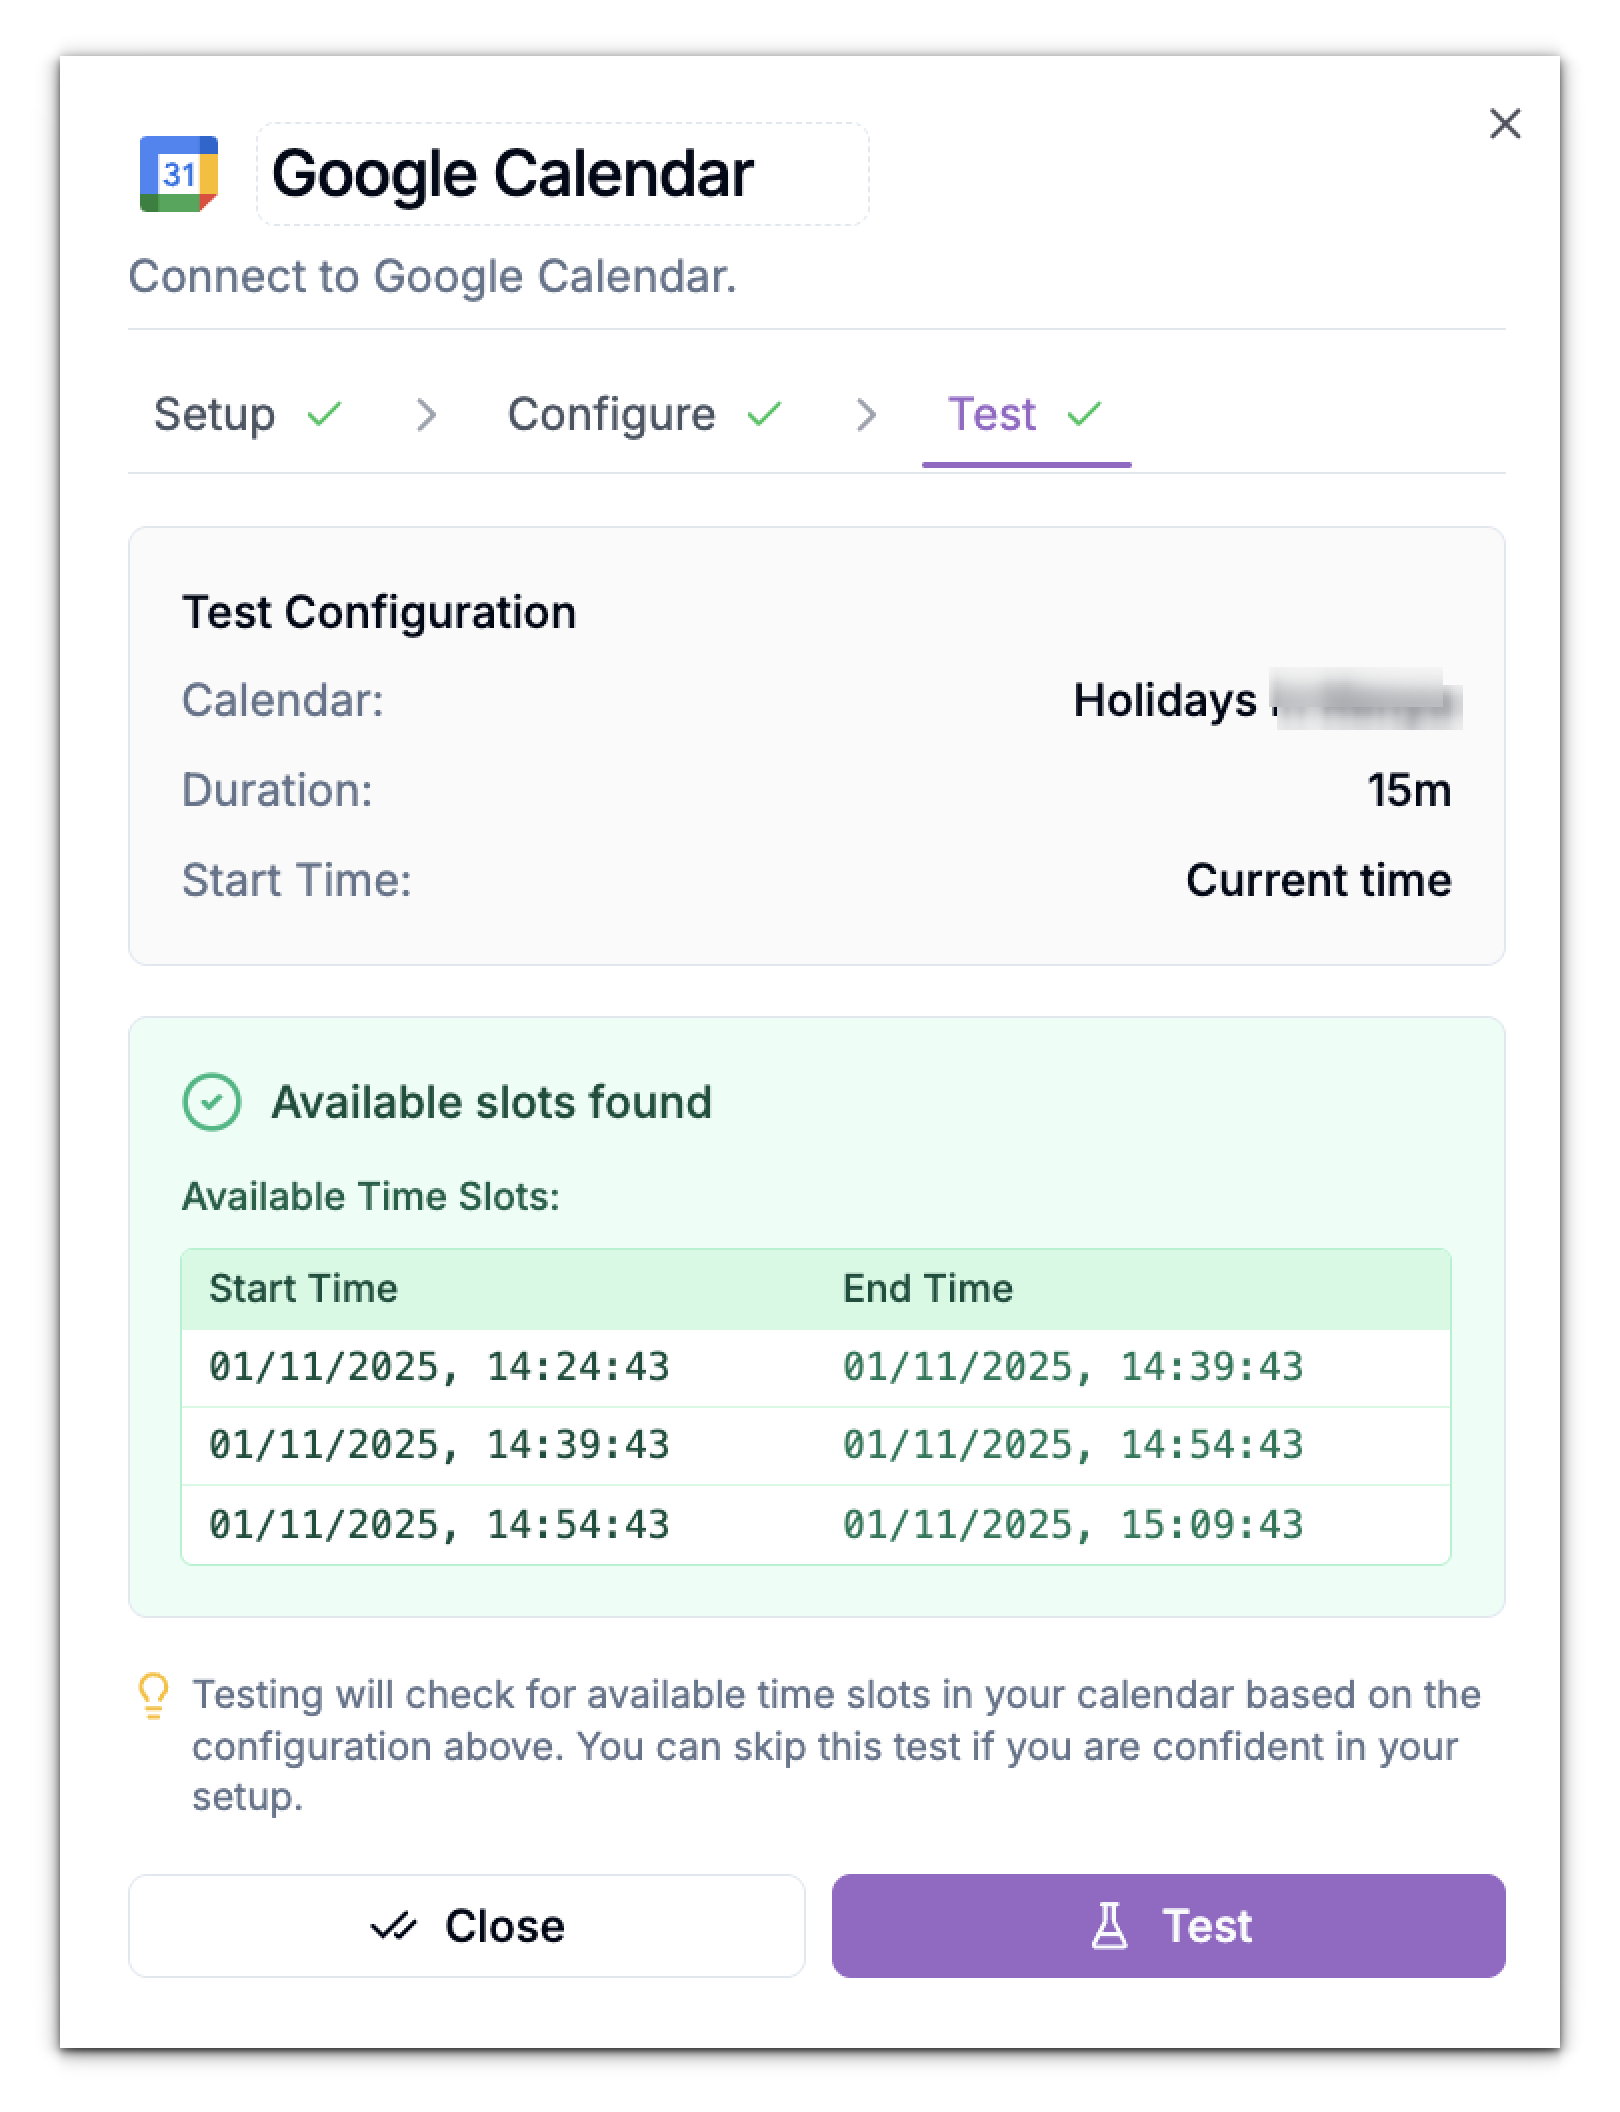
When Action = Check Availability
The Test tab runs a dry-run against your calendar with the exact parameters you configured. It checks your defined working hours, slot duration, and search period, then lists which time slots are open.What You’ll See
- Test Configuration Summary:
Displays the configuration details that were used for the test.- Selected Calendar – which Google Calendar is being queried
- Duration – length of each slot (e.g., 15m or 30m)
- Start Time – the point from which the system begins checking (usually “Current time” if you clicked the clock icon)
- Available Slots Found Panel:
Shows a table of available slots.- Each row includes Start Time > End Time pairs.
- These are real, conflict-free ranges within your defined working hours.
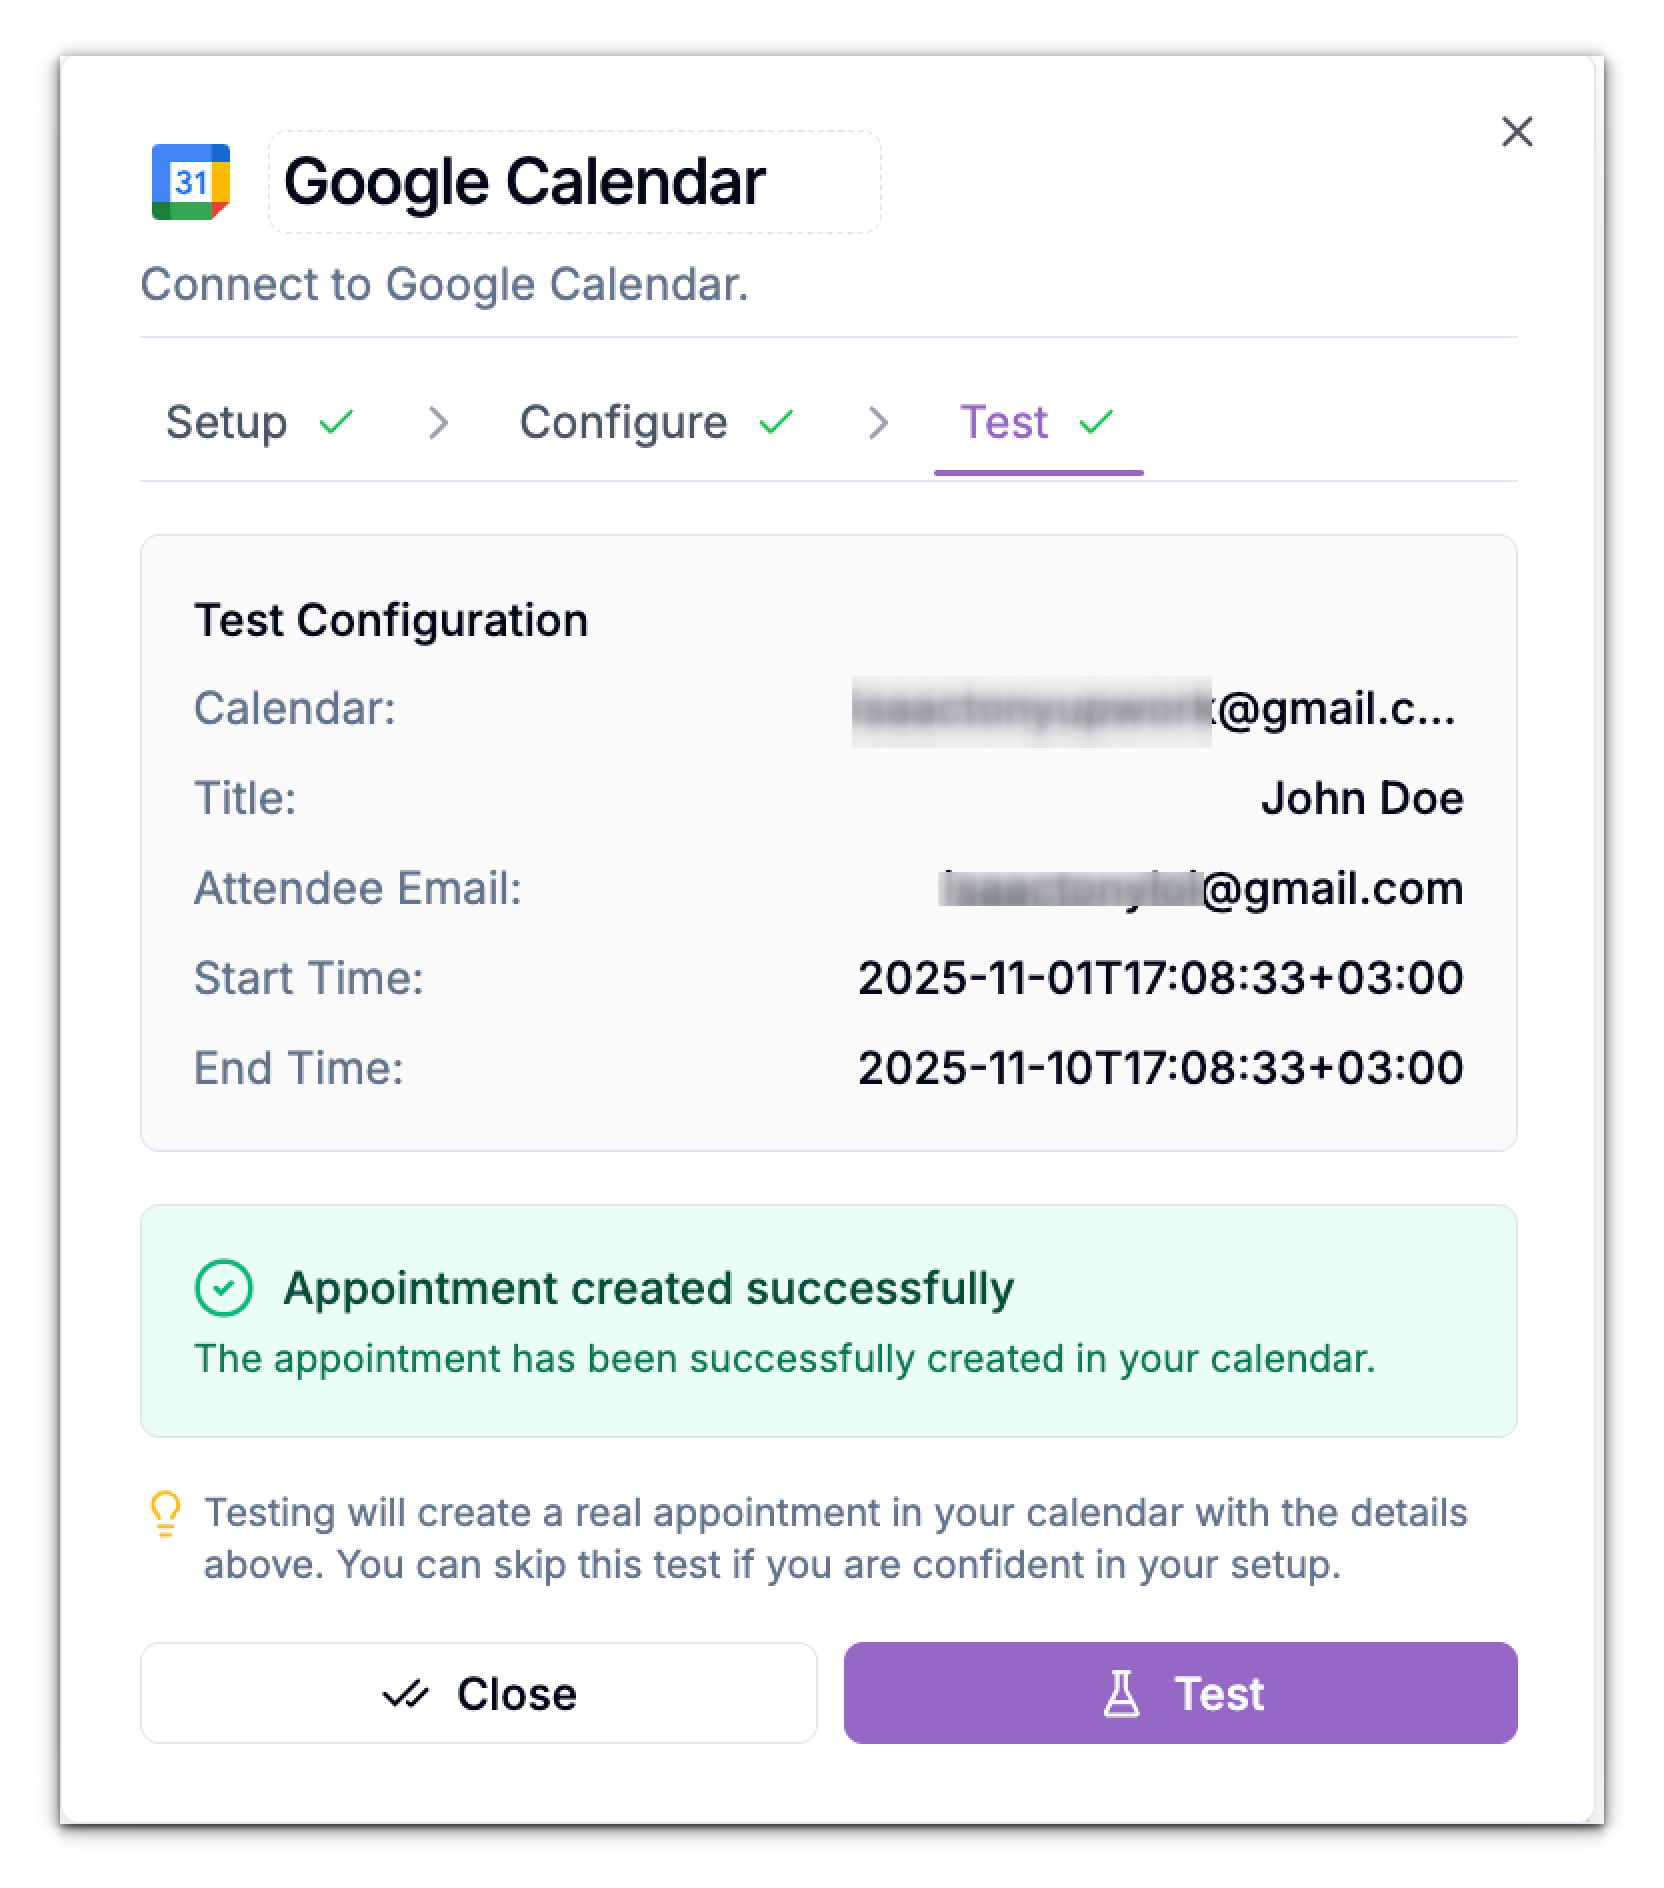
When Action = Create Appointment
The Test tab performs a live test that actually creates an appointment in your Google Calendar using the parameters you defined.What You’ll See
- Test Configuration Summary:
Lists the appointment details that will be used for the event creation, including: Calendar, Title, Attendee Email, and Start Time / End Time – the scheduled duration of the appointment - Appointment Created Successfully Panel:
- Shows a confirmation message.
Outcome
Once successfully connected, your Phonely agent can:- Instantly check your availability during a call.
- Automatically schedule or confirm appointments in your connected Google Calendar.