Outbound AI calling is subject to regulations such as the TCPA and other local laws. Phonely is designed to support legitimate, opt-in use cases, not spam or mass cold calling.As a general rule:Do not use AI to spam or cold-call people without proper consent.Ensure you understand when and how AI-generated voices are allowed.Seek legal counsel if you are unsure about compliance requirements.
- Outbound Call Flows – define what the AI says and does during the call
- Campaigns – define who to call, when to call, and how often
- Go to Outbound Calls > Campaigns
- Click Create Campaign
- Enter the name of your campaign. Use a descriptive name that conveys purpose.
Campaign Use Cases
Next, choose a use case. This tells Phonely what kind of automation you’re building. Common use cases include:- Lead Qualification – calling potential customers and gathering initial details.
- Customer Retention – re-engaging existing users or upselling new offers.
- Appointment Reminders – automatically reminding clients of upcoming bookings.
- Feedback Collection – conducting post-service surveys.
- Voicemail Redials – following up with missed or unanswered leads.
Add Outbound Numbers
A campaign needs outbound phone numbers that it can use to place calls. These numbers are provisioned through Twilio. When you connect Twilio to Phonely, all your available numbers become visible, allowing you to choose which ones will represent the campaign.Connect to Twilio
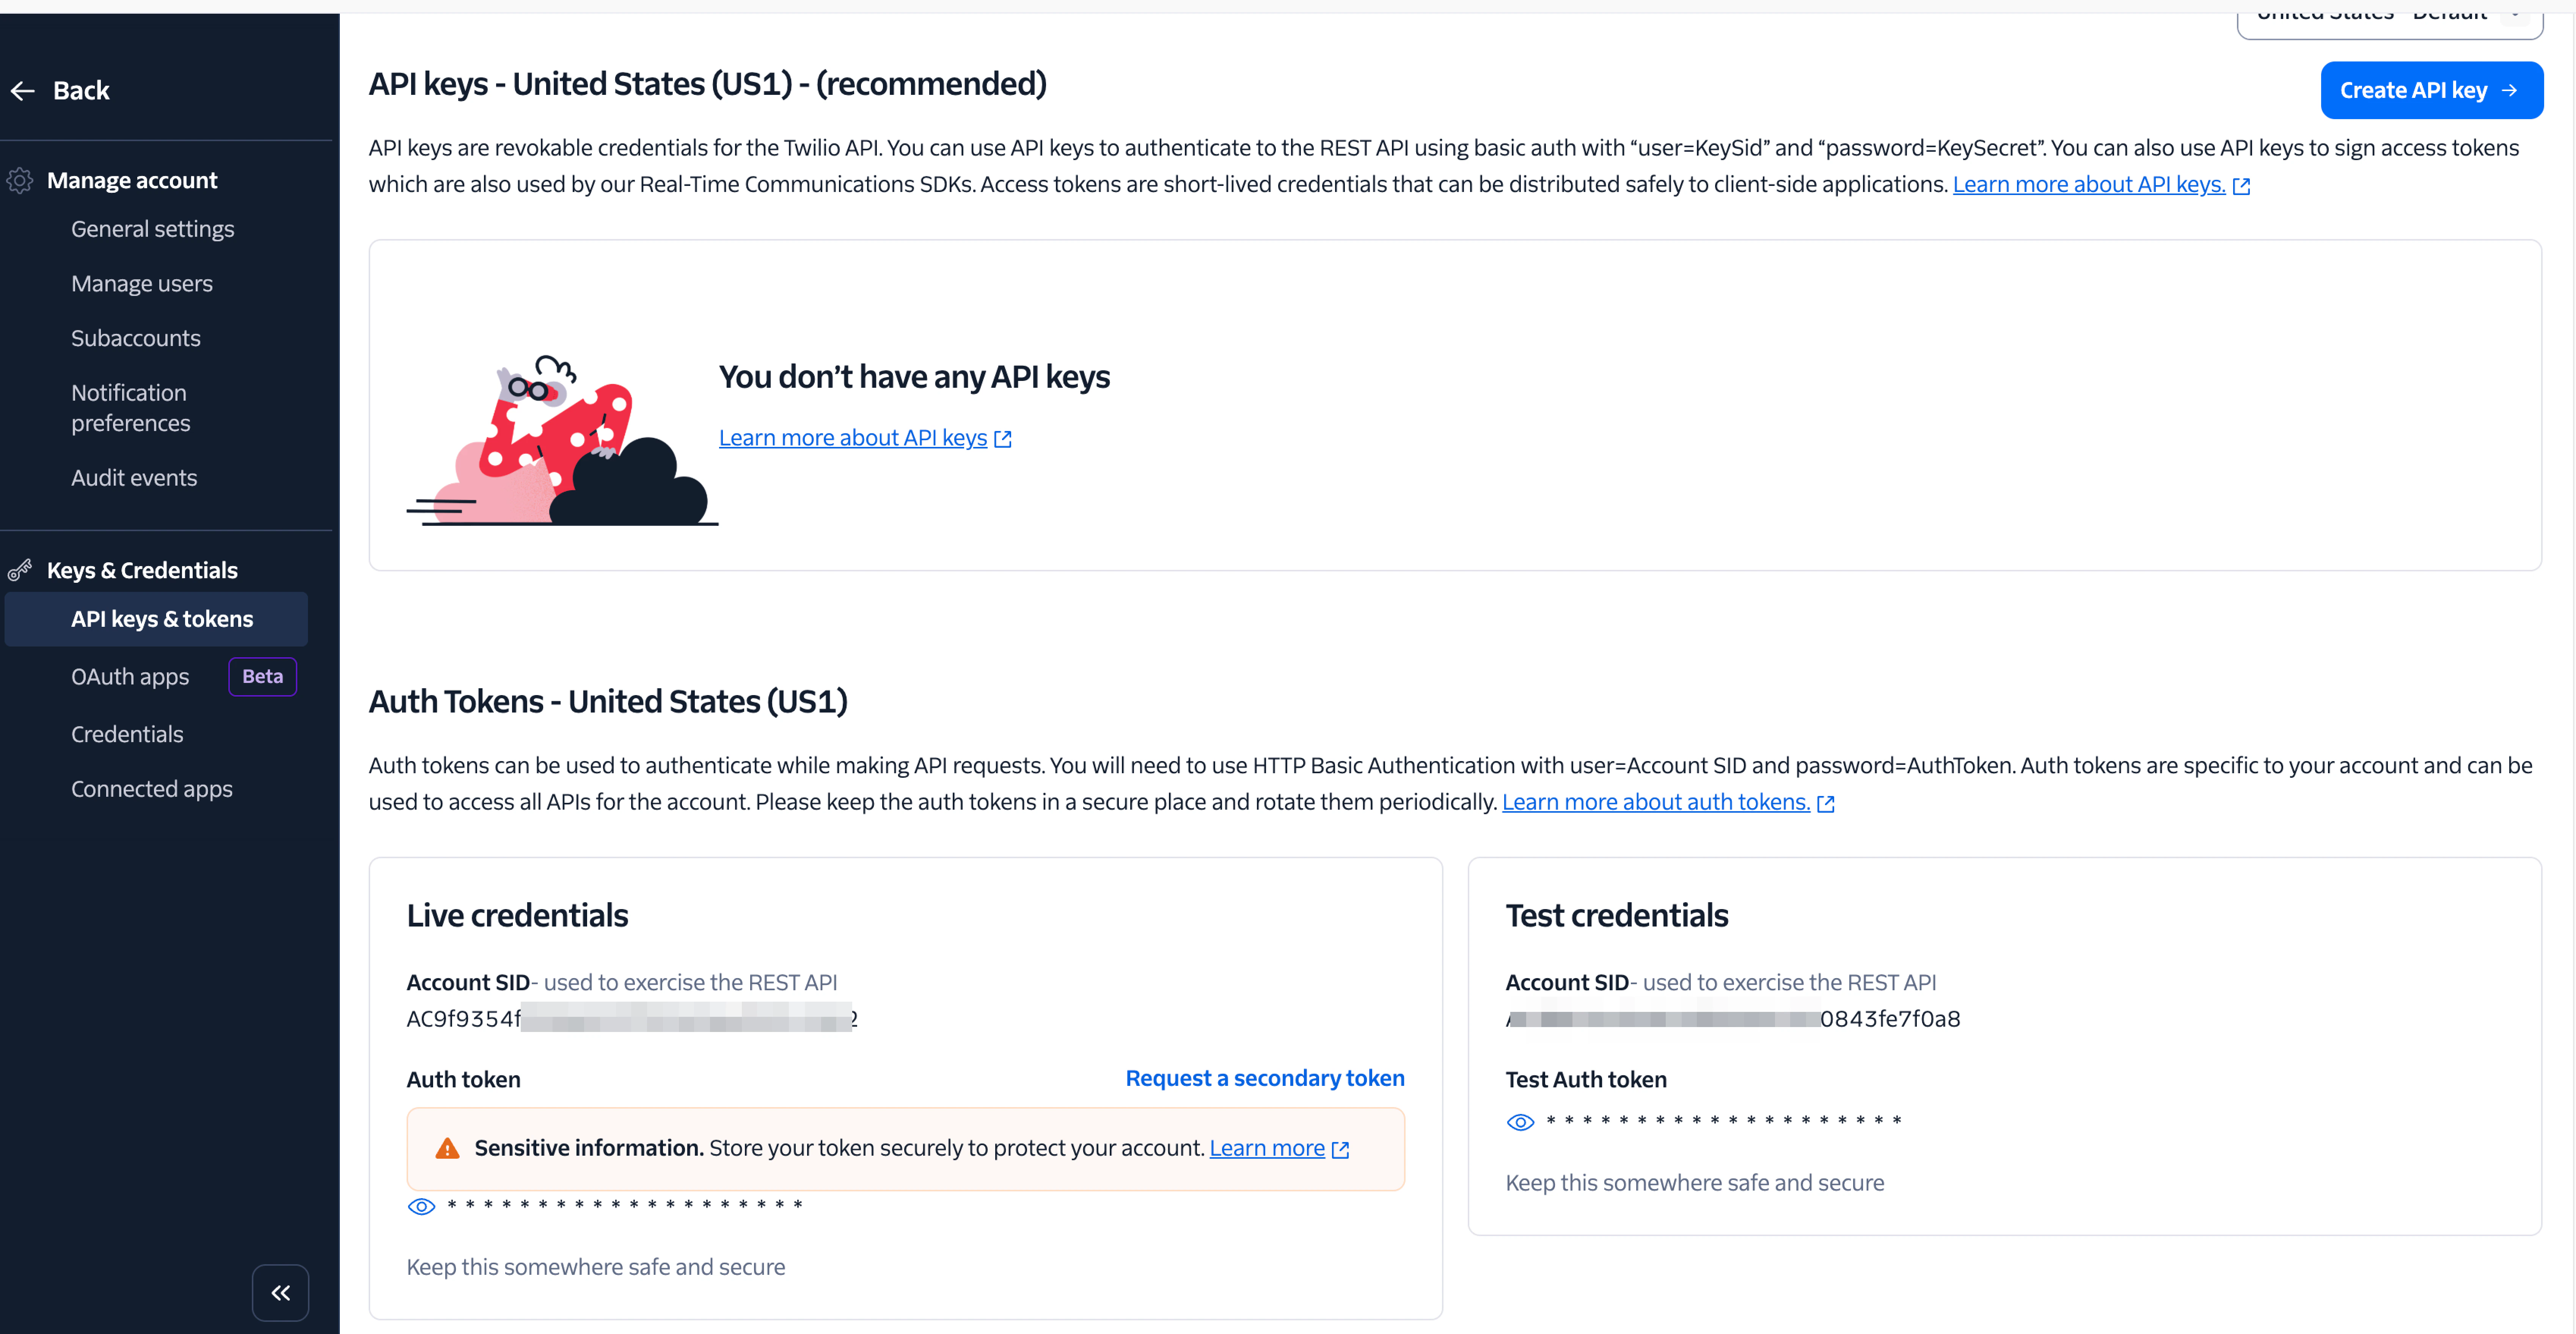
To place calls or receive calls in Phonely, you first need to connect your Twilio account and import at least one phone number.Access Your Twilio Credentials
Start by logging into your Twilio Console.From the Account Dashboard, use the Jump to search bar at the top of the page and search for General Settings. This is the fastest way to locate account-level configuration without navigating through menus manually.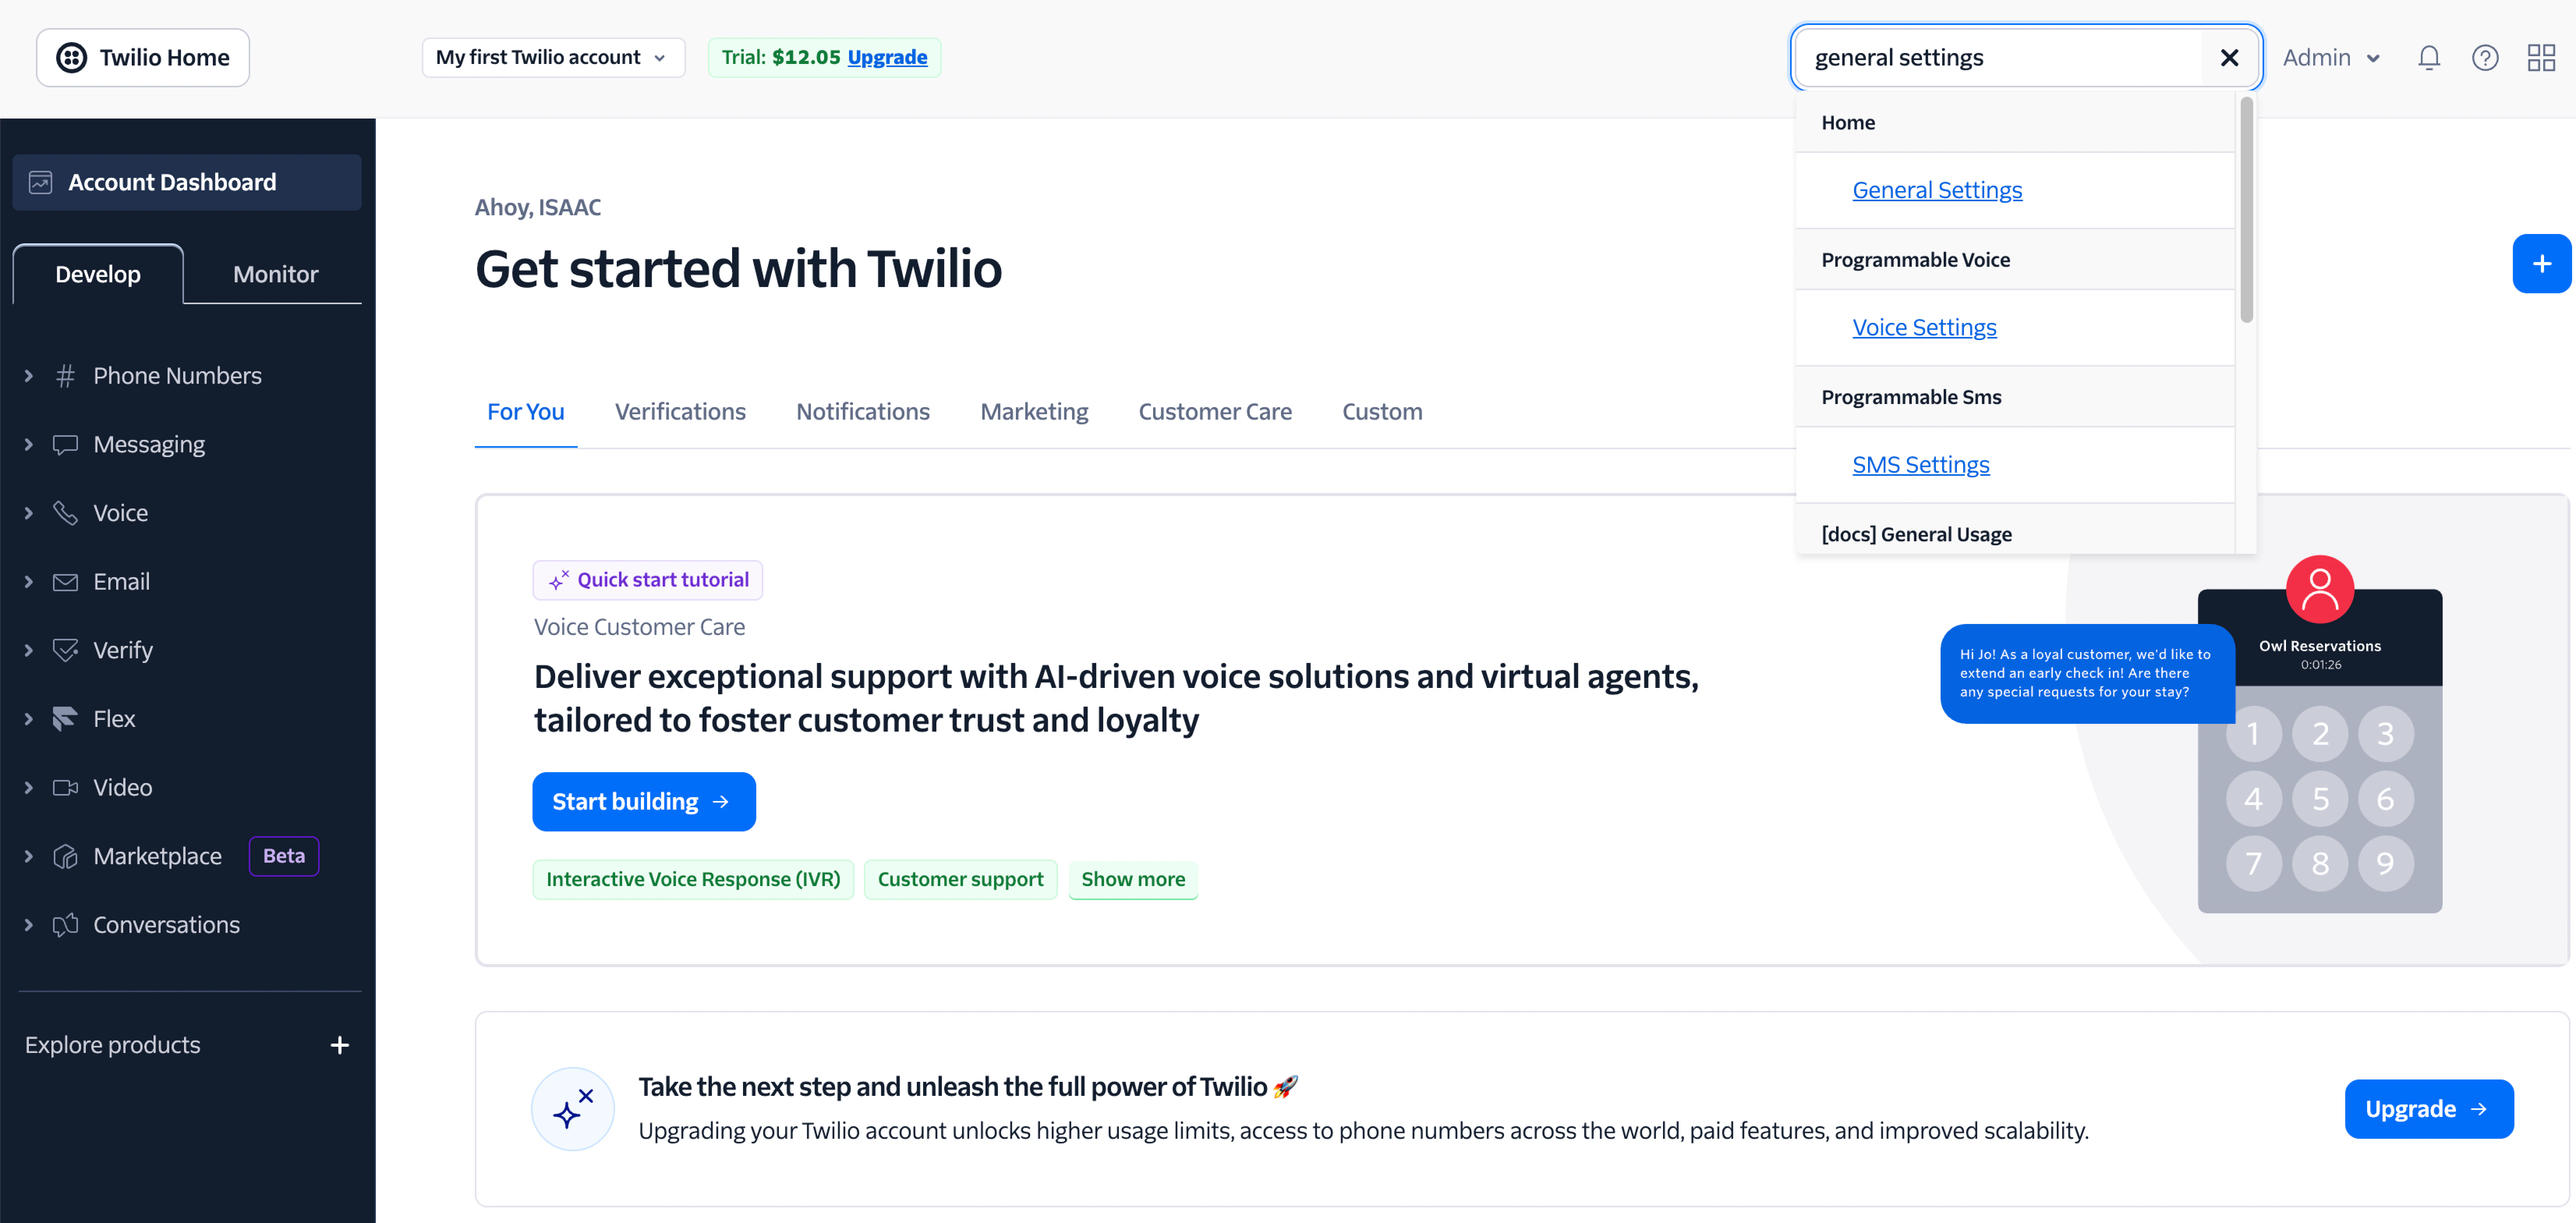
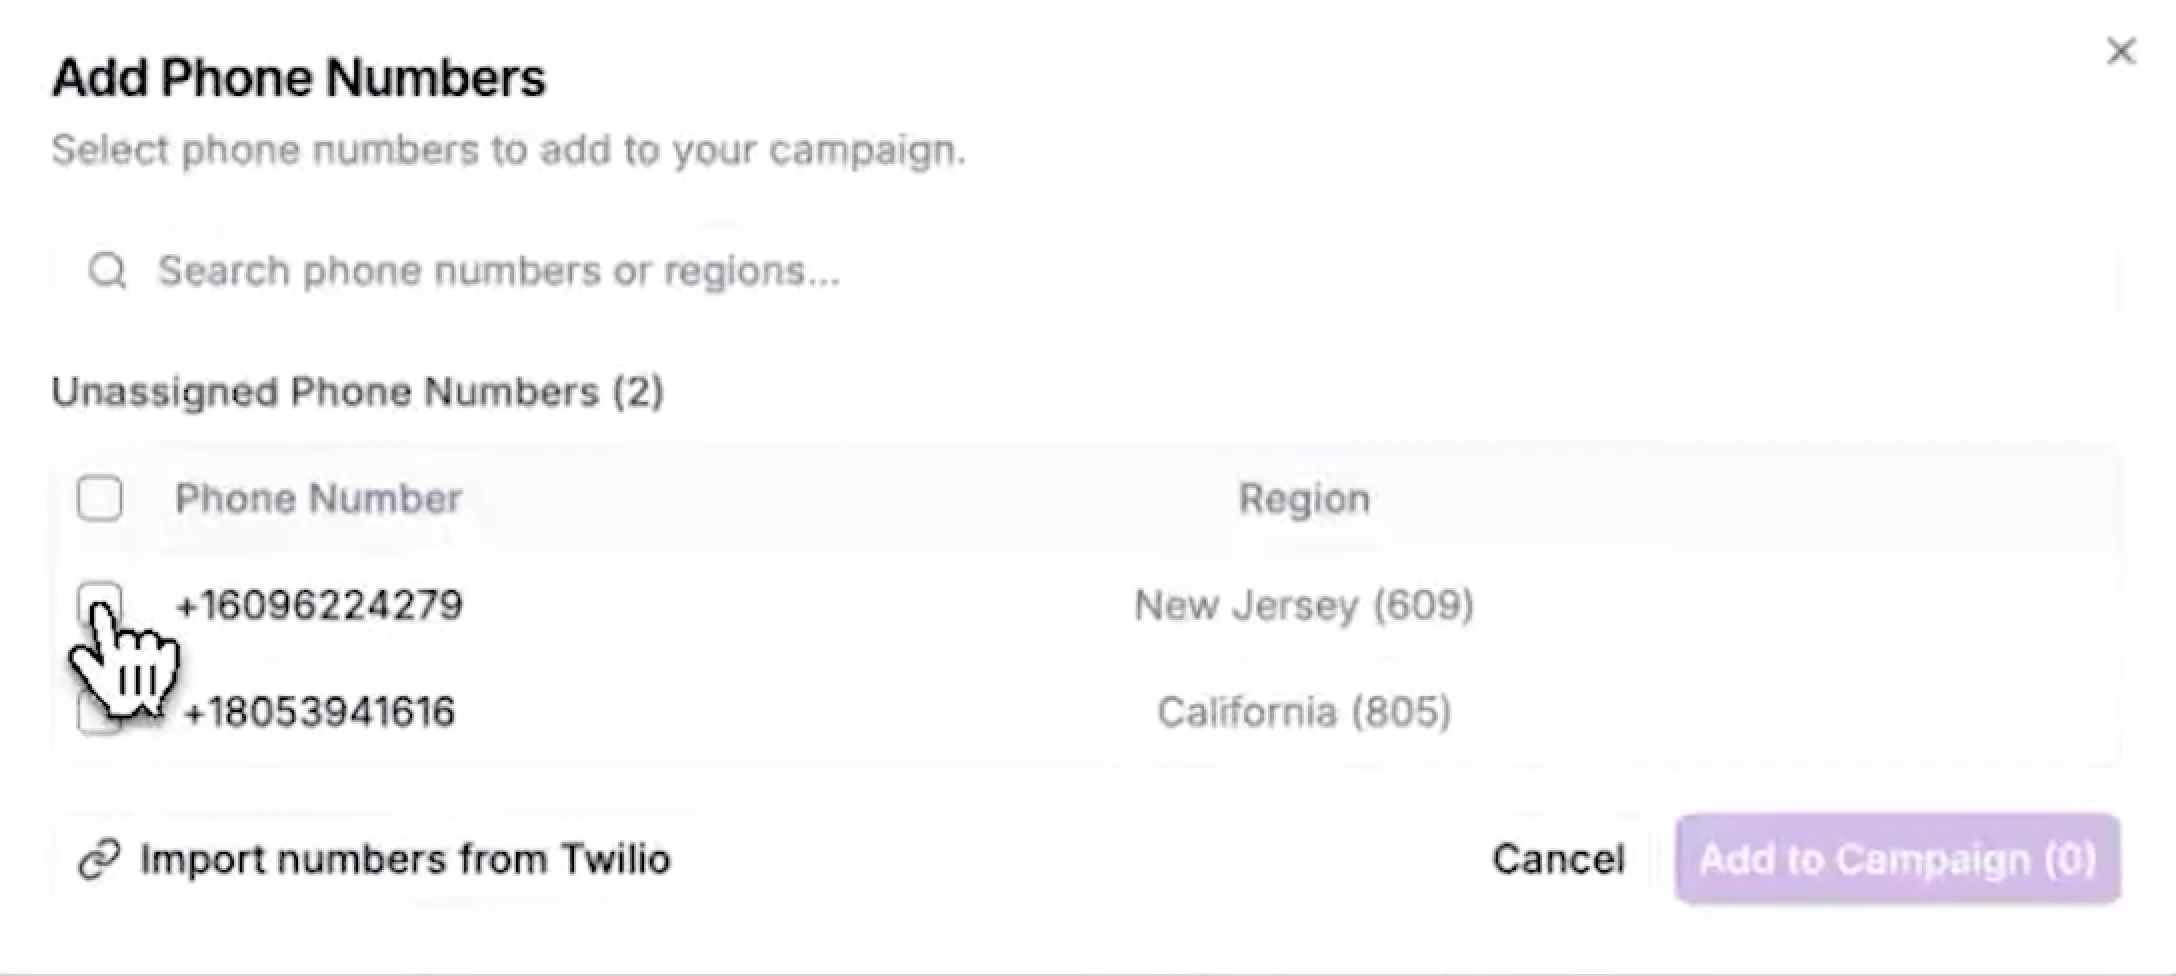
Import Numbers into Phonely
Now switch over to Phonely. Navigate to the area where you manage phone numbers and click Add Phone Numbers.Click Import numbers from Twilio.Paste the credentials you copied from Twilio, then click Connect & Fetch Numbers.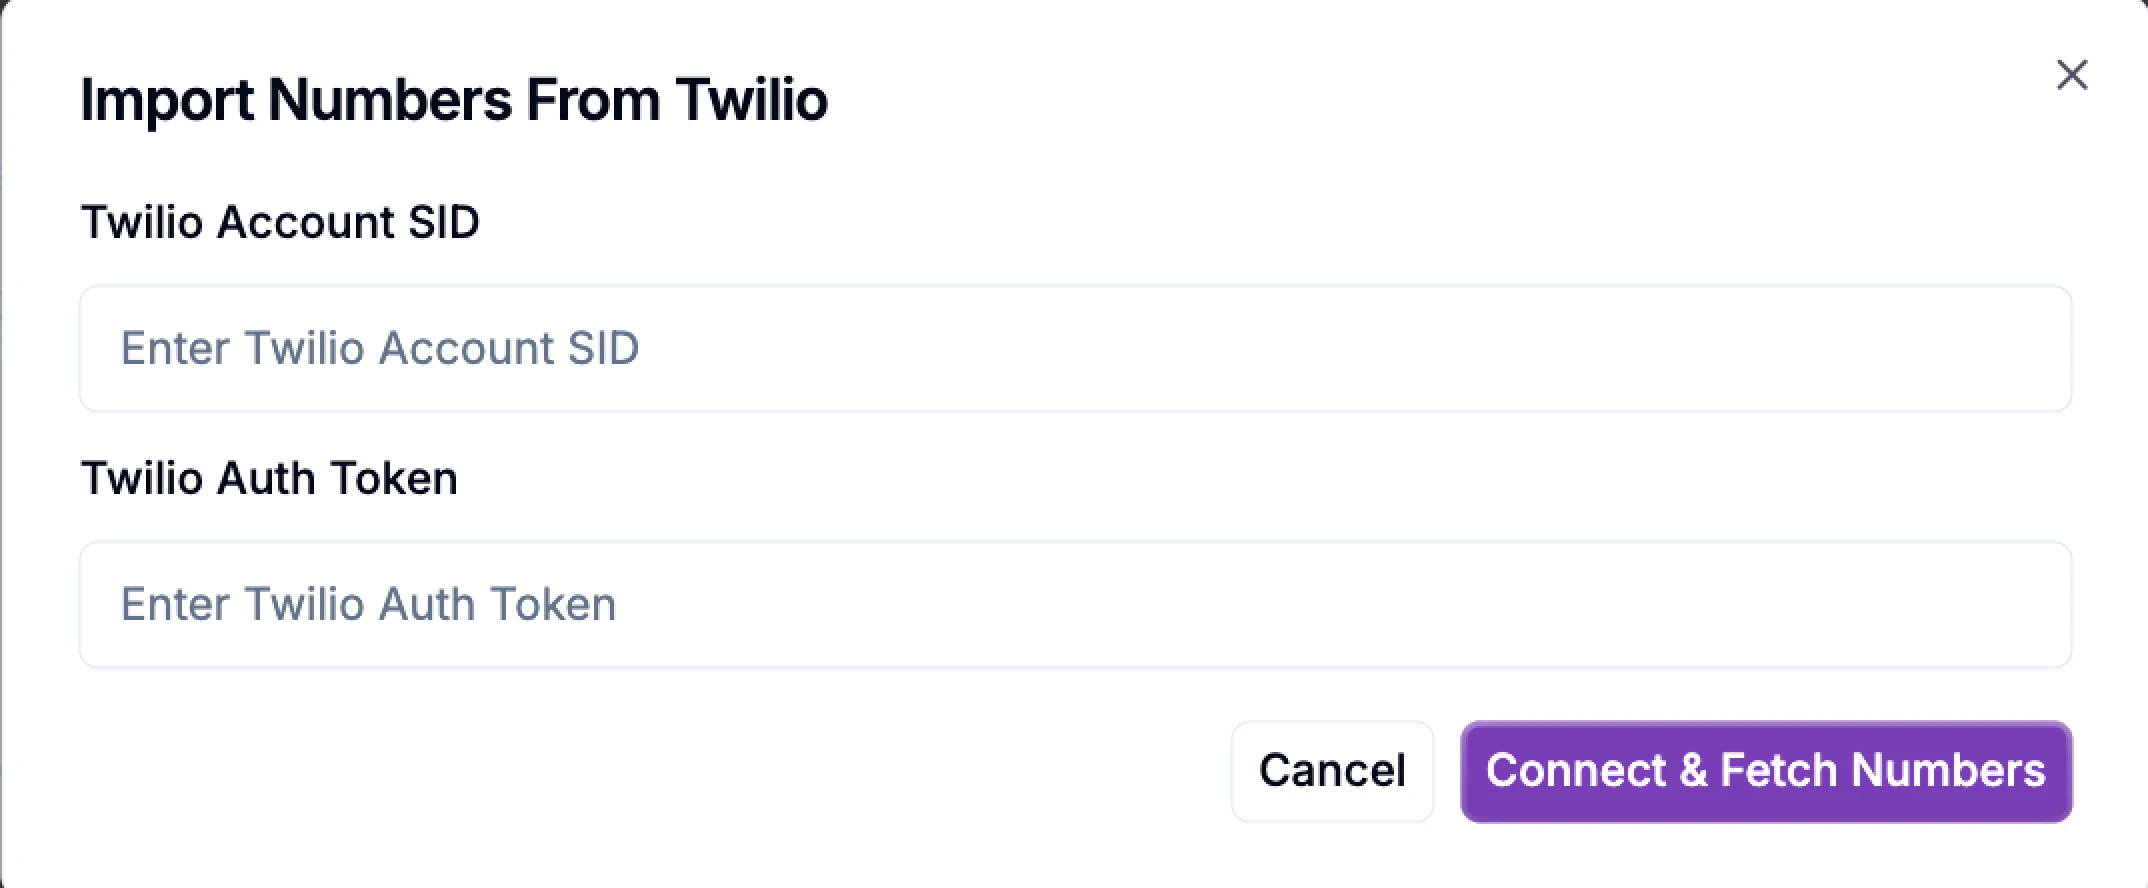
Purchase a Phone Number in Twilio
If no phone numbers appear after connecting, it means your Twilio account does not yet have an active number.To purchase, return to the Twilio Console and go back to the Account Dashboard. From the left-hand menu, open Phone Numbers.Twilio will display a list of available numbers based on region. When choosing a number, review its capabilities carefully: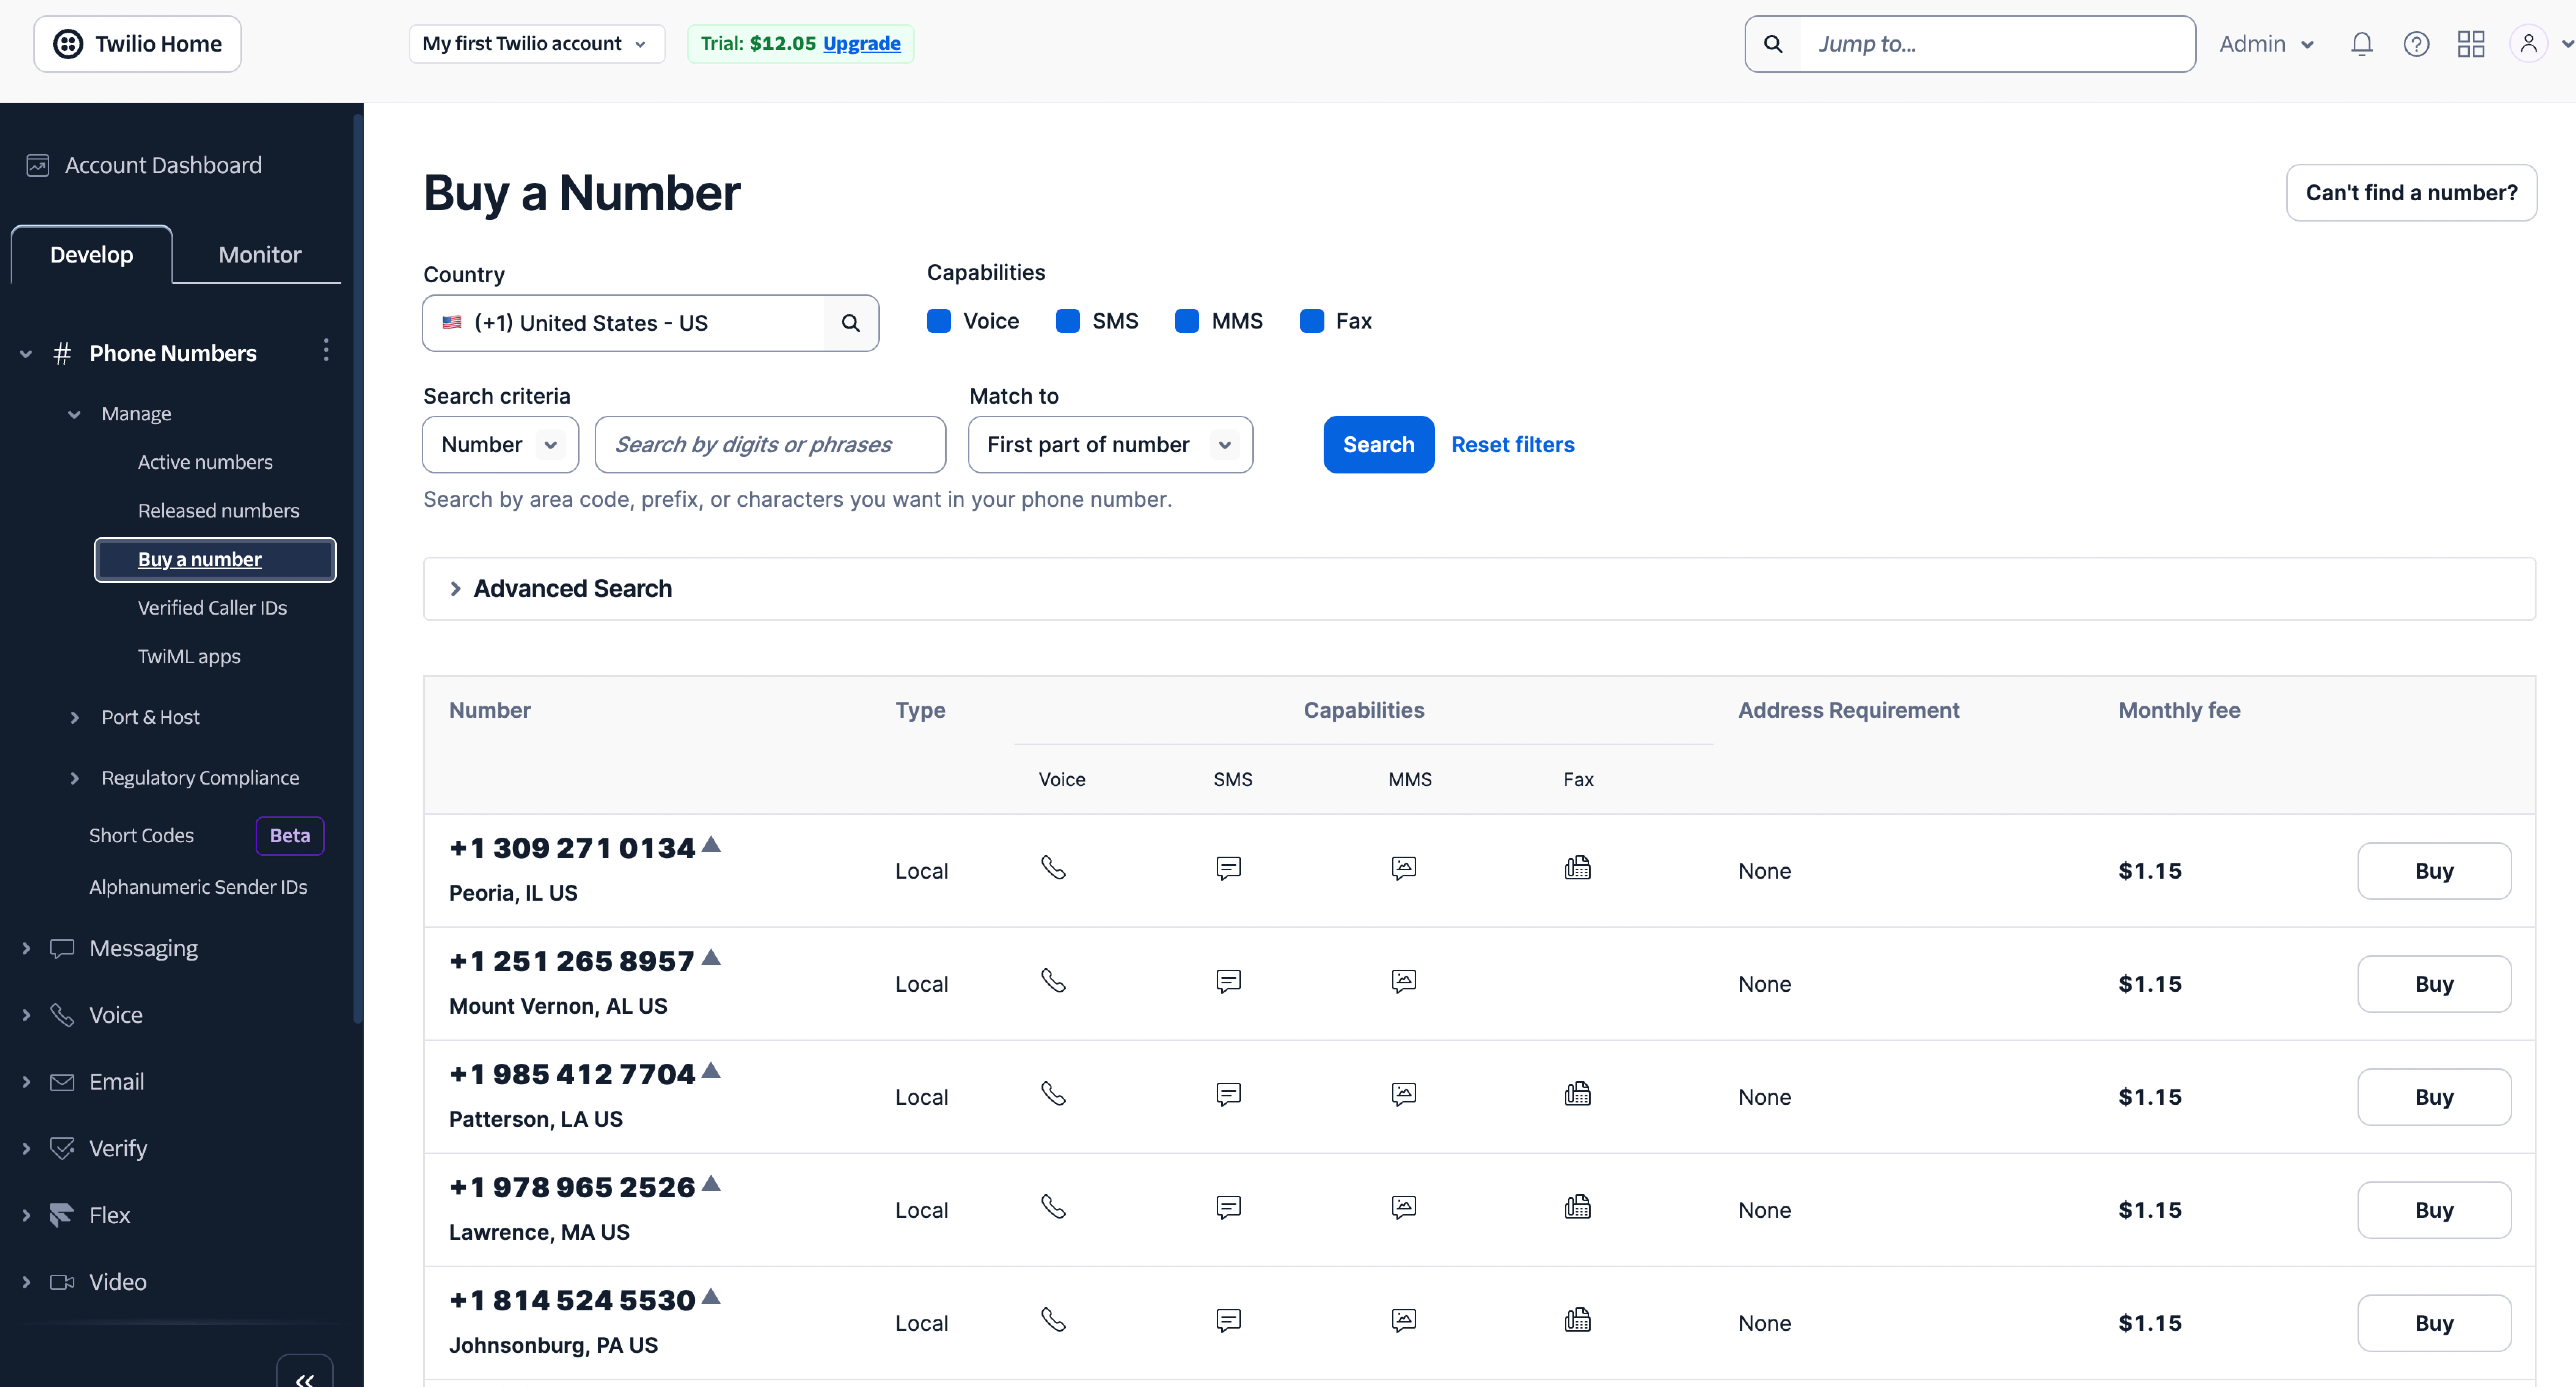
- Voice (required for calls)
- SMS/MMS (optional, but may require A2P 10DLC registration in the US)
Choose Routing Method
Phonely offers three distinct ways to route calls across your outbound numbers:- Weight Routing – The simplest and most common method. Phonely uses these weights to proportionally distribute calls.
- State-Based Routing – Designed for localized campaigns. Phonely detects the state of the recipient and automatically uses a number that matches that state. This improves answer rates, since recipients often respond more positively to local area codes. If no number matches the caller’s state, Phonely defaults to a random enabled number.
- Country-Based Routing – Used for international outreach. Calls are routed through numbers assigned to the recipient’s country, preserving a local presence and helping with compliance in regions where cross-border calls may be restricted. As with state-based routing, if no local number exists, Phonely falls back to a random enabled number.
Call Cadence
Call cadence refers to when and how often your campaign will place calls. Phonely allows scheduling so your AI never calls outside of approved working hours. You’ll see a week-based grid interface where you can toggle each day on or off and define start and end times (for instance, Monday–Friday, 9 AM–6 PM). You can add multiple blocks per day if you want to include breaks. These schedules align with your customers’ local time zones, ensuring compliance with “do not disturb” hours. Calls per Hour You’ll also find a rate control slider that sets the maximum calls per hour. This feature prevents overwhelming your telephony provider or overloading concurrent call capacity.Select Trigger
This step determines how Phonely knows who to call and when to trigger those calls.It’s here that you’ll decide between a continuous, always-on campaign and a finite, one-time batch.
- Continuous Calling – This mode automatically calls new leads as they appear in your connected source (like Google Sheets or an incoming webhook). Whenever a new record is added, Phonely detects it and starts a call within your defined schedule.
- Batch Calling – In this mode, you manually upload a fixed list of leads via CSV. Phonely then calls through that entire list until it’s completed. It’s perfect for short campaigns, such as a limited-time promotion or follow-up drive.
Trigger Sources
After you pick the campaign type, Phonely asks you to specify the data source that provides leads. You’ll see three available options.1. Google Sheets
This is the most popular option for Continuous Calling. You’ll authenticate your Google account (or reconnect if needed), then select:- The spreadsheet where your leads are stored.
- The specific tab to monitor.
2. Webhook
The Webhook trigger is designed for real-time system integrations. Phonely generates a secure URL endpoint that can receive POST requests containing lead data. For example:3. CSV Upload
For batch campaigns, you’ll upload a CSV file containing one or more leads. Each row represents a contact record, and at minimum you must include a column labeled. Once uploaded, Phonely processes the list sequentially according to your call cadence.If you want to reuse the same campaign later with new leads, simply upload another CSV or create a new campaign.
Configure Call Flows
Now that Phonely knows who to call, this step defines what happens during the call. Your AI agent’s behavior is determined by a Call Flow - a visual, block-based sequence that specifies messages, questions, responses, and follow-up actions.Selecting or Editing a Flow
You can choose an existing flow or create a new one. Each flow contains “prompt blocks” and “logic branches” that the AI uses to guide conversations.Mapping Variables
Phonely detects variables in your flow that require data - such as{name}, {email}, and asks you to map these to fields from your trigger source.
For example:

Please note that not all variables need to be mapped, only those you want your agent to reference or use during the call
Campaign Compliance
Outbound calling regulations vary by country, so Phonely includes a mandatory compliance review step before publishing. You’ll see two confirmation checkboxes:- General Compliance – You confirm that your campaign abides by relevant telemarketing laws, including:
- Consent from call recipients.
- Adherence to permitted calling hours.
- Accurate identification of your business.
- Maintenance of opt-out and record logs.
- Do-Not-Call (DNC) Policy – You acknowledge responsibility for ensuring that no prohibited numbers are called. Phonely screens against common DNC registries, but compliance ultimately rests with the campaign owner.

Launching and Monitoring the Campaign
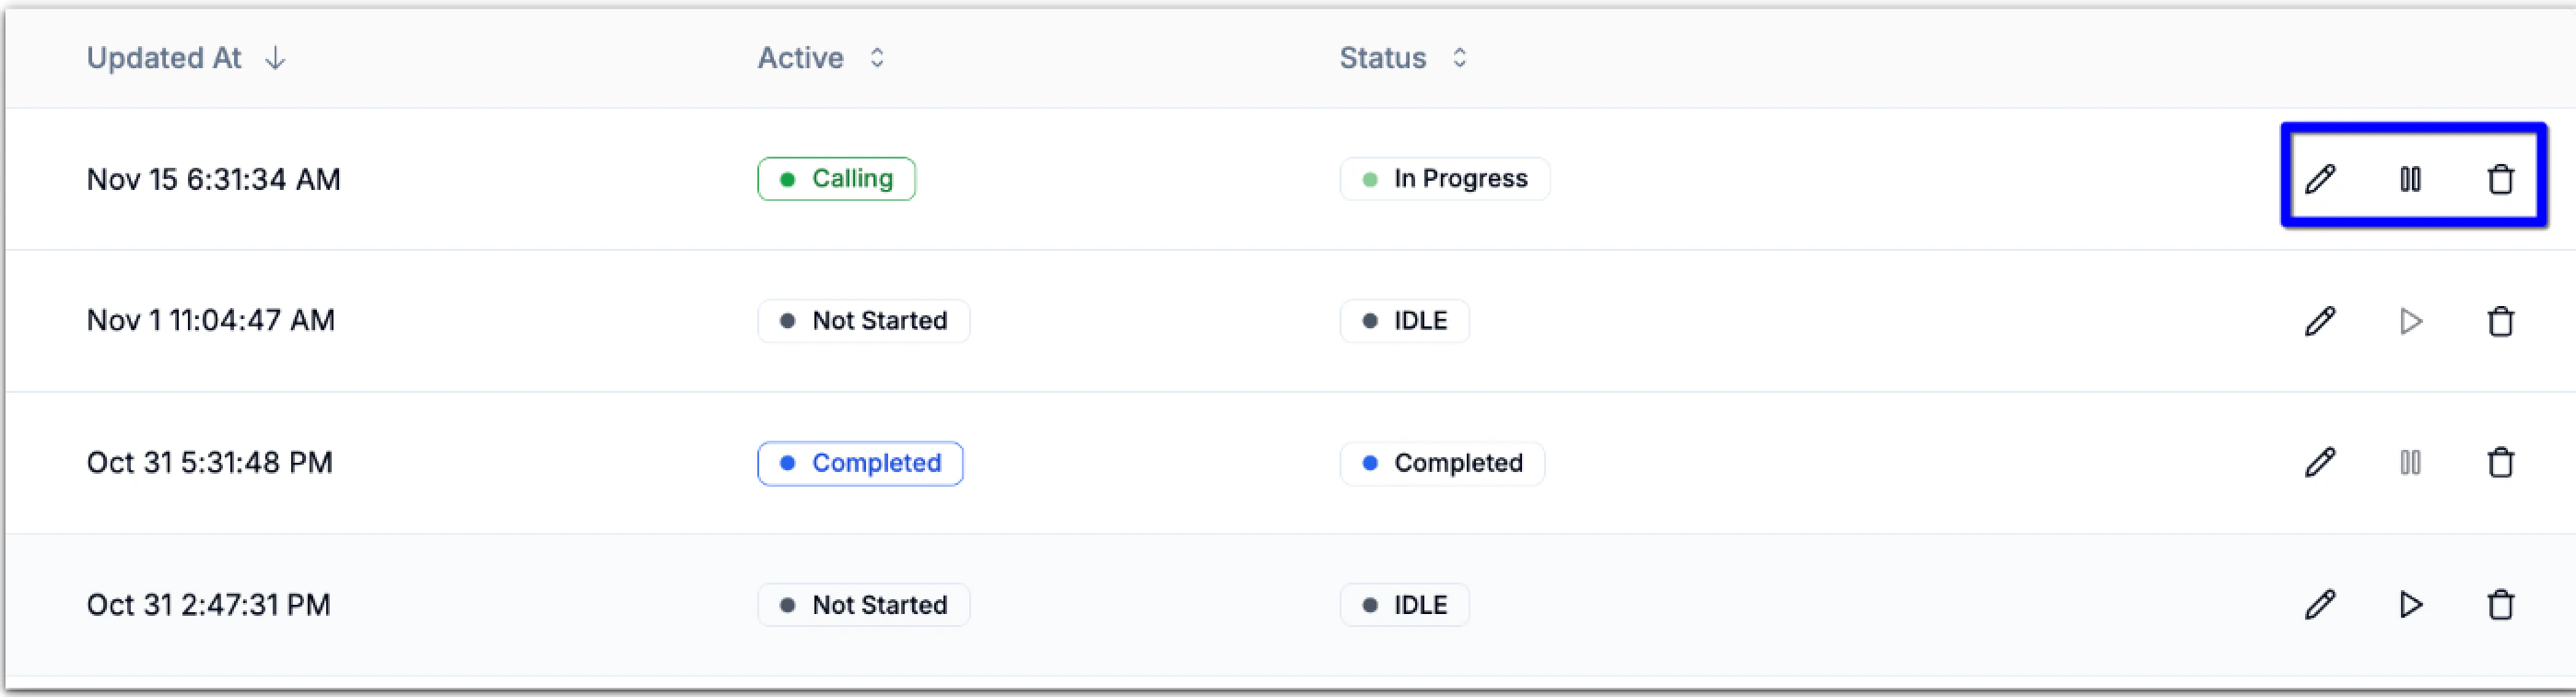
Once published, the campaign is listed on the outbound calls dashboard with real-time visibility into call activity and results. Use the ▶️ Start control on the campaign row to launch the campaign.Managing Campaign Status
Once running, your campaign displays an In Progress status badge.Click it to reveal control options:
- Pause Campaign – temporarily stop all outbound calls while retaining data and progress.
- End Campaign – permanently stop the campaign. Once ended, it cannot be resumed.
Edit a Campaign
If you need to make adjustments after launch, click Edit Campaign at the top-right of the dashboard. You can modify:- Campaign name and type.
- Phone numbers used for this campaign and routing method.
- Call cadence and call per hour.
- Trigger type (e.g., reconnect a Google Sheet or update webhook URL).
-
Call flow connections.
