- Get Availability
- Select Appointment Slot
- Make Appointment
- Open your Flow.
- Click any + connector to add a new block.
- Under Custom Actions, select Google Calendar.

- Success: Appointment successfully created.
- Fail: Calendar error, missing info, or scheduling failure.

Connect Your Google Account
- Click “Connect to Google Calendar.” A pop-up will appear prompting you to link your Google account.
- Select the Google account you want to connect. Choose from the list of accounts or click “Use another account” if not listed.
- Review the permissions requested and click “Continue.” This authorizes Phonely to securely access your calendar.
- Once authenticated, Phonely will display Reconnect and the Continue button should now be activated.
Configure the Custom Google Calendar Block
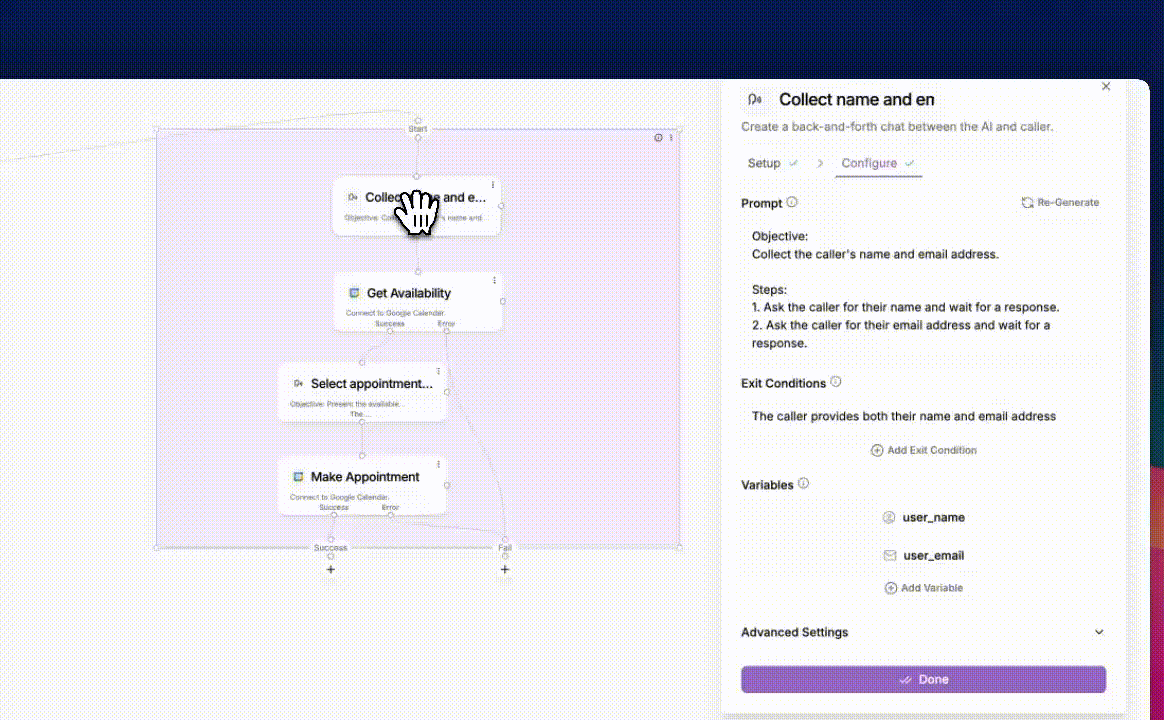
After selecting the Custom Google Calendar action and connecting your Google account, the Configure tab allows you to define how appointments should be created. This block comes pre-wired with all logic needed to fetch availability, present options to the caller, and book the selected slot.Your job is simply to fill in basic scheduling details.
1. Duration
Define how long each appointment slot should be. For example you can enter:15m, 30m, or 1h 30m etcThis value determines how each time slot is generated and displayed to the caller.
Enter the title that should appear on the Google Calendar event. This is what both you and the caller will see on the calendar invite.
2. Event Description
Add optional additional details that should appear inside the calendar event.3. Availability Schedule
Set which days and hours callers are allowed to book.Scheduling Actions
Day Toggle: Enable or disable booking for that day (e.g., disable weekends).Time Ranges: For each enabled day, you can define one or more availability windows.Clock icon: quickly adjust time✕ to remove the current window+ to add another window
- Check your Google Calendar for conflicts
- Only offer callers times that fall within these defined ranges
- Generate slots using the Duration you defined earlier
4. Click Done
Once your duration, title, description, and weekly schedule are set: Click Done Your Google Calendar block is now fully configured and ready to handle booking automatically during live calls.Edit the Block Internally
If you want full control, custom prompts, more conditions, storing the slots, or adjusting logic, you can turn the block into an editable group.- Click the ⋮ menu on the Google Calendar block.
- Select Edit.

- Collect Info
- Get Availability
- Select Appointment Slot
- Make Appointment

- Change the prompts in the Talk blocks.
- Adjust variable names.
- Modify how slots are presented.
- Change fallback logic (e.g., if no slots available).
- Add conditions.
- Save slots for later use.
Publishing or Reverting Edits
Inside the group’s top-right corner menu you will see:- Cancel editing – revert to the original single block.
- Save as Draft – changes only apply to this Flow.
- Publish to Marketplace – make this integration reusable across your workspace