- Start conversations with full awareness of the caller
- Route calls without delays
- Skip unnecessary questions
- Execute logic based on external systems
Set the Start Flow
Open your Flow Editor and select the block that should run first when a call is received.In the settings panel on the right, enable Set as First Flow. Once this is enabled, the Add a pre-call action option appears above the Start Flow.

Select Webhook
From the list of available Pre-Call Actions, choose Webhook.The Webhook configuration panel opens with the following steps:Setup → Configure → Test
Choose the Webhook Action Type
In the Setup step, open the Action dropdown and select Custom Webhook.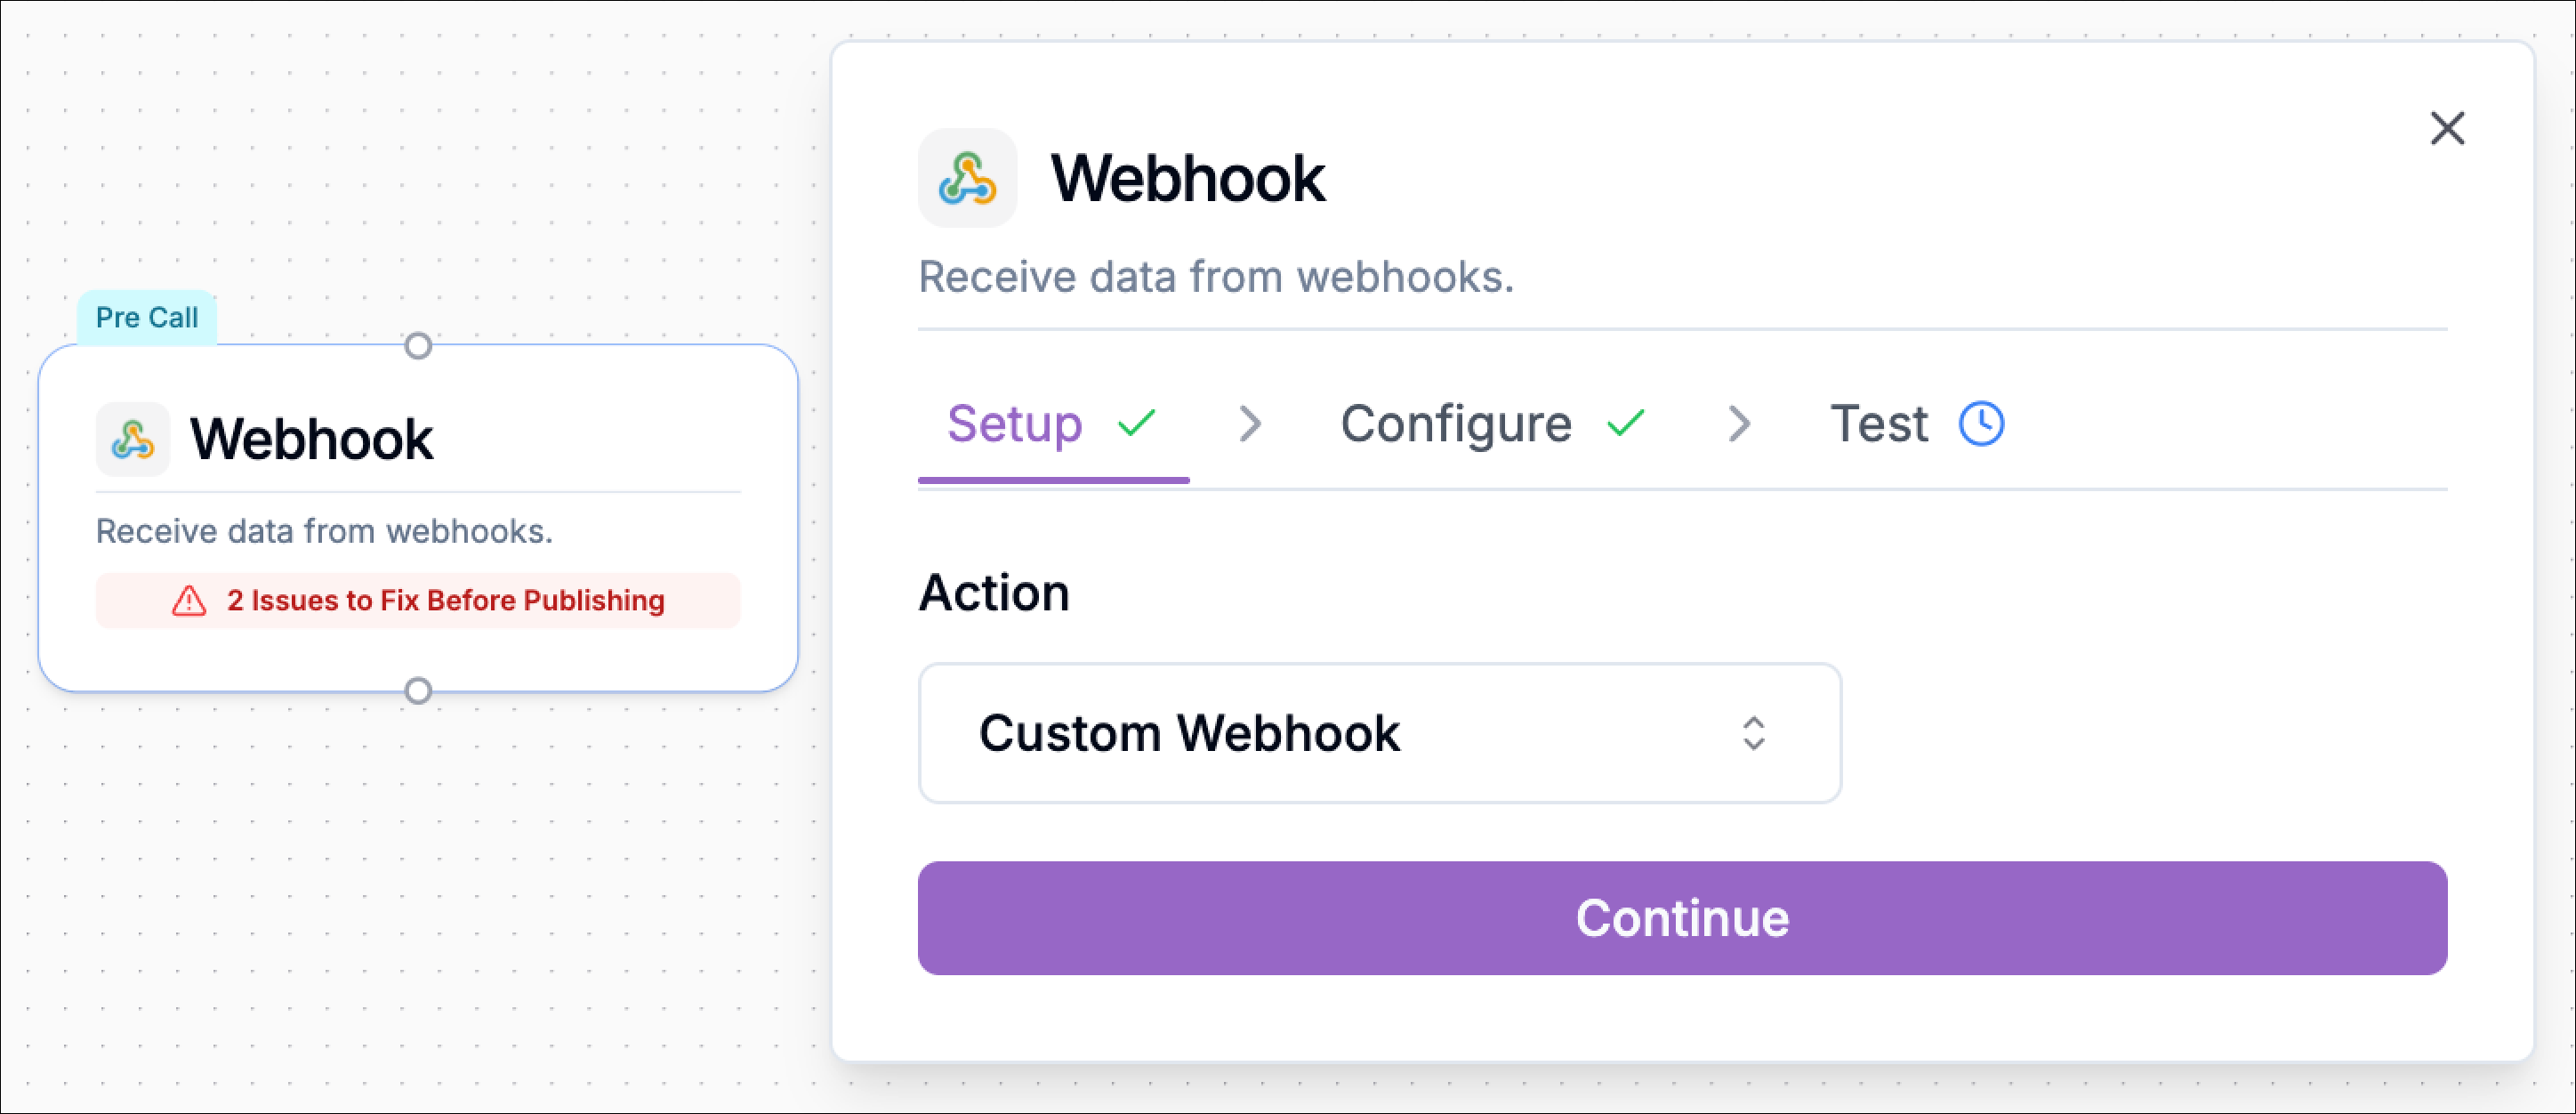
Configure the Webhook Endpoint
In the Configure step, Phonely generates a webhook URL for this Pre-Call Action.This is the endpoint your external system will send data to before the call begins.From this section, you can also use:
- Copy cURL to copy a sample request
- Copy API Key if authentication details are needed
- Copy to copy the webhook URL directly
Set Time Wait Before Fallback
Under Advanced Settings, configure Time Wait Before Fallback.This setting controls how long Phonely should wait for webhook data before continuing with default values.If the webhook data arrives within this wait period, it becomes available in the workflow. If it does not arrive in time, Phonely proceeds without it.
Test
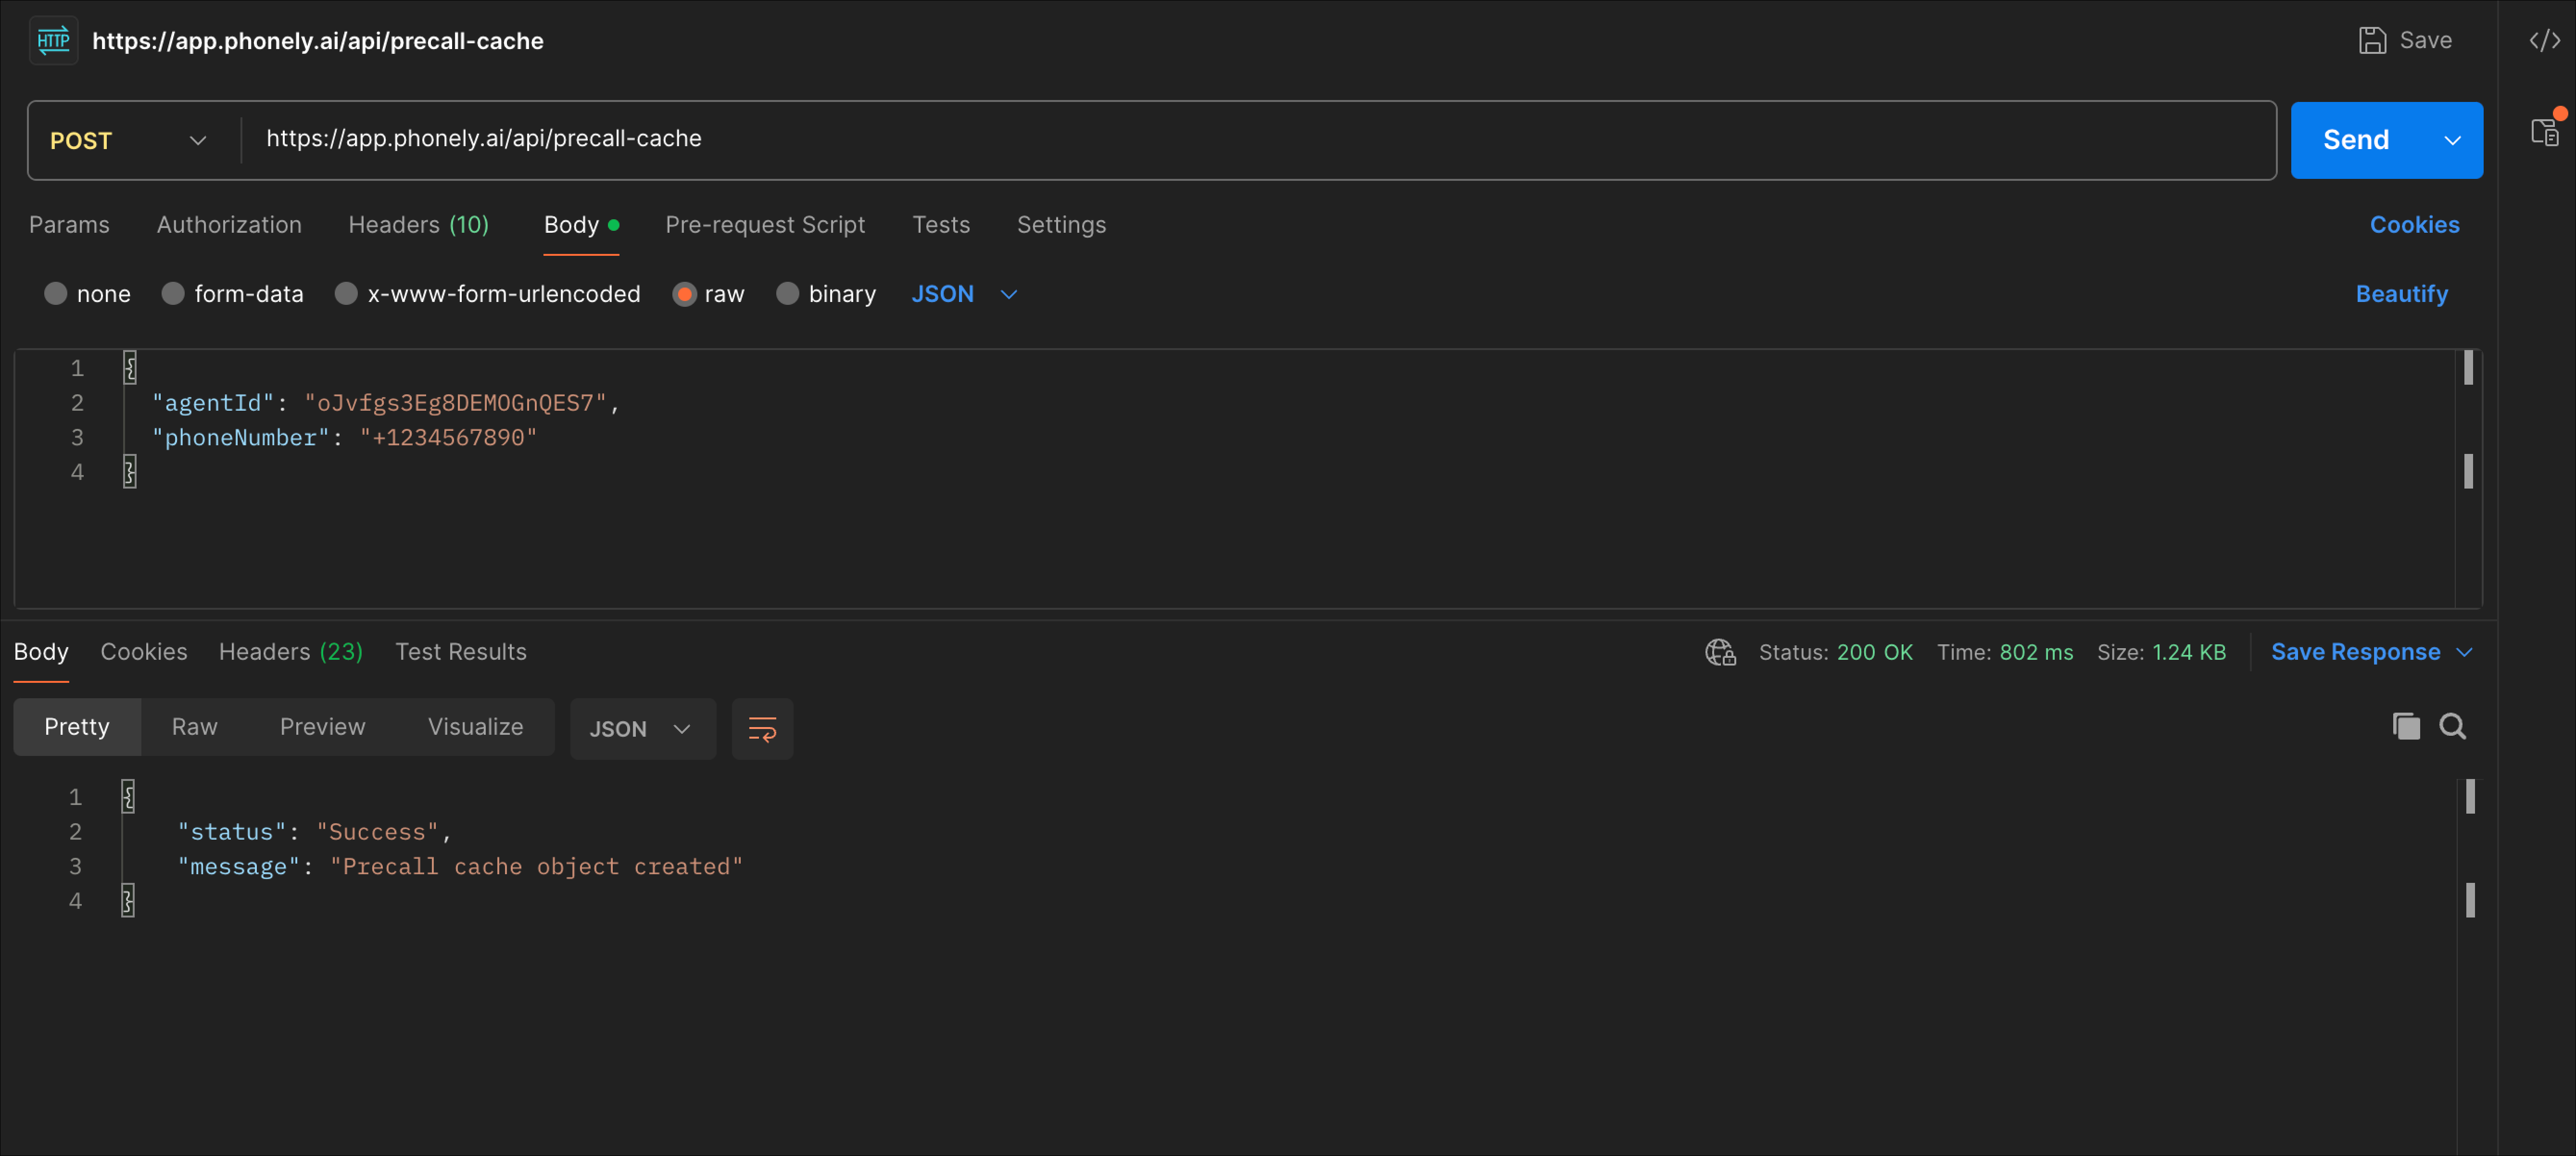
Use the Test step to verify that your external system can successfully send data to the Pre-Call Webhook and that Phonely can cache that data for use in the workflow. To test the webhook:- Copy the webhook URL shown in the Configure step.
- Send a POST request to that URL.
- Include a JSON body with the required fields shown below.
agentId and phoneNumber are required.
agentIdidentifies the Phonely agent that should receive the data.phoneNumberis used to match the cached data to the caller.
customer_name, priority, and issue_type would all become available for use in your Pre-Call and downstream workflow logic.
Use this test step to confirm that:
- the webhook endpoint is reachable
- the payload is structured correctly
- the required fields are included
- the cached values can be used in the workflow as expected
Examples
1. Call Transfer with Context
A telecom or IVR system transfers a caller to Phonely. Before transfer, it sends:- Call is routed immediately
- Phonely starts with context
- No need for initial questioning
2. CRM-Based Personalization
Your backend detects an incoming call and enriches it with CRM data.- Personalized greeting
- Enterprise-level routing
- Context-aware responses
3. Lead Qualification
A marketing system sends pre-qualified lead data:- Routed directly to sales
- Tailored conversation
4. Fraud Detection
A risk system evaluates the caller:- Trigger verification flow
- Apply stricter handling