

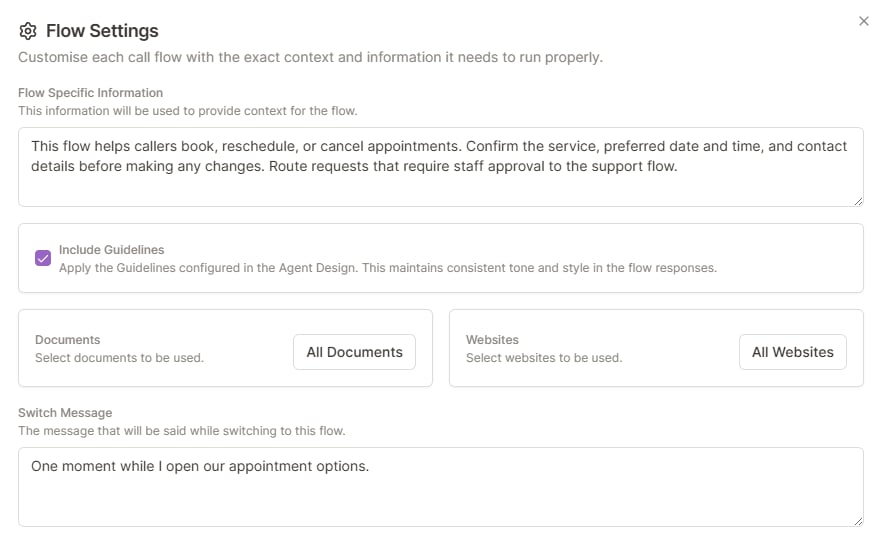
Available settings
Flow Specific Information
Use this field for context that applies throughout the current flow:- For an inbound flow, describe what the flow handles, its limits, and when to route the caller elsewhere.
- For an outbound flow, describe the purpose of the call, who the agent is calling, and the desired outcome. Phonely uses this as the call instructions.
This flow handles billing and subscription questions. Use the billing policy sources selected for this flow. Route refund exceptions to the billing escalation flow.Avoid copying reference material into this field. Select the relevant documents and websites in Flow Settings instead so the content remains easier to maintain.
Include Guidelines
Keep Include Guidelines enabled to apply the agent’s shared behavior, tone, and response rules to this flow. It is enabled by default. Turn it off only when the flow should operate without those shared instructions. This affects only the current flow; it does not change the agent’s Guidelines or other flows. Add any replacement context to Flow Specific Information or the relevant blocks.Documents and Websites
Documents and Websites determine which existing Knowledge Base sources the flow can reference. Add or update the source in the Knowledge Base, then select it here. Choose the appropriate scope for each source type:- Select All Documents or All Websites to include existing sources and sources added later.
- Select individual sources when the flow should use only a specific set. New sources are not added automatically.
- Clear every selection when the flow should not use that source type.
Switch Message
Switch Message is a short transition spoken when an active call enters an inbound flow through Transfer Flow or a matching Global Flow trigger condition. It is not used when the First Flow begins the call; the Greeting is used instead. Keep the message brief and tell the caller what is happening. For example:One moment while I pull up our scheduling information.Switch Message is not available for outbound flows because an outbound flow starts the call instead of receiving a transfer from an active call. After publishing, use Web Call and enter the flow through Transfer Flow or its Global Flow trigger condition to hear the message.
Choose the right level
Place settings and instructions at the narrowest level where they should apply:
This avoids duplicated instructions and keeps future changes in one place.