Key Features of the Post-Call Send Email Block
- Automated Email Dispatch: Sends emails automatically from your Phonely agent to a specified recipient after the call has ended.
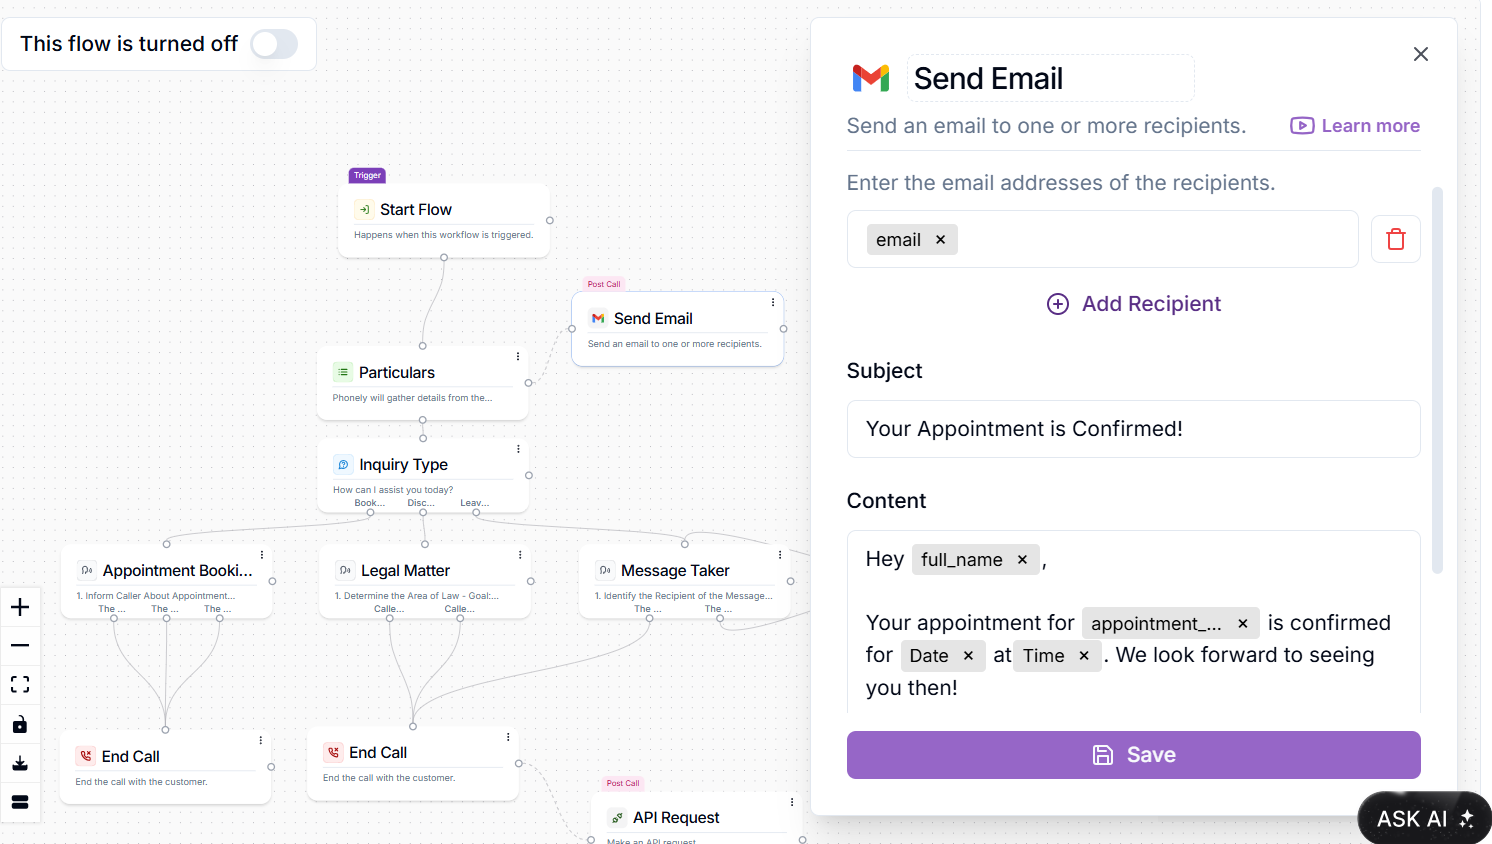
- Variable-Rich Content: Dynamically compose email subject lines and body content by embedding variables from the ongoing conversation (e.g., caller’s name, provided email, phone number, call summary, dashboard URL to the call recording).
- Plain Text or HTML: Choose between sending emails in plain text format or with rich HTML formatting for enhanced presentation.
-
Flexible Triggering:
- Post Call Action: Triggers the email after the call has ended. Post-call emails are highly valuable as they can be configured to send even if the caller doesn’t complete the entire workflow, acting as a preemptive notification.
- Custom Recipient & Sender: Define the recipient email address and the “From” name that appears on the email.
- Variable Formatting: Utilizes Phonely’s variable formatting capabilities, ensuring captured data (like phone numbers) is presented in a desired style.
How to Use the Post Call Send Email Block
Implementing the Post Call Send Email Block involves setting up your workflow to gather information, adding the block, and configuring its content and recipient. 1. Create or Edit a Workflow- Access the Workflows Page from your Phonely Dashboard.
- Create a New Flow, or select an existing one to edit.
- Ensure a Trigger Condition is Set: Define a trigger for your workflow (e.g., “when someone asks for a callback” or “wants to speak to a person”). This ensures the flow initiates under specific circumstances.
- Add a Prompt Block (or a Multi-Ask Block) early in your workflow.
- Instruct the AI to gather specific contact information that you want to include in the email (e.g., name, email address, phone number).
- Define Variables: Ensure you define variables within your Prompt Block (e.g., caller_name, caller_email, caller_phone_number) and specify their types.
- In your workflow, hover over the node on the right of any block, click the ’+’ where it says ‘add post call action’, and select ‘Send Email Message’ (you’ll see a Gmail logo, but it sends to any valid email address).
- This connection will appear to the right of your block, as a dotted line. This means you can connect it anywhere in your flow, and the email will be sent automatically after the call, even if the caller doesn’t complete the entire workflow path, ensuring preemptive notification.
- Click on the Send Email Block to open its settings.
- Format: Choose between “Plain Text” or “HTML” format for your email content.
- Compose Subject & Body: Enter your desired subject line and message content.
- Subject: New call from [caller_name] - Callback Requested
- Body:
- New call from: [caller_name]
- Email: [caller_email]
- Phone Number: [caller_phone_number]
- Summary of Conversation: [summary] (Phonely can capture a live summary)
- Link to Call: [dashboard_url] (Provides a direct link to the call recording in your Phonely dashboard)
- Set Email Recipient: Specify the email address to which this automated email should be sent. If you want to send this to your team, you can send to a static email address. If you want to send this to your customer, you can select the email variable that was earlier defined in the call.
- Set From Name: Define the name that will appear as the sender of the email.
Example Use Case
Here’s an example workflow to illustrate the process of using the Post Call Send Email Block for callback requests:- Trigger: Customer says “I want to schedule an appointment with Joe”
-
Action 1 (Prompt Block):
- Instruct AI to: “Get the caller’s name, email, and best callback phone number. Inform them that an appointment scheduling link will be sent to their email”
- Store variables: customer_name (text), customer_email (email), callback_phone (phone).
-
Action 2 (Post Call Send Email Block):
- Recipient: [email protected] (or select customer_email variable for customer notifications)
- From Name: Phonely AI Agent
- Subject: Appointment Scheduling for [customer_name]
- Body:
- Customer Name: [customer_name]
- Email: [customer_email]
- Callback Phone: [callback_phone]
- Conversation Summary: [summary]
- Appointment Scheduling Link: [email protected]
- Action 3 (End Call Block): Graciously end the call after collecting information and dispatching the email.