> ## Documentation Index
> Fetch the complete documentation index at: https://docs.phonely.ai/llms.txt
> Use this file to discover all available pages before exploring further.
# Code
The Code Pre-Call Action allows you to run custom code before the conversation begins.
It gives you a way to add logic that goes beyond standard workflow routing. You can use it to evaluate conditions, transform data, generate new variables, or prepare information that the AI agent will use from the very first message.
When this action runs, it:
* Receives input variables
* Executes your code
* Returns output variables
* Makes those output variables available to the Start Flow and the rest of the conversation
This makes the Pre-Call Code action useful when you need more flexibility than a standard Filter or API Request can provide. Currently, the code action supports Python.
## When This Action Runs
The Pre-Call Code action runs immediately after the call starts, before the Start Flow begins.
Execution order:
```text theme={null}
Incoming Call
↓
Pre-Call Code
↓
Start Flow
↓
Conversation Workflow
```
Because it runs before the AI agent speaks, it is ideal for preparing values that influence the greeting, routing, or early workflow behavior.
## When to Use Pre-Call Code
Use the Pre-Call Code action when you need to perform logic before the caller hears the first response.
Common uses include:
* Evaluating caller eligibility
* Transforming values returned from another Pre-Call Action
* Creating new variables for routing
* Formatting phone numbers or other fields
* Assigning customer tiers
* Applying custom business rules
* Preparing values used later in Filters, API requests, transfers, or messaging
This action is especially helpful when the logic is too complex for a simple condition check.
## How to Add a Pre-Call Code Action
Pre-Call Actions can only be added **above the Start Flow**, which is the block that runs first when a call is answered.
To add a Pre-Call Code action:
Open your **Flow Editor** and select the block that should run first when a call is received.
In the settings panel on the right, enable **Set as First Flow**. Once this is enabled, the **Add a pre-call action** option appears above the Start Flow.
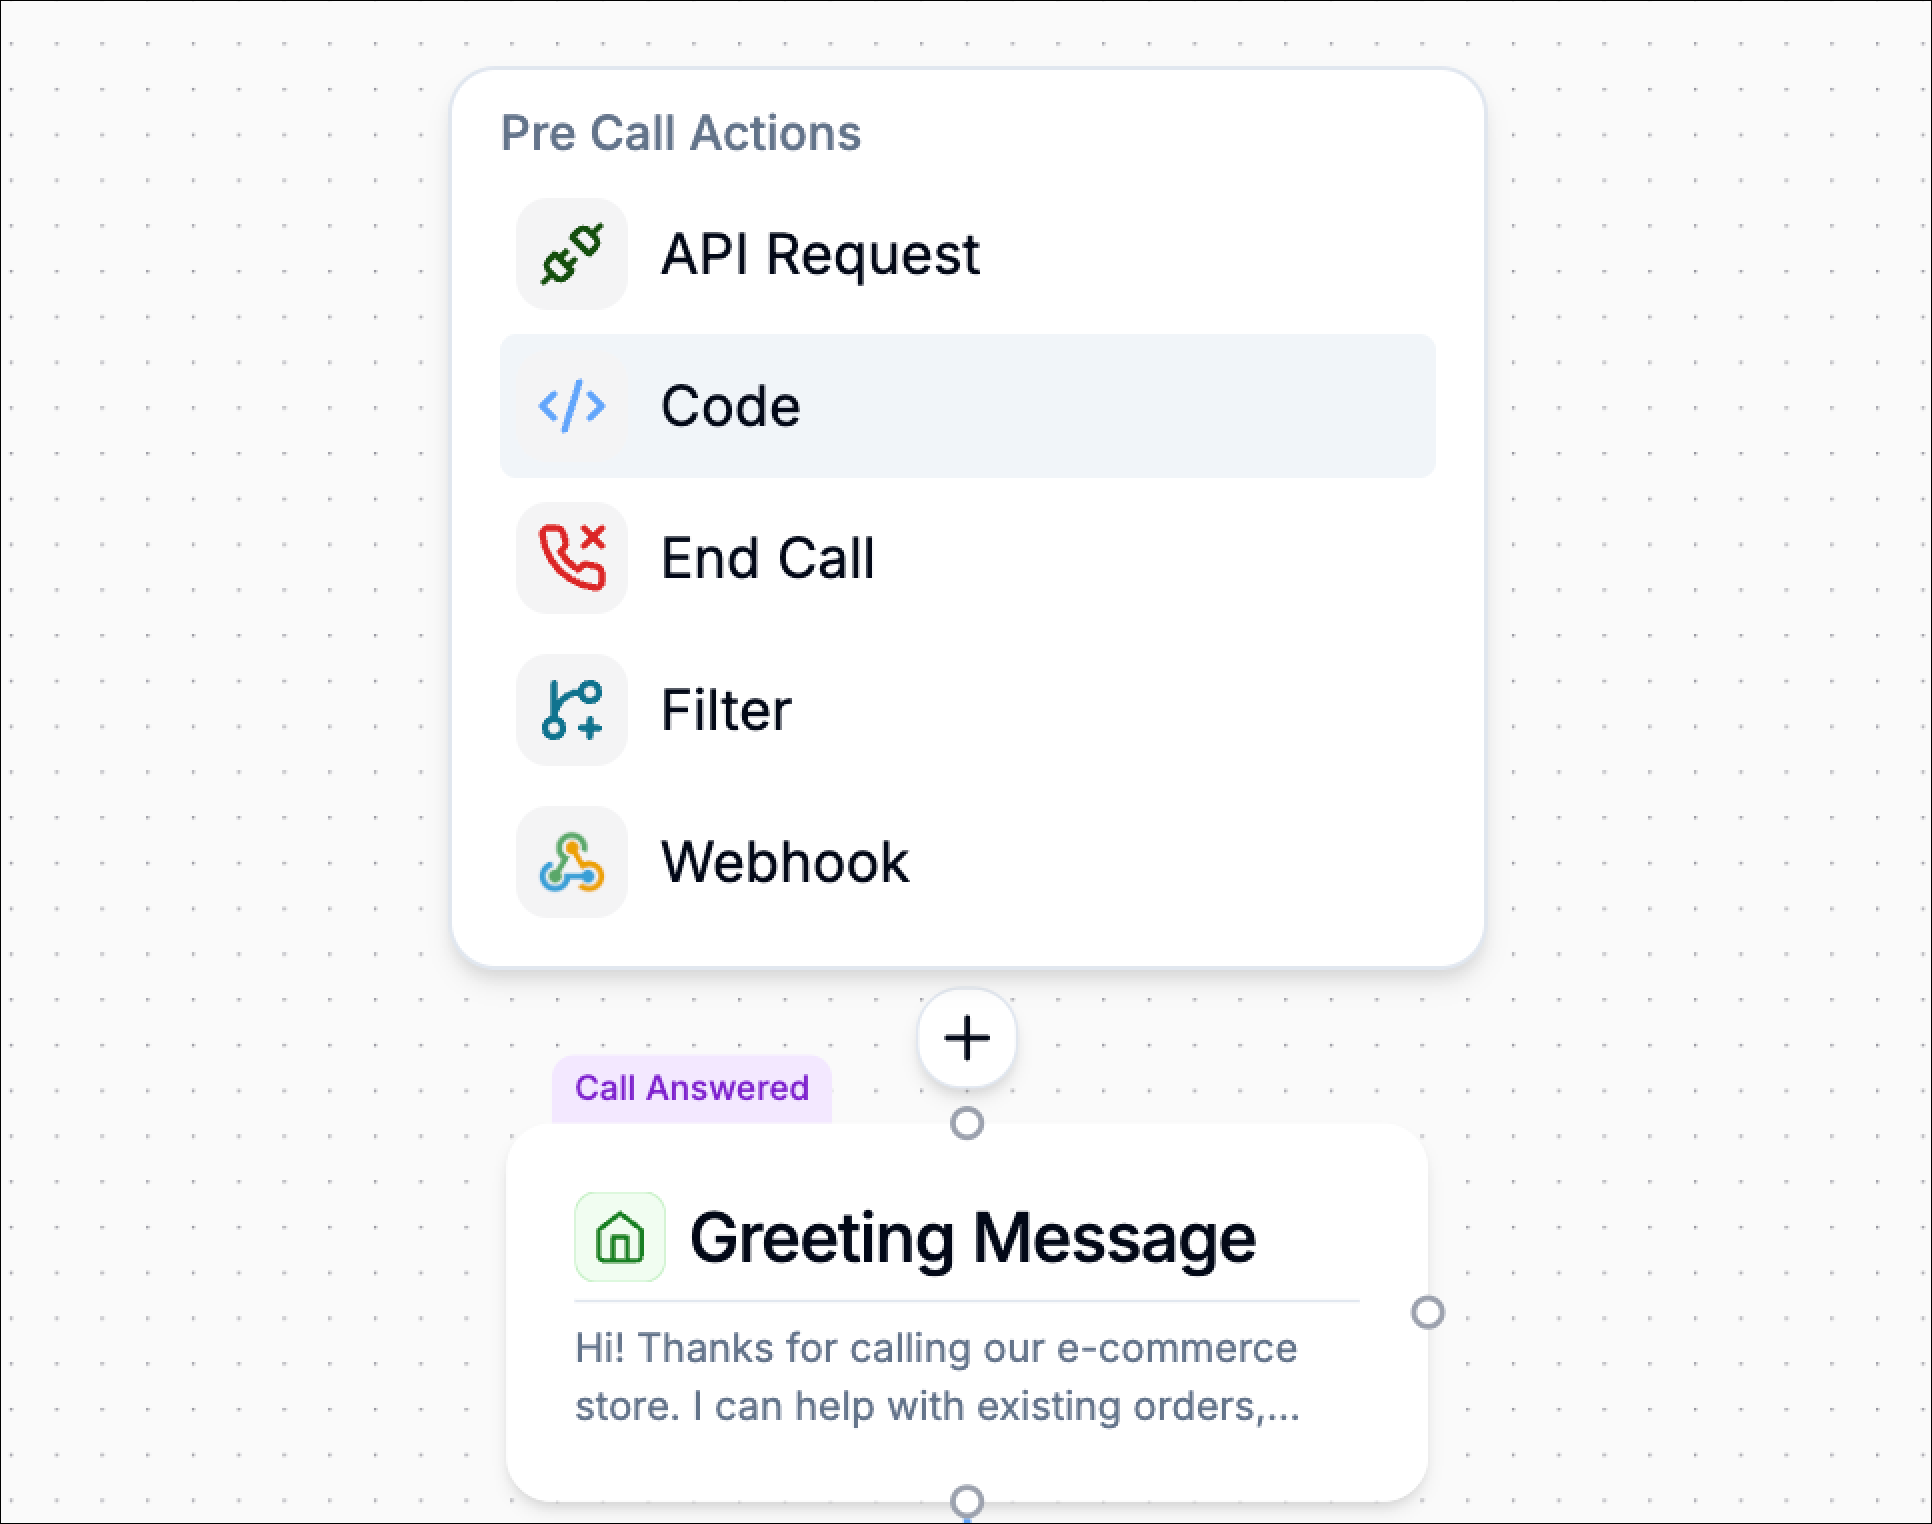
Click the **➕** button above the Start Flow.
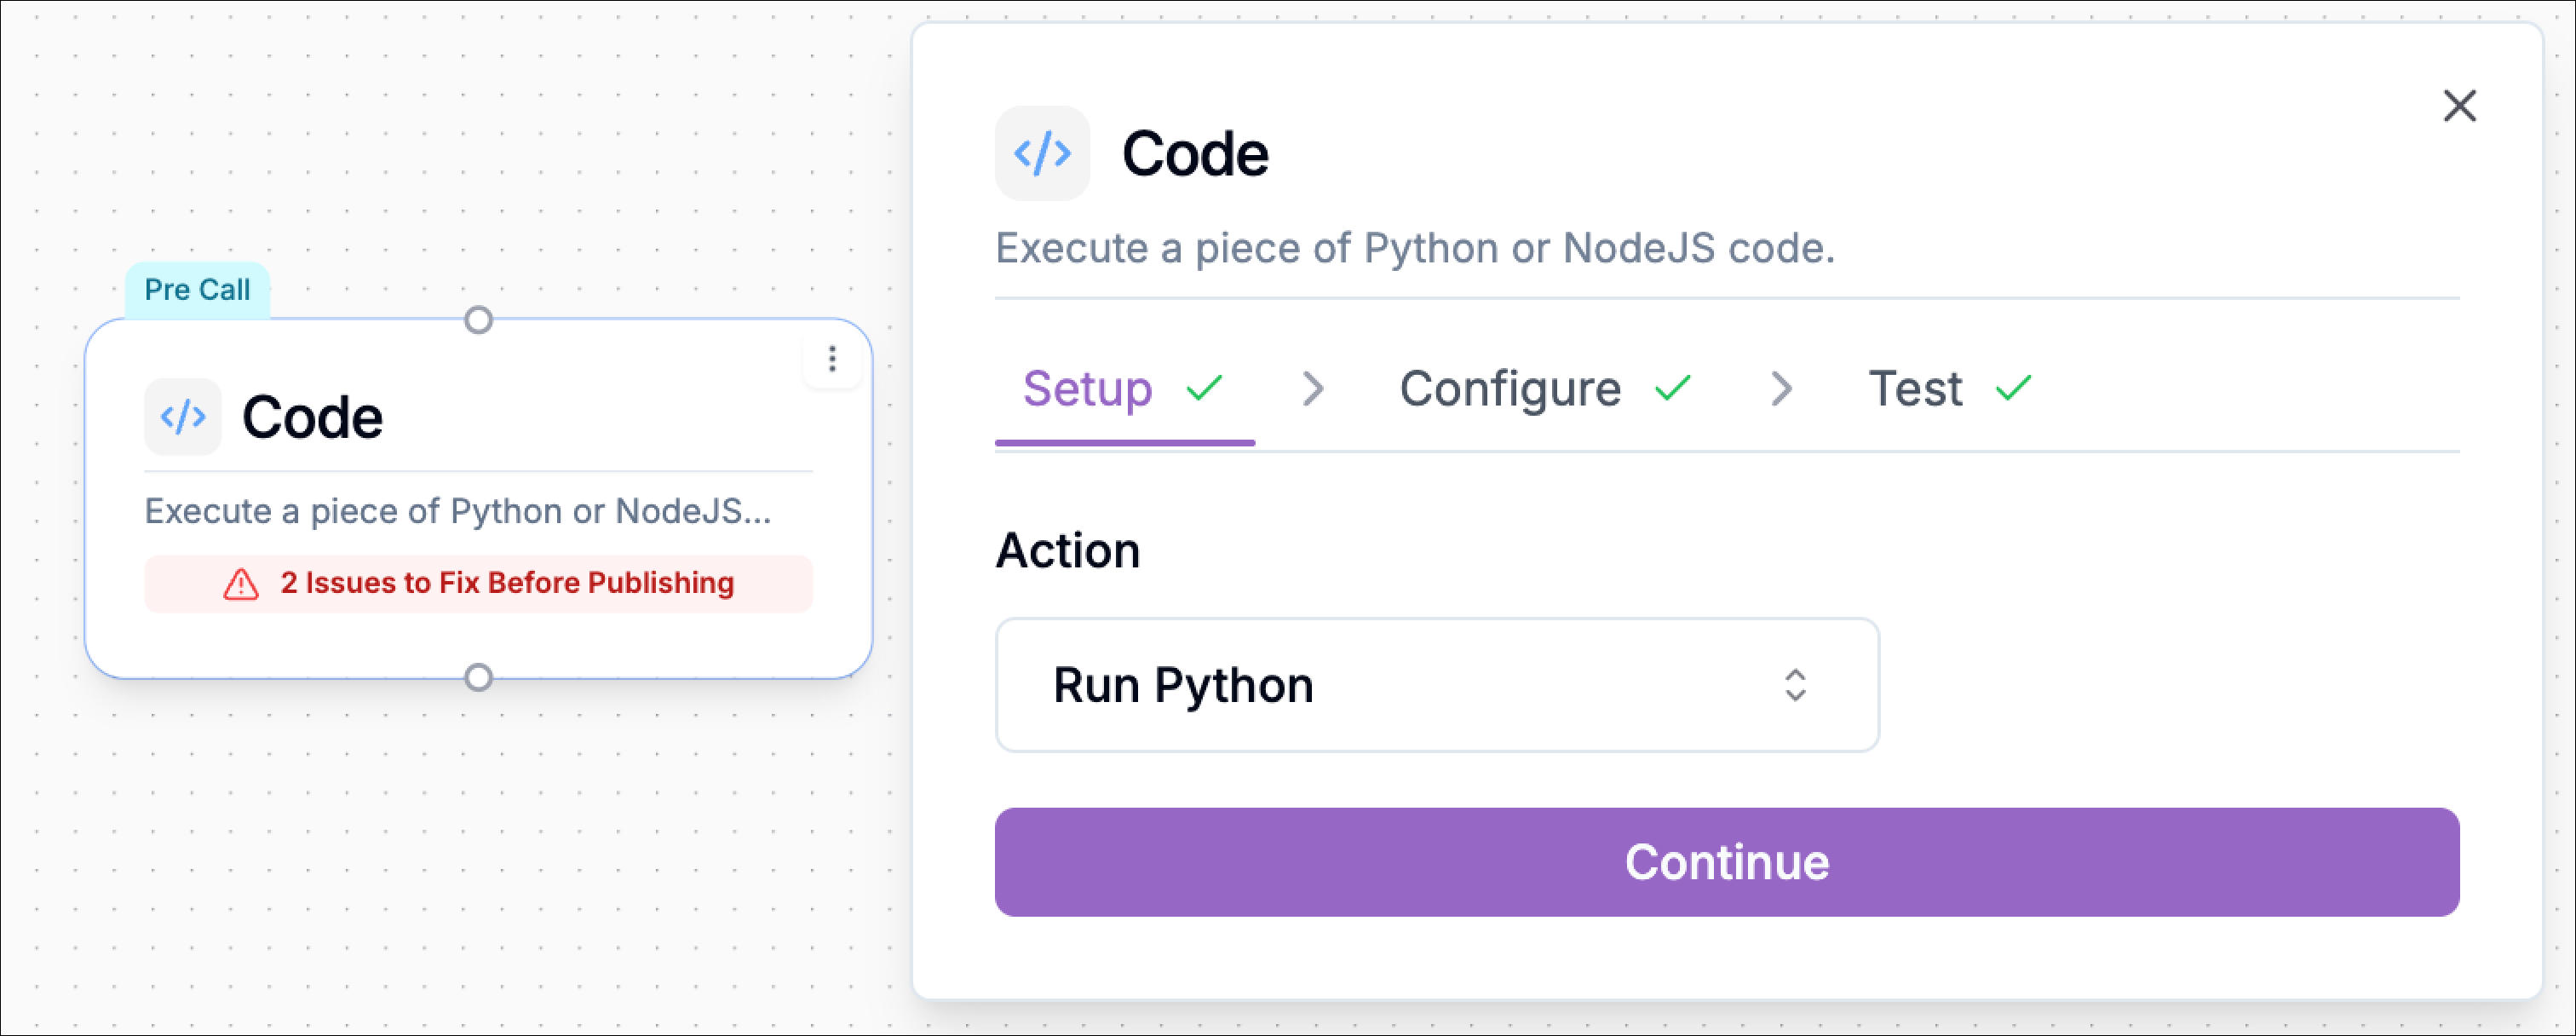
From the list of available pre-call actions, choose **Code**. The Code configuration panel opens with the following steps:
 ```text theme={null}
Setup → Configure → Test
```
## Setup
In the **Setup** step, select the type of code action you want to run. For this action, choose **Run Python.** Once selected, click **Continue** to move to the configure step.
```text theme={null}
Setup → Configure → Test
```
## Setup
In the **Setup** step, select the type of code action you want to run. For this action, choose **Run Python.** Once selected, click **Continue** to move to the configure step.
 The **Configure** step is where you define the variables your code will use and write the Python logic.
At the top of the configuration panel, you can define **Input Variables**. These are the values passed into your Python function.
You’ll notice default variables like `arg1` and `arg2` when adding a Code Block. Feel free to rename or remove them to match your workflow’s actual input variables.
You can:
* rename them
* remove them
* add more input variables
Each input variable has two parts:
* **Variable name** – the name used inside your code
* **Set variables** – the workflow variable that should be passed into that input
Example:
| Variable name | Set variables |
| :------------ | :---------------------- |
| caller\_phone | caller\_phone\_number |
| account\_type | customer\_account\_type |
This allows your Python code to access values collected or generated earlier in the workflow.
The Python editor includes a starter function:
```python theme={null}
def function(input_dict: dict) -> dict:
arg1 = input_dict.get('arg1')
arg2 = input_dict.get('arg2')
output_dict = {}
# execute code
return output_dict
```
This structure should remain in place.
Your code must:
* accept `input_dict`
* return `output_dict`
Phonely uses `input_dict` to pass values into the block and uses `output_dict` to make new values available after the block finishes.
### **Example: Assign a Customer Tier**
The example below checks a customer’s account type and returns a tier that can be used later in the workflow.
The **Configure** step is where you define the variables your code will use and write the Python logic.
At the top of the configuration panel, you can define **Input Variables**. These are the values passed into your Python function.
You’ll notice default variables like `arg1` and `arg2` when adding a Code Block. Feel free to rename or remove them to match your workflow’s actual input variables.
You can:
* rename them
* remove them
* add more input variables
Each input variable has two parts:
* **Variable name** – the name used inside your code
* **Set variables** – the workflow variable that should be passed into that input
Example:
| Variable name | Set variables |
| :------------ | :---------------------- |
| caller\_phone | caller\_phone\_number |
| account\_type | customer\_account\_type |
This allows your Python code to access values collected or generated earlier in the workflow.
The Python editor includes a starter function:
```python theme={null}
def function(input_dict: dict) -> dict:
arg1 = input_dict.get('arg1')
arg2 = input_dict.get('arg2')
output_dict = {}
# execute code
return output_dict
```
This structure should remain in place.
Your code must:
* accept `input_dict`
* return `output_dict`
Phonely uses `input_dict` to pass values into the block and uses `output_dict` to make new values available after the block finishes.
### **Example: Assign a Customer Tier**
The example below checks a customer’s account type and returns a tier that can be used later in the workflow.
 In this example:
* the block receives `account_type`
* it evaluates the value
* it returns a new variable called `customer_tier`
That returned variable can then be used later in the flow.
### Function Definition
```python theme={null}
def function(input_dict: dict) -> dict:
```
This is the required function signature for the Code action.
* `Input_dict` contains all variables passed into the block
* the function must return a dictionary of outputs
### Reading Inputs
```python theme={null}
account_type = input_dict.get("account_type")
```
This retrieves the input variable from the dictionary.
If the mapped workflow variable contains `"premium"`, that value becomes available in the code.
### Applying Logic
```python theme={null}
if account_type == "enterprise":
customer_tier = "VIP"
elif account_type == "premium":
customer_tier = "Priority"
else:
customer_tier = "Standard"
```
This is where your business logic runs.
You can use code to:
* compare values
* assign labels
* transform strings
* calculate totals
* decide fallback values
### Returning Outputs
```python theme={null}
output_dict = {
"customer_tier": customer_tier
}
```
This defines the variables that will be returned to the workflow.
After the block runs, `customer_tier` becomes available to later steps.
## Advanced Settings
The pre-call code action includes advanced settings similar to other Phonely actions.
### Enable Error Handling
When enabled, the system can catch code execution failures and handle them more gracefully.
This is useful when your logic depends on input values that may be missing or incorrectly formatted.
### Interim Message
If the code action takes time to execute, you can enable an interim message so the caller hears a short response while the system completes the task.
Example:
> “One moment while I check that.”
This helps avoid silence at the start of the call.
### Post Interim Message Delay
Adds a delay after the interim message before the flow continues. This can make the interaction feel more natural.
### Interim Message Prompt
You can configure how the interim message is generated. Available options include:
* **Promptable** – the system generates the interim message dynamically
* other available prompt types depending on your setup
Example prompt:
> Generate a friendly 3–7 word interim message to inform the caller that you are working on their request.
### Call Outcome Tagging
You can assign an outcome tag to help classify the result of the code action for reporting and analytics.
Examples:
* `tier_assigned`
* `eligibility_checked`
* `routing_prepared`
## Validate Your Code
Before continuing, click **Validate**.
Validation checks that the Python code is syntactically correct.
If validation succeeds:
* The configure step is marked complete
* Click continue to proceed to **Test**
In this example:
* the block receives `account_type`
* it evaluates the value
* it returns a new variable called `customer_tier`
That returned variable can then be used later in the flow.
### Function Definition
```python theme={null}
def function(input_dict: dict) -> dict:
```
This is the required function signature for the Code action.
* `Input_dict` contains all variables passed into the block
* the function must return a dictionary of outputs
### Reading Inputs
```python theme={null}
account_type = input_dict.get("account_type")
```
This retrieves the input variable from the dictionary.
If the mapped workflow variable contains `"premium"`, that value becomes available in the code.
### Applying Logic
```python theme={null}
if account_type == "enterprise":
customer_tier = "VIP"
elif account_type == "premium":
customer_tier = "Priority"
else:
customer_tier = "Standard"
```
This is where your business logic runs.
You can use code to:
* compare values
* assign labels
* transform strings
* calculate totals
* decide fallback values
### Returning Outputs
```python theme={null}
output_dict = {
"customer_tier": customer_tier
}
```
This defines the variables that will be returned to the workflow.
After the block runs, `customer_tier` becomes available to later steps.
## Advanced Settings
The pre-call code action includes advanced settings similar to other Phonely actions.
### Enable Error Handling
When enabled, the system can catch code execution failures and handle them more gracefully.
This is useful when your logic depends on input values that may be missing or incorrectly formatted.
### Interim Message
If the code action takes time to execute, you can enable an interim message so the caller hears a short response while the system completes the task.
Example:
> “One moment while I check that.”
This helps avoid silence at the start of the call.
### Post Interim Message Delay
Adds a delay after the interim message before the flow continues. This can make the interaction feel more natural.
### Interim Message Prompt
You can configure how the interim message is generated. Available options include:
* **Promptable** – the system generates the interim message dynamically
* other available prompt types depending on your setup
Example prompt:
> Generate a friendly 3–7 word interim message to inform the caller that you are working on their request.
### Call Outcome Tagging
You can assign an outcome tag to help classify the result of the code action for reporting and analytics.
Examples:
* `tier_assigned`
* `eligibility_checked`
* `routing_prepared`
## Validate Your Code
Before continuing, click **Validate**.
Validation checks that the Python code is syntactically correct.
If validation succeeds:
* The configure step is marked complete
* Click continue to proceed to **Test**
 Validation helps catch mistakes before you use the block in a live workflow.
## Test your Code
Use the **Test** step to confirm that your code behaves as expected.
Enter sample values for the input variables and run the test.
Validation helps catch mistakes before you use the block in a live workflow.
## Test your Code
Use the **Test** step to confirm that your code behaves as expected.
Enter sample values for the input variables and run the test.
 You can test multiple scenarios to verify the logic.
Example outcomes:
* `enterprise` → `VIP`
* `premium` → `Priority`
* `basic` → `Standard`
Testing helps ensure the block returns the correct values before publishing the workflow.
## Using Output Variables
Every value returned in `output_dict` becomes available to downstream steps in the workflow.
These output variables can be used in later:
* Filters
* API Requests
* Transfer logic
* Messaging blocks
* Call outcome tagging
* other workflow actions
For example, if your code returns:
```text theme={null}
{
"customer_tier": "VIP"
}
```
You can later use `customer_tier` to route VIP callers to a priority support path.
You can test multiple scenarios to verify the logic.
Example outcomes:
* `enterprise` → `VIP`
* `premium` → `Priority`
* `basic` → `Standard`
Testing helps ensure the block returns the correct values before publishing the workflow.
## Using Output Variables
Every value returned in `output_dict` becomes available to downstream steps in the workflow.
These output variables can be used in later:
* Filters
* API Requests
* Transfer logic
* Messaging blocks
* Call outcome tagging
* other workflow actions
For example, if your code returns:
```text theme={null}
{
"customer_tier": "VIP"
}
```
You can later use `customer_tier` to route VIP callers to a priority support path.