> ## Documentation Index
> Fetch the complete documentation index at: https://docs.phonely.ai/llms.txt
> Use this file to discover all available pages before exploring further.
# Manage Workflow Versions
> Learn how to manage workflow versions so you can safely iterate, roll back, and publish updates with confidence
Phonely automatically tracks every major change you make to a workflow (agent flow) so you can safely iterate, roll back, and publish updates with confidence. This guide walks you through how to access version history, restore previous versions, rename or delete versions, and save your workflow as a reusable template.
You can view all saved versions of your workflow, including drafts, published versions, and historical snapshots.
The version history panel shows whether your current draft differs from the latest published version, which helps teams review changes before publishing.
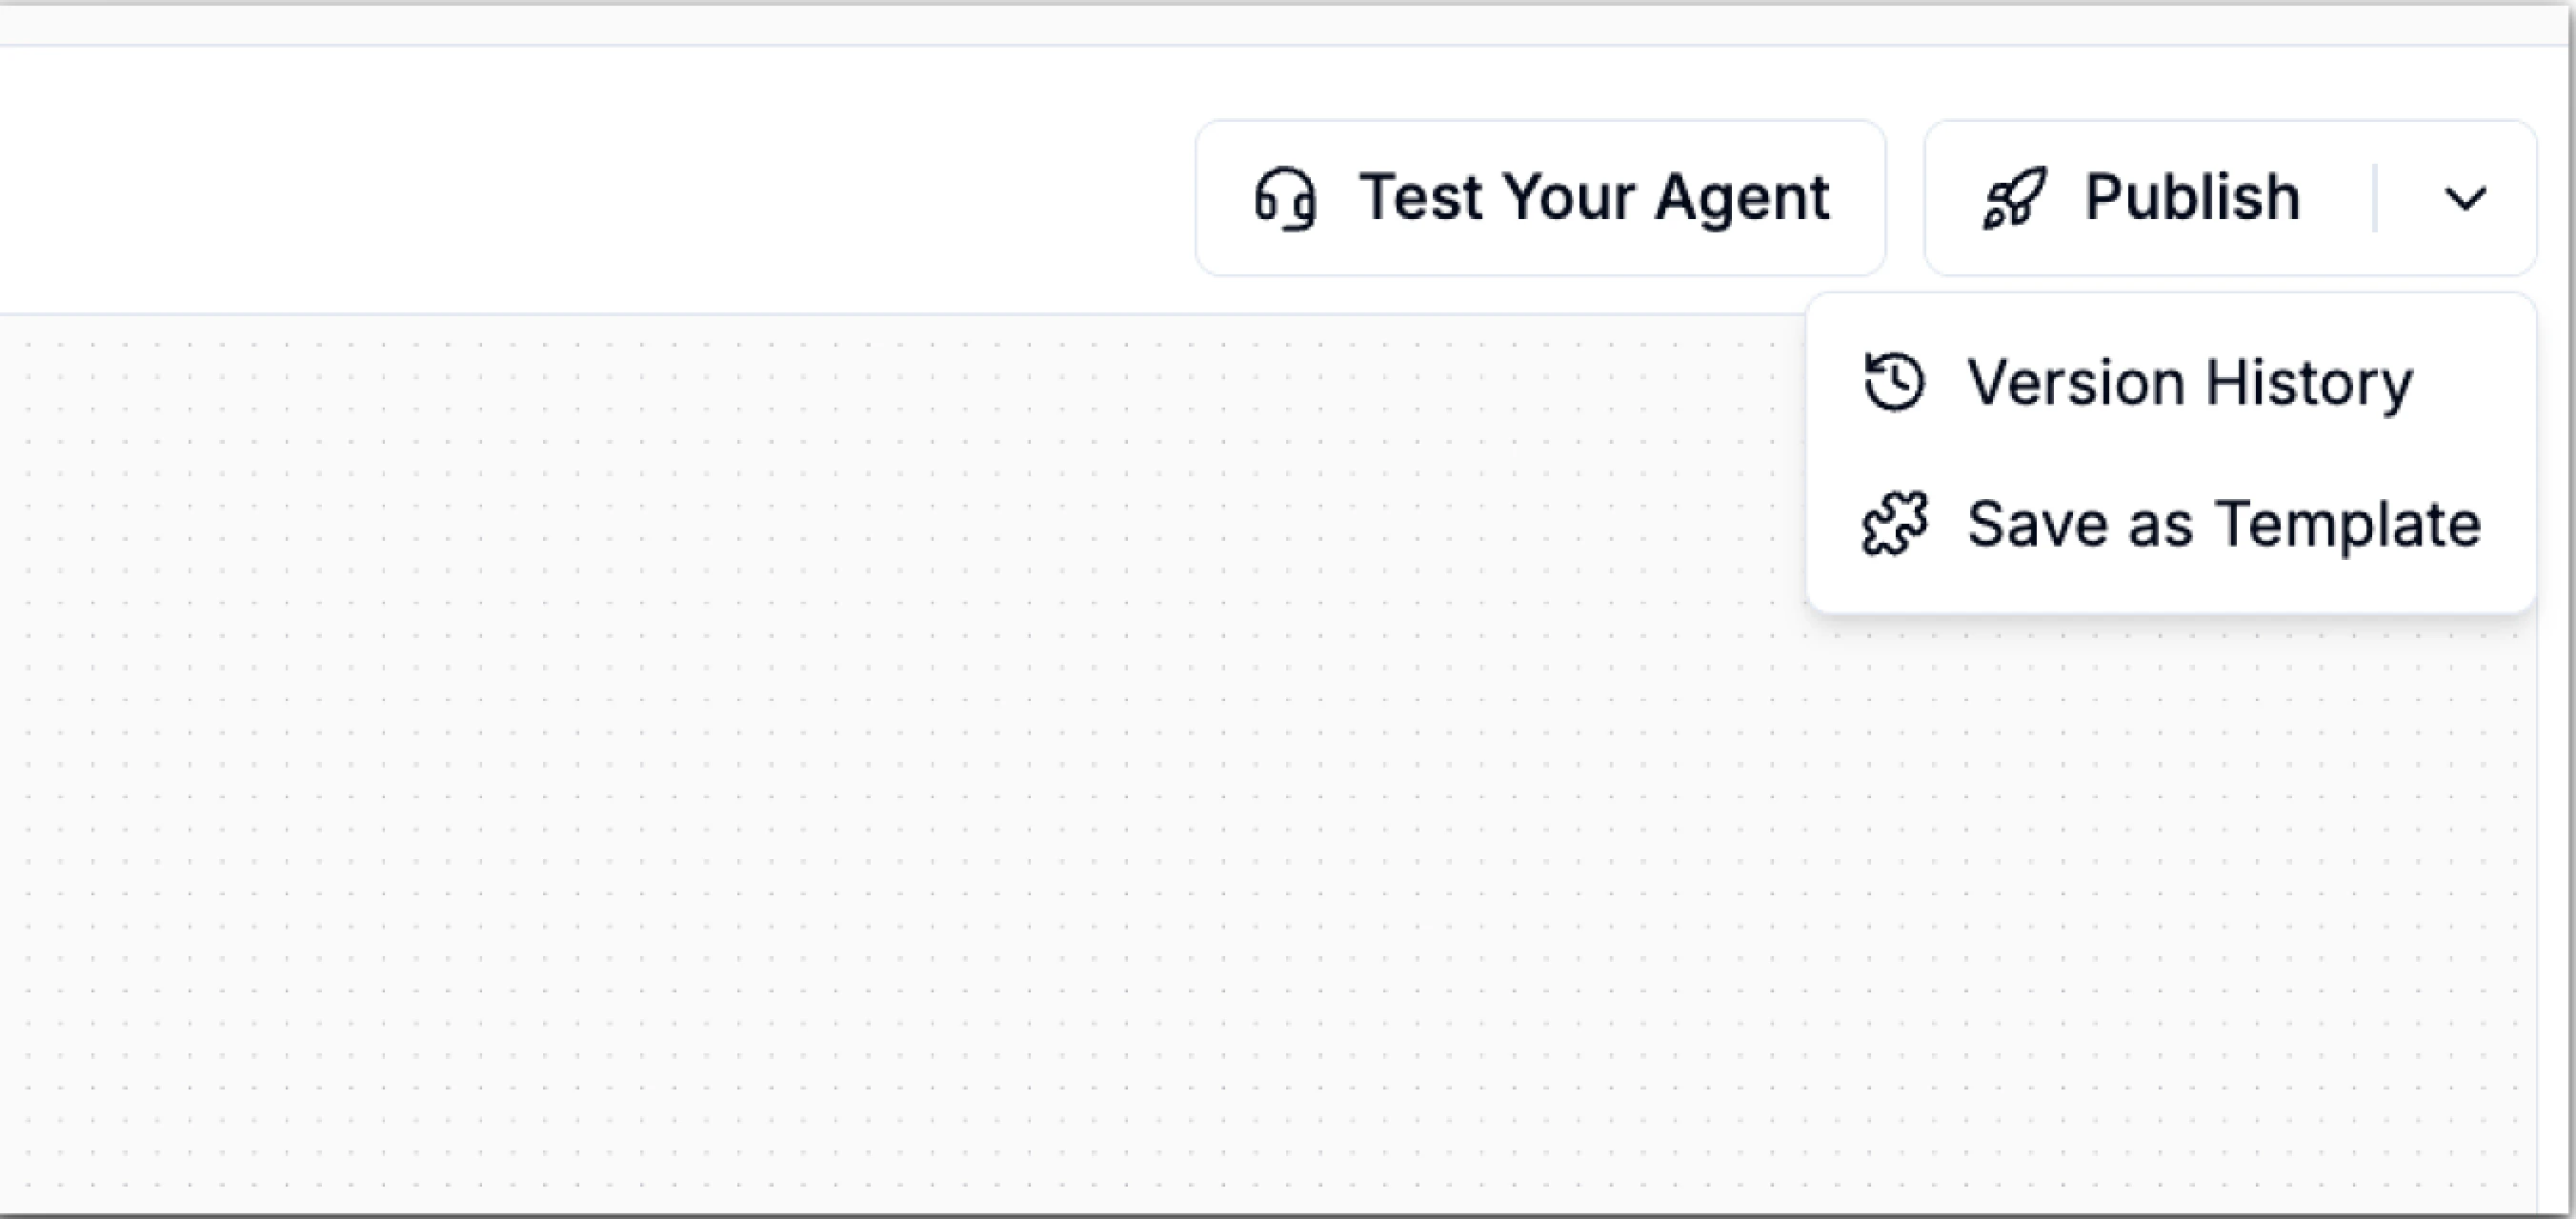
### **How to Access Agent Version History**
1. Open your agent’s flow editor.
2. Click drop-down icon besides the publish button in the top-right corner.
3. From the dropdown, select **Version History**.
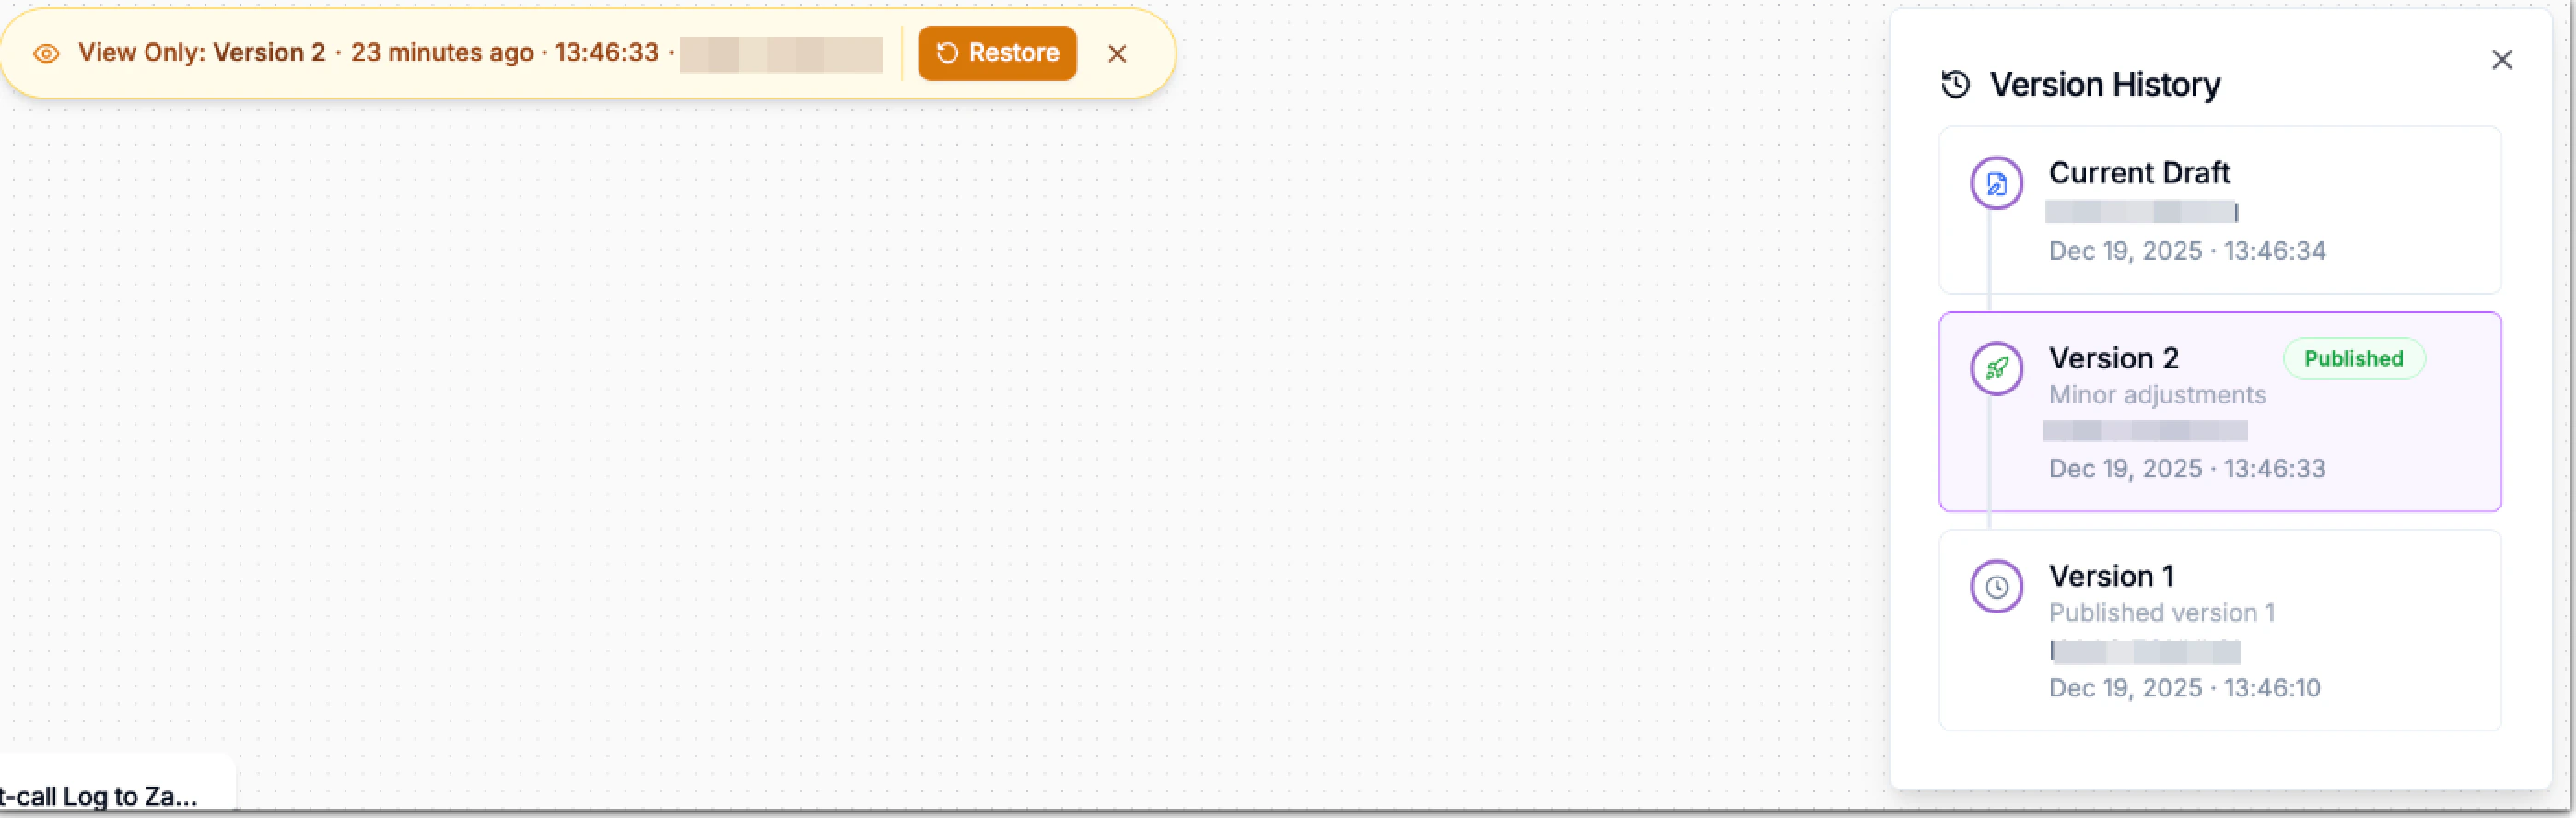
A panel appears showing a chronological list of all versions.
 ### **Understanding Version Types**
Inside the Version History panel, you’ll see:
* **Current Draft:** Your most recent, unpublished changes.
* **Published Version:** The published version.
* **Previous Versions:** Archived snapshots created at different points in time.
Each version shows the following details:
* Version name
* Who saved it
* Date and timestamp
* Whether it is currently published
### **Restoring an Older Version**
If a recent update breaks something or you want to revert to a previous design, you can restore any earlier version.
### View & Restore a Version
1. Click the dropdown button besides the publish button.
2. Click the version history to open the version histoy window.
3. You’ll also see a pop-up banner at the top indicating the version number, timestamp, author and a **Restore** button for prior versions.
4. Click a version from the Version History panel.
5. Click **Restore** in the banner at the top and confirm the action.
### **Understanding Version Types**
Inside the Version History panel, you’ll see:
* **Current Draft:** Your most recent, unpublished changes.
* **Published Version:** The published version.
* **Previous Versions:** Archived snapshots created at different points in time.
Each version shows the following details:
* Version name
* Who saved it
* Date and timestamp
* Whether it is currently published
### **Restoring an Older Version**
If a recent update breaks something or you want to revert to a previous design, you can restore any earlier version.
### View & Restore a Version
1. Click the dropdown button besides the publish button.
2. Click the version history to open the version histoy window.
3. You’ll also see a pop-up banner at the top indicating the version number, timestamp, author and a **Restore** button for prior versions.
4. Click a version from the Version History panel.
5. Click **Restore** in the banner at the top and confirm the action.
 The restored version becomes your **Current Draft**, allowing you to edit it further, test it and publish it when ready.
Restoring does not overwrite the live version until you publish.
The restored version becomes your **Current Draft**, allowing you to edit it further, test it and publish it when ready.
Restoring does not overwrite the live version until you publish.
 The restored version will become your new current draft, allowing you to make edits or publish it immediately.
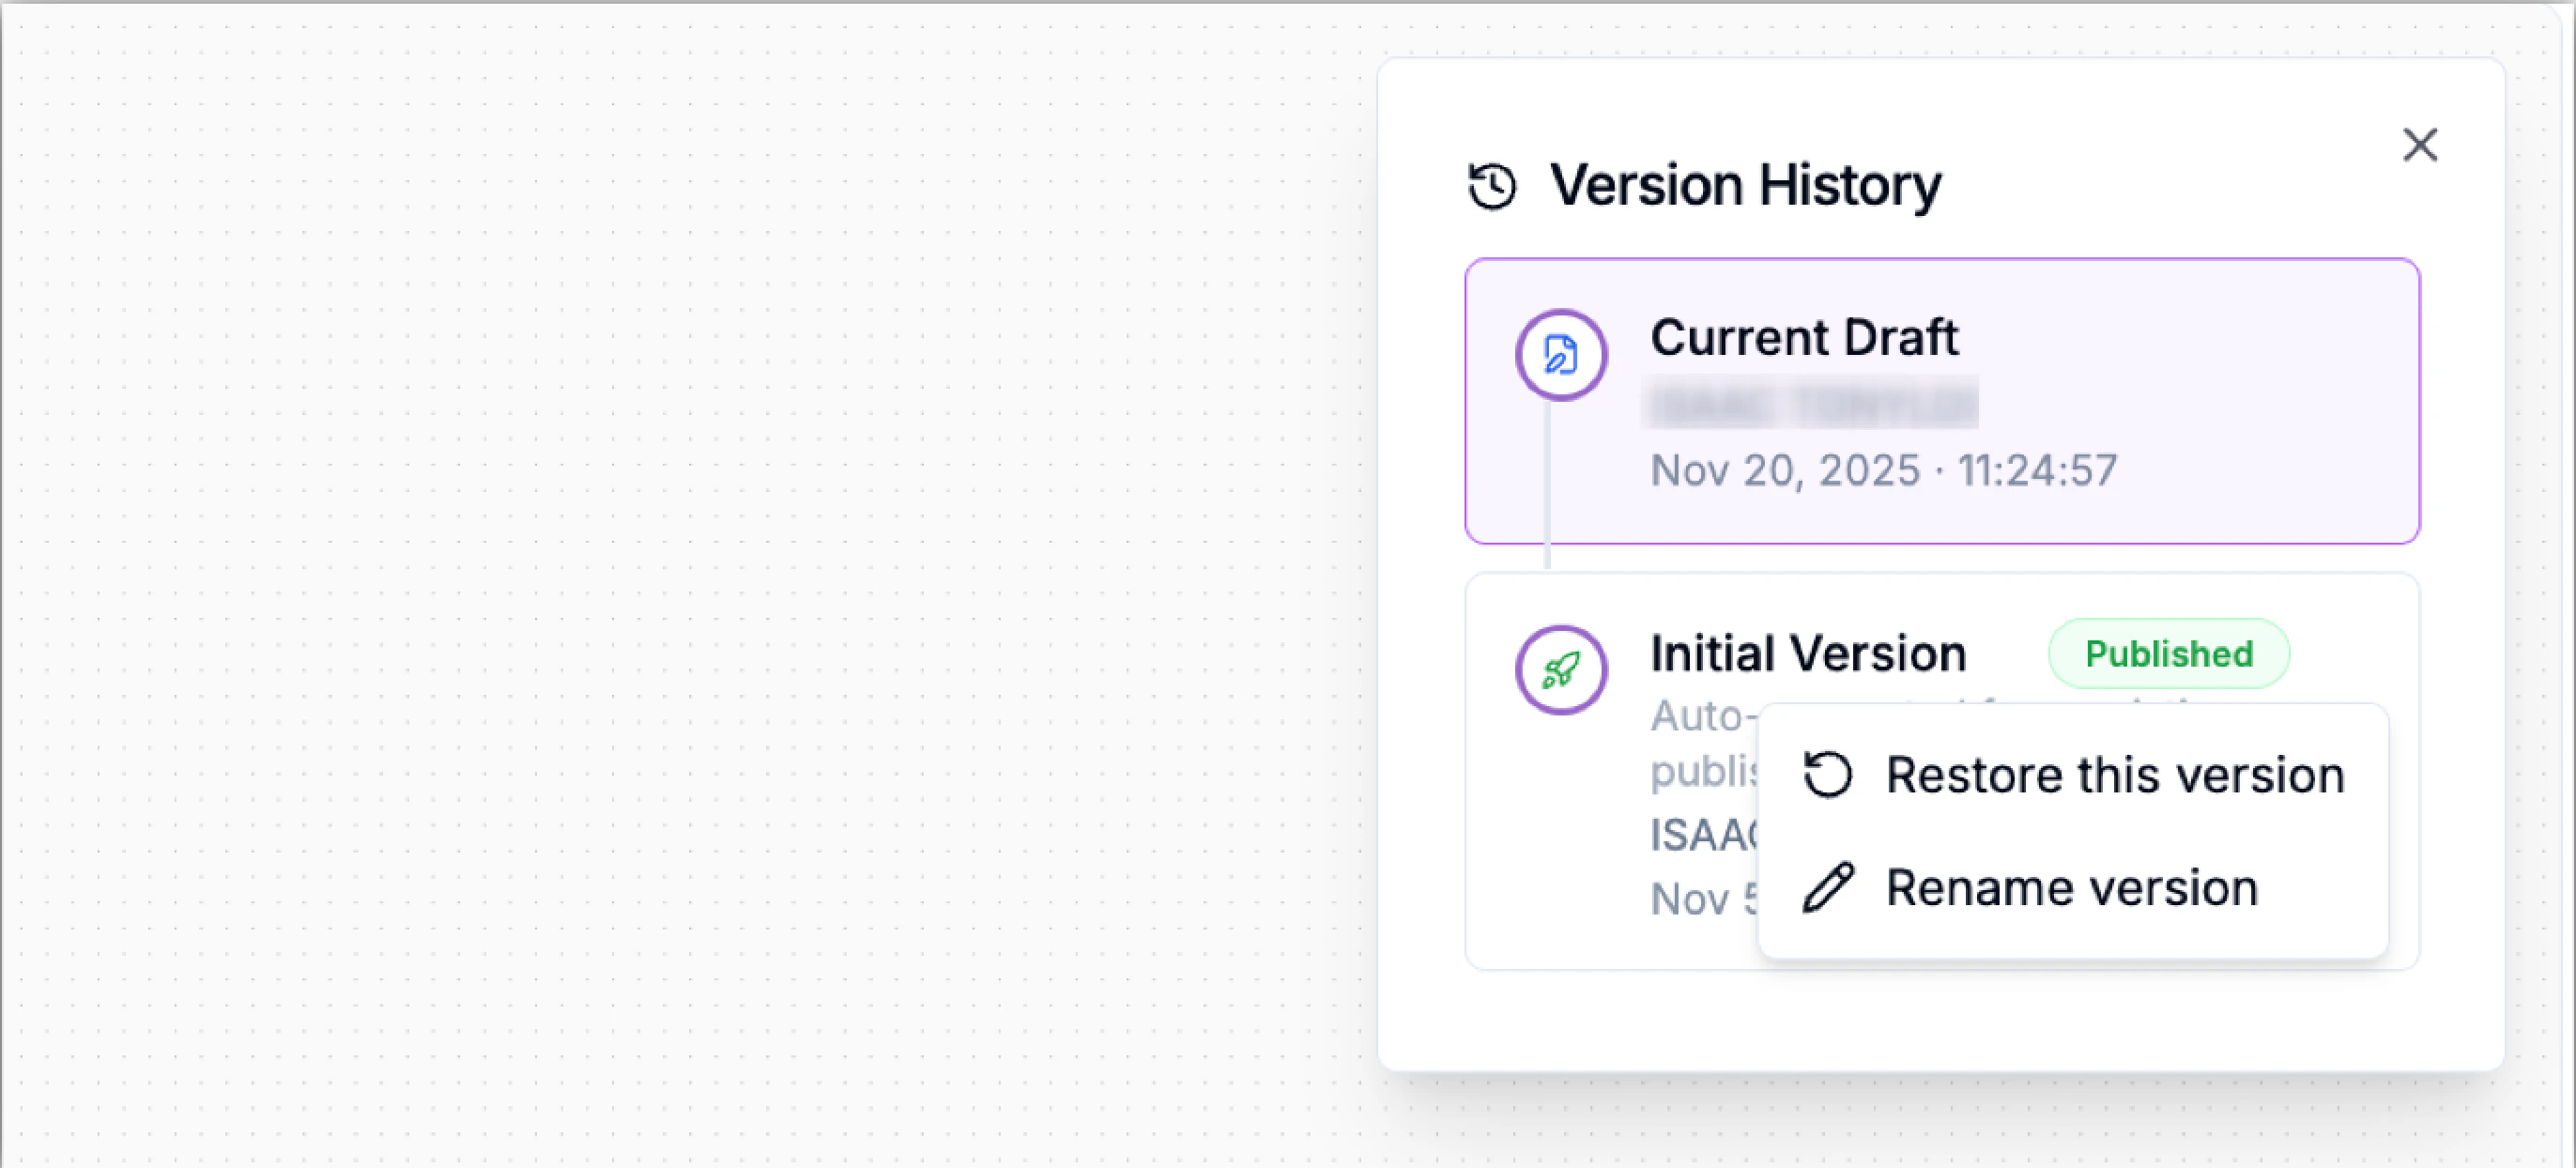
### Renaming a Version
Clear version names make it easier to track iterations - especially in large teams.
**To rename a version:**
1. Click the **⋯** next to the version and select **Rename version**.
2. Enter a descriptive name.
3. Save.
### Deleting a Version
If you have redundant or obsolete versions, you can permanently remove them.
To delete a version:
1. Click the **⋯** next to the version and select **Delete version**.
2. Confirm deletion.
You cannot delete the currently published version.
### How to Save a Workflow as a Template
Templates help you re-use successful flow structures across multiple agents or organizations.
1. Open the flow editor for the workflow you want to reuse.
2. In the top-right corner, click **Publish** to open the publish menu.
3. Select **Save as Template**. The Add Template dialog will appear.
4. Complete the template details:
* **Name** – Enter a clear, descriptive name for the template.
* **Description** – Explain what the template does and when it should be used.
* **Use Cases** – Select one or more relevant use cases (e.g., Appointment Scheduling, Order Tracking, Payment Processing).
5. Click **Continue** to proceed through the remaining steps and confirm.
The restored version will become your new current draft, allowing you to make edits or publish it immediately.
### Renaming a Version
Clear version names make it easier to track iterations - especially in large teams.
**To rename a version:**
1. Click the **⋯** next to the version and select **Rename version**.
2. Enter a descriptive name.
3. Save.
### Deleting a Version
If you have redundant or obsolete versions, you can permanently remove them.
To delete a version:
1. Click the **⋯** next to the version and select **Delete version**.
2. Confirm deletion.
You cannot delete the currently published version.
### How to Save a Workflow as a Template
Templates help you re-use successful flow structures across multiple agents or organizations.
1. Open the flow editor for the workflow you want to reuse.
2. In the top-right corner, click **Publish** to open the publish menu.
3. Select **Save as Template**. The Add Template dialog will appear.
4. Complete the template details:
* **Name** – Enter a clear, descriptive name for the template.
* **Description** – Explain what the template does and when it should be used.
* **Use Cases** – Select one or more relevant use cases (e.g., Appointment Scheduling, Order Tracking, Payment Processing).
5. Click **Continue** to proceed through the remaining steps and confirm.
 Your template will now be available when creating new workflows.