> ## Documentation Index
> Fetch the complete documentation index at: https://docs.phonely.ai/llms.txt
> Use this file to discover all available pages before exploring further.
# Send Call Data
> Learn how to share call data to external systems via a webhook
The Send Call Data action allows your agents to automatically send call details, such as caller information, call duration, outcomes, and workflow data, to an external system via a webhook.\
This is particularly useful for integrating Phonely with CRMs, analytics dashboards, or automation tools like Zapier, or custom APIs.
You can configure this integration to:
* Send all call data (for analytics or logging)
* Send specific fields only (for lightweight or customized workflows)
* Format and control the payload using manual or code input modes
## Access the Send Call Data Block
1. Go to **Agent Design** in your Phonely dashboard.
2. Open or create a **workflow**.
3. Click the **plus (+)** icon after any block (commonly after **End Call**).
4. From **Post Call Actions**, select **Send Call Data**.
This action is triggered once the call ends, ensuring all relevant data is finalized before being sent.
## Configure Webhook Settings
In the **Configure** tab, you’ll define where Phonely should send your call data.
### **Webhook URL**
Enter the endpoint URL where the data will be sent.
Make sure your endpoint is ready to receive POST requests with JSON data.
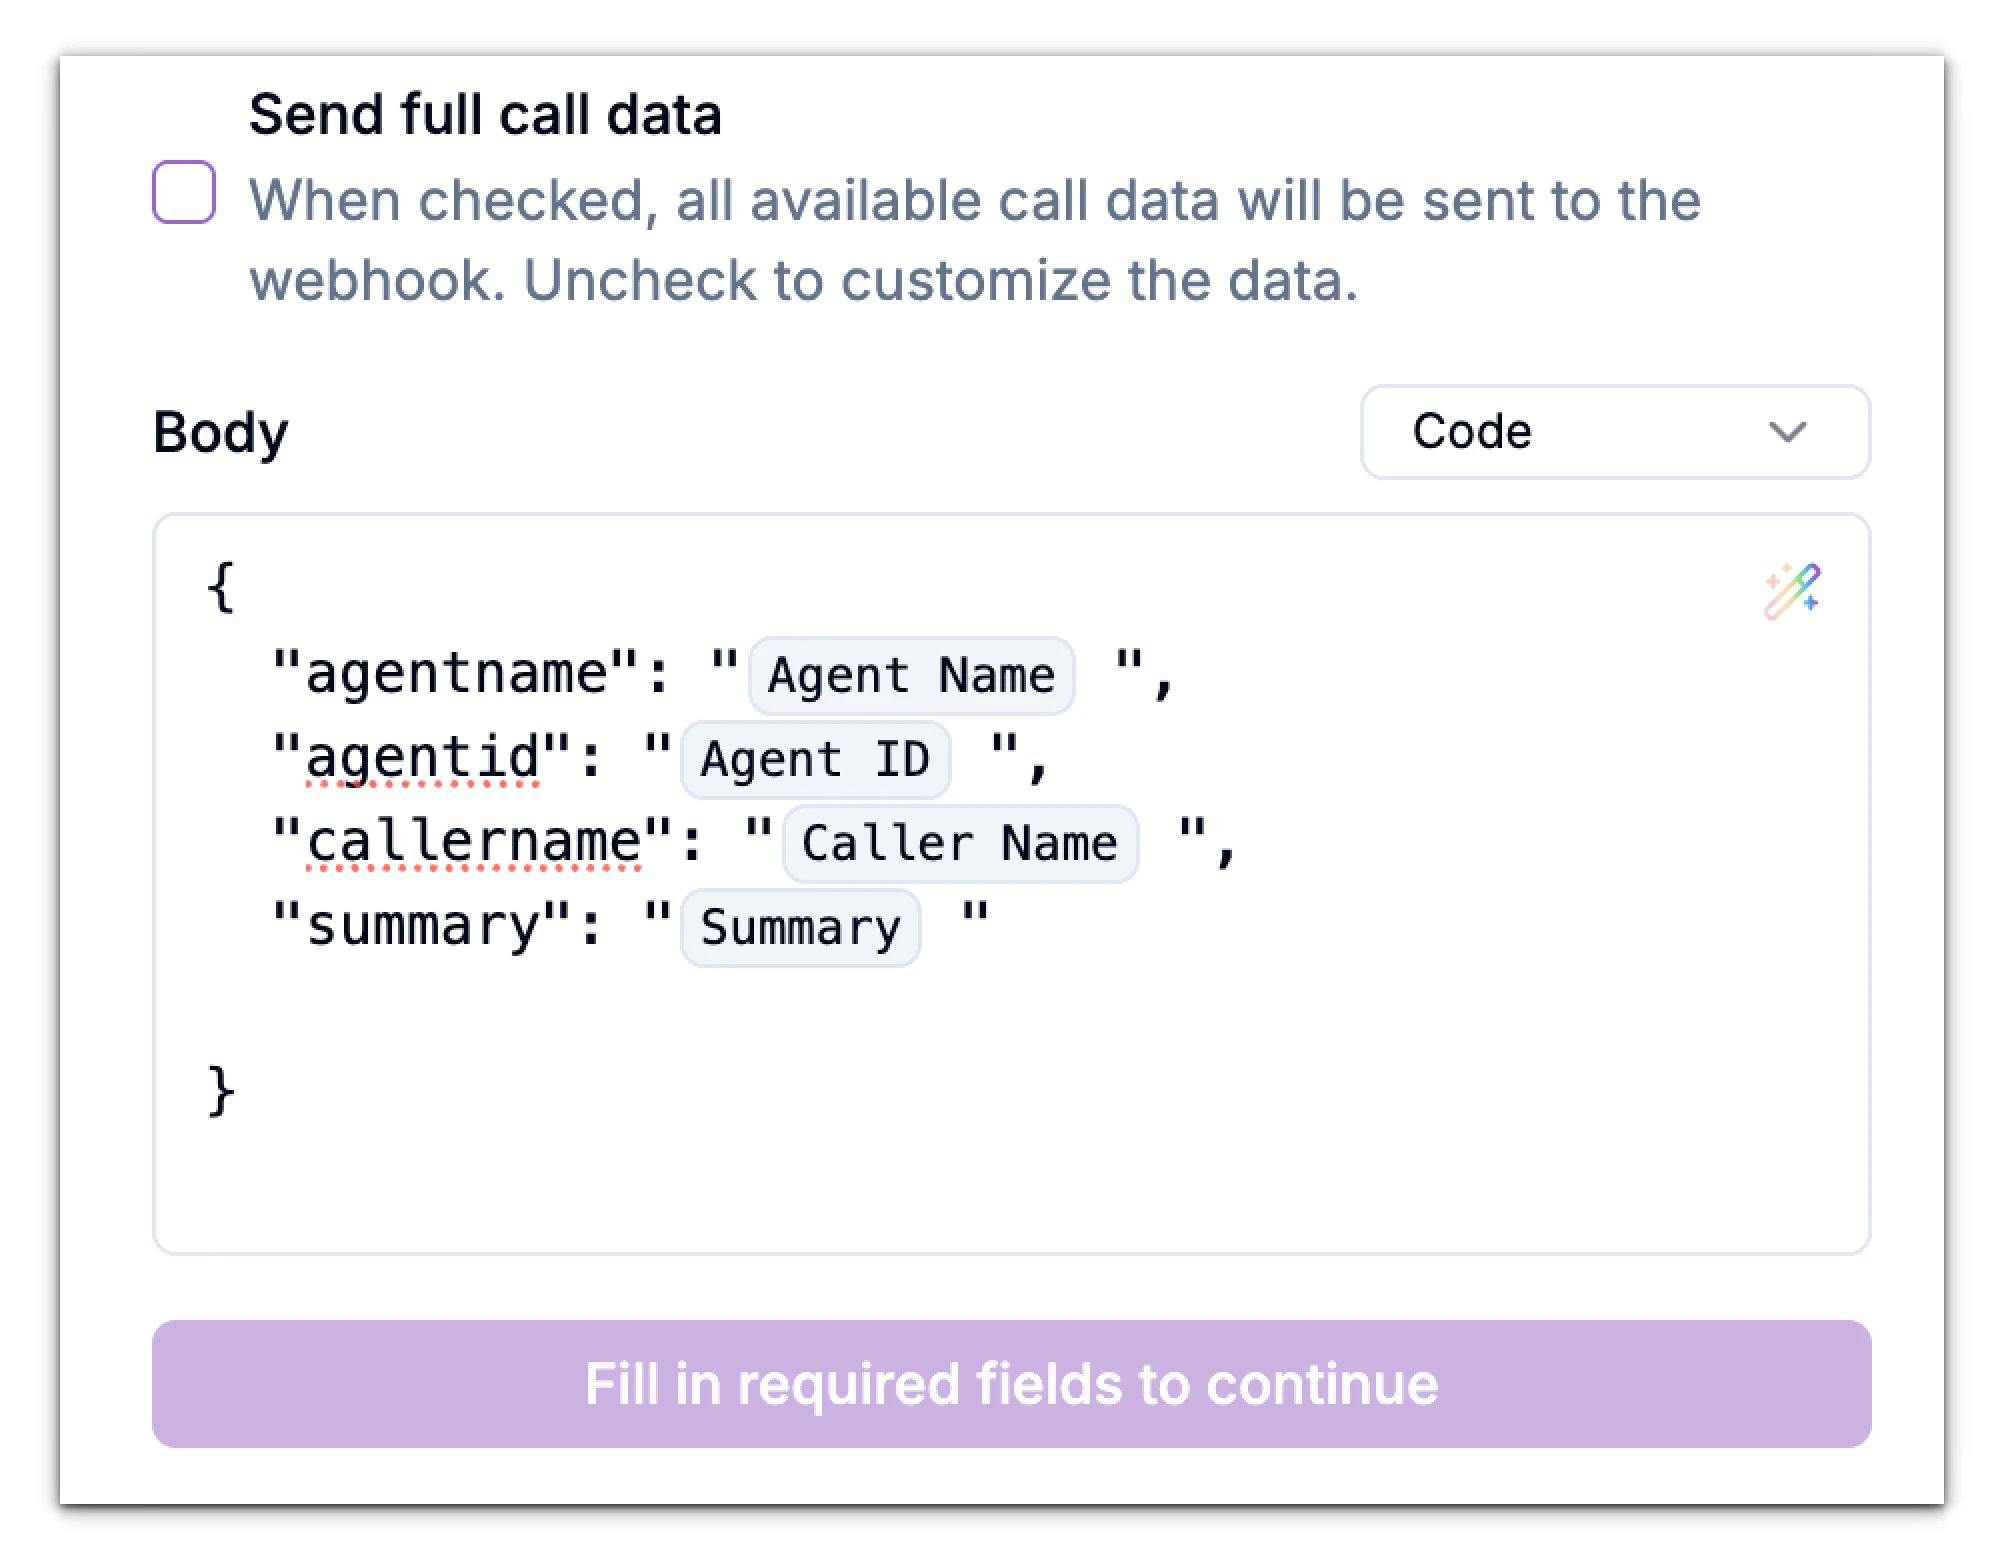
## Send Full Call Data
Toggle Send full call data to decide whether Phonely should send all available call fields or only specific ones.
### Option A: Full Call Data.
When this is checked, Phonely automatically sends the entire call payload to your webhook.
### **Option B: Custom Call Data**
If you uncheck **Send full call data**, you can manually define which fields and values to include in your payload.
You’ll then see the **Body** section with three options for customization:
* **Manual**
* **Code**
Let’s look at each in detail.
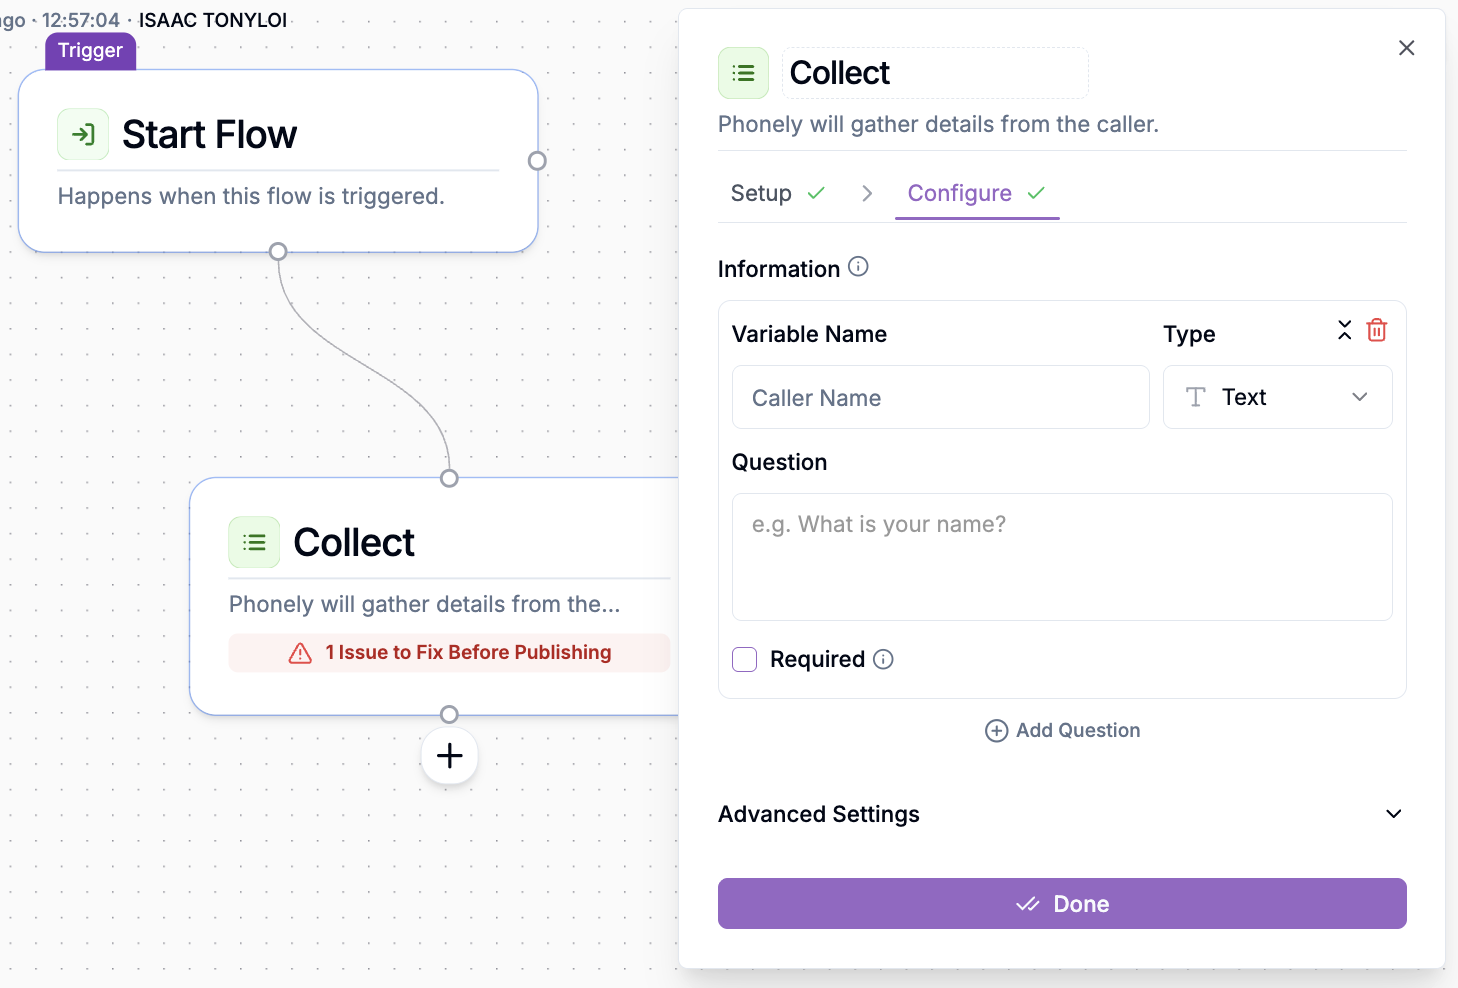
## Manual Mode
The **Manual** option lets you build a JSON payload by specifying each key-value pair directly.
### How to Use
1. Click **Add Field** to create new entries.
2. Under **Key**, define the name of your data field (e.g., `callerName`, `callSummary`).
3. Under **Value**, enter a static value or select a dynamic variable from your workflow.
4. Select the **Type** (String, Number, Boolean, etc.) for each field.
 Manual mode is best for simple, structured payloads sent to other systems like CRMs or notification apps.
## Code Mode
For advanced users, the **Code** option allows you to directly write or paste raw JSON.\
You can freely format your request body, insert variables, and structure nested objects.
Manual mode is best for simple, structured payloads sent to other systems like CRMs or notification apps.
## Code Mode
For advanced users, the **Code** option allows you to directly write or paste raw JSON.\
You can freely format your request body, insert variables, and structure nested objects.
 ## Test the Configuration
Once your webhook and payload are set up, switch to the **Test** tab to verify the connection.
1. Confirm your **Webhook URL** is correct.
2. Choose whether to send **full** or **custom** call data.
3. Click **Test**.
Phonely will send a sample payload to your webhook.\
If successful, you’ll see a **Test Result** preview with the response returned from your endpoint.
## Test the Configuration
Once your webhook and payload are set up, switch to the **Test** tab to verify the connection.
1. Confirm your **Webhook URL** is correct.
2. Choose whether to send **full** or **custom** call data.
3. Click **Test**.
Phonely will send a sample payload to your webhook.\
If successful, you’ll see a **Test Result** preview with the response returned from your endpoint.
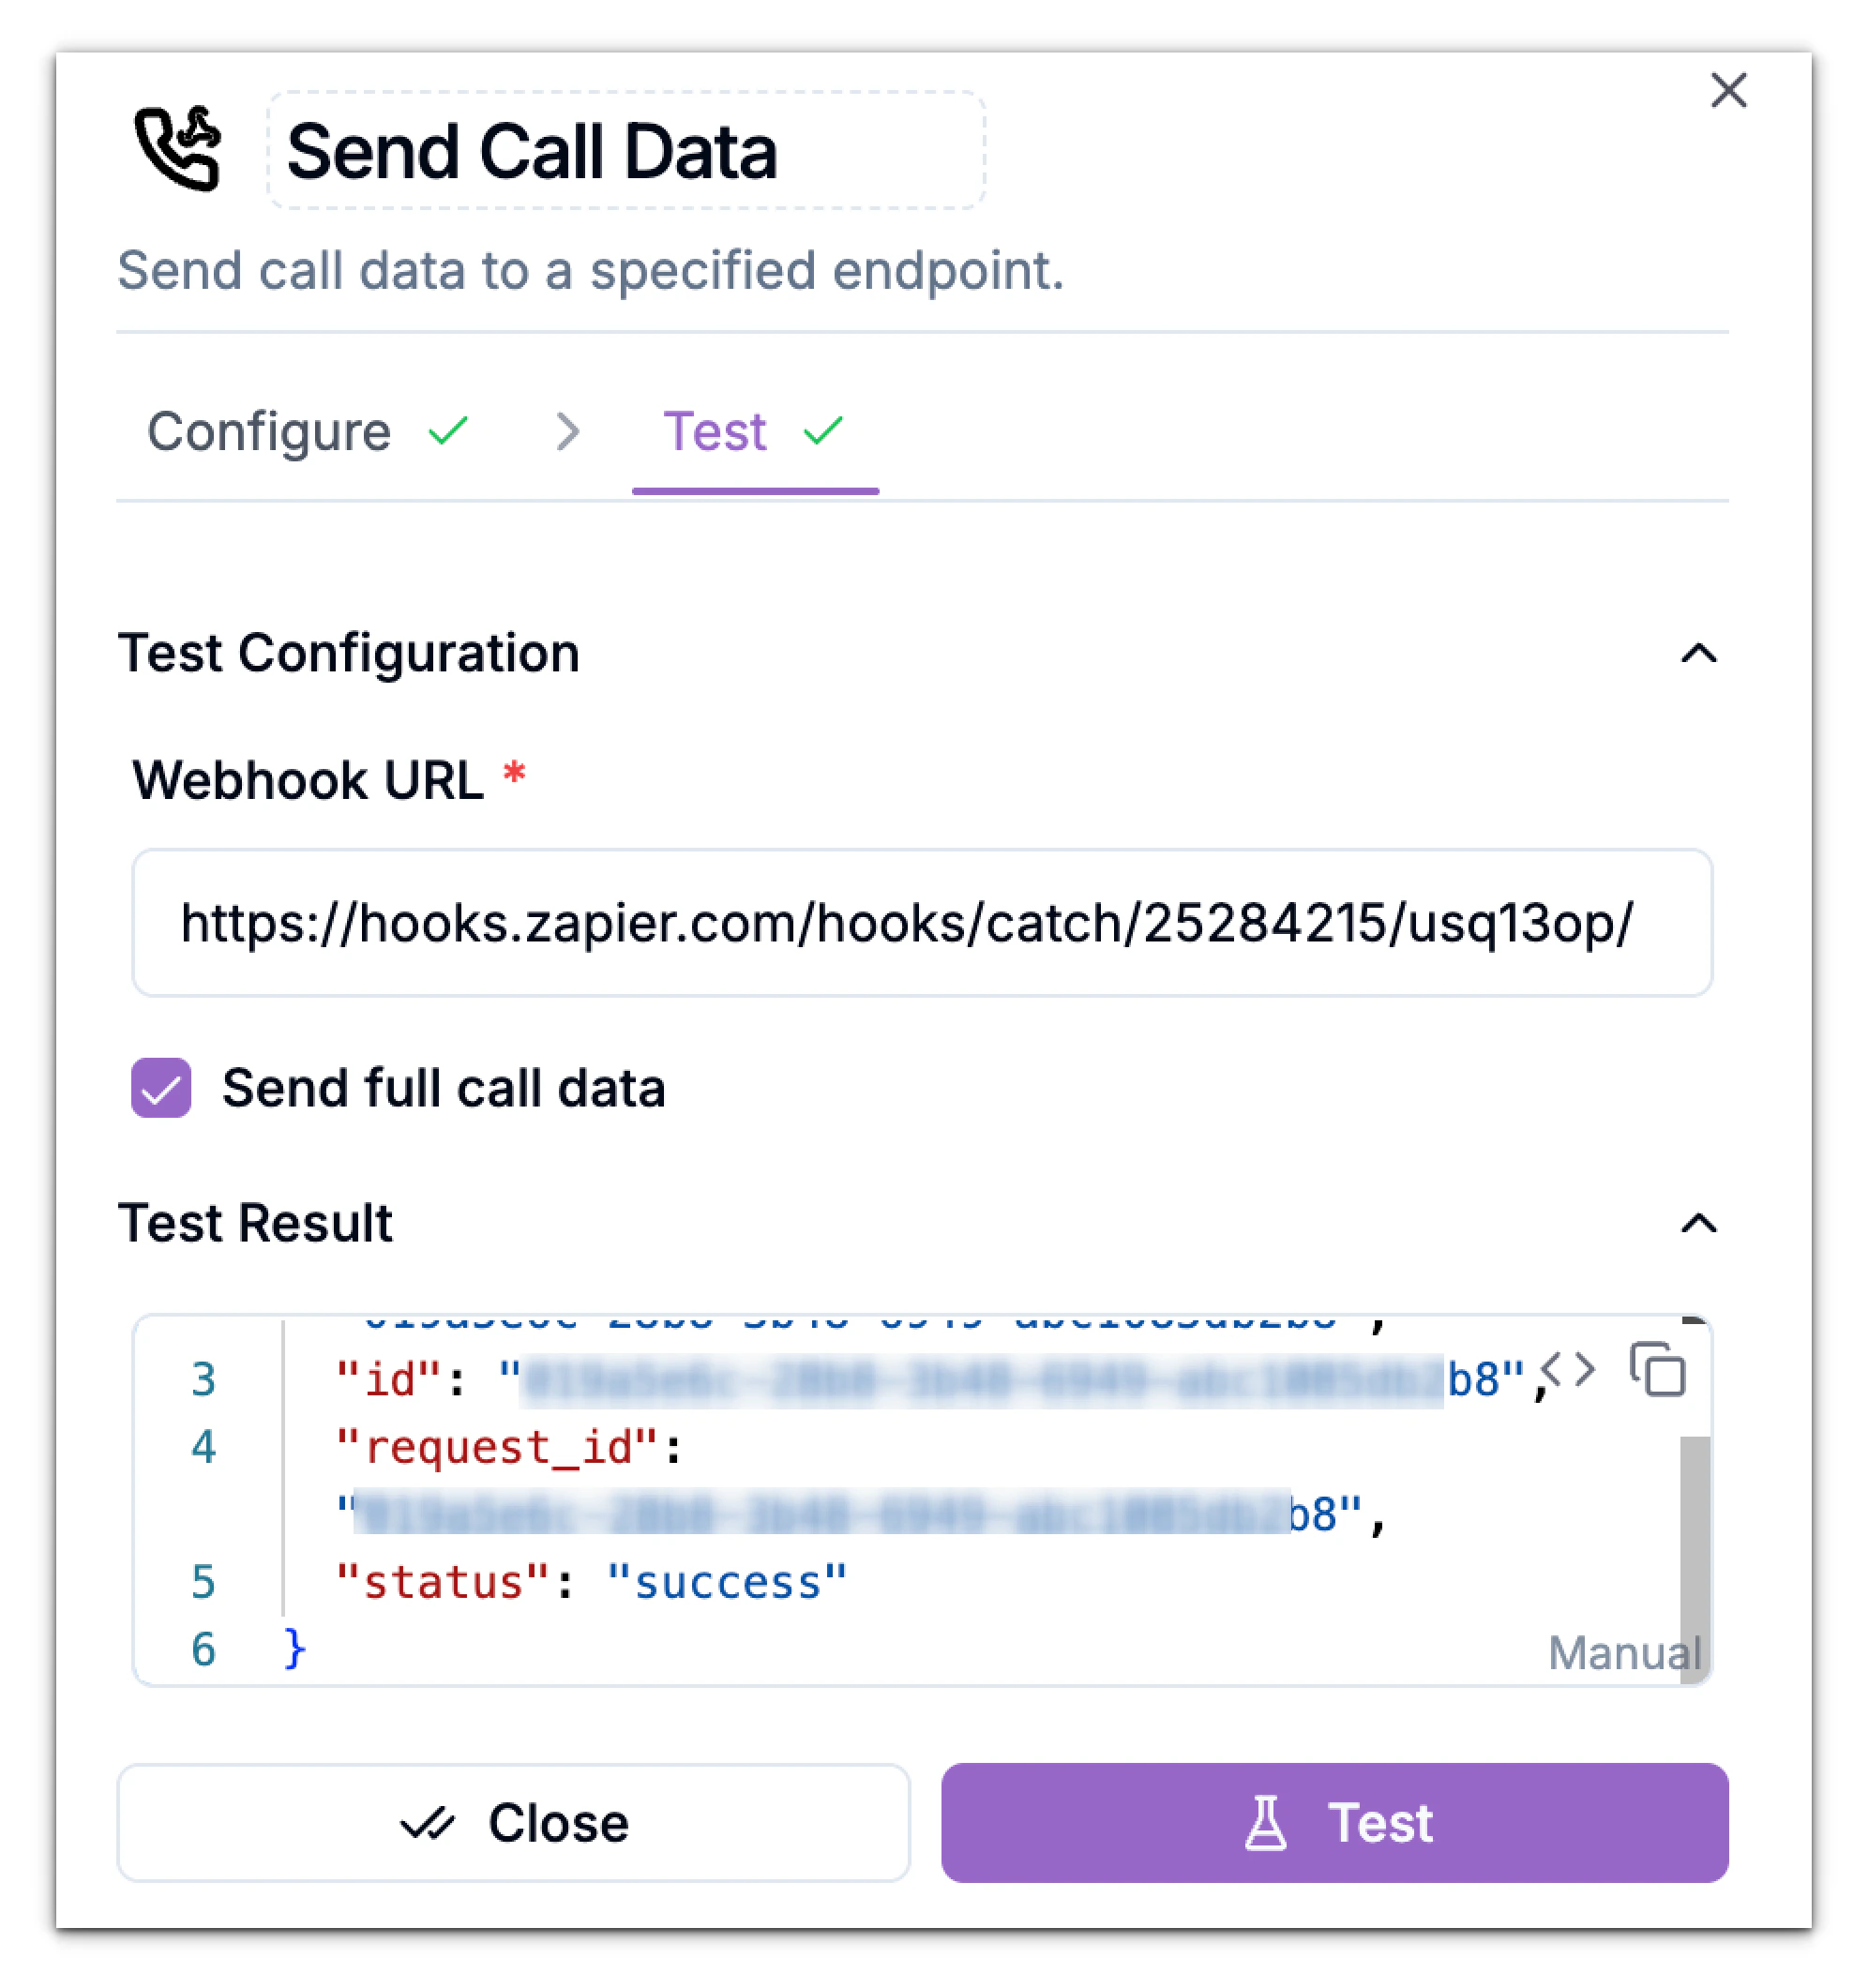 If you see the response displayed under “Test Result,” with success status then your webhook is active and configured correctly.
If the test fails:
* Check that your webhook URL is accessible and accepts `POST` requests.
* Ensure SSL (HTTPS) is enabled for secure transmission.
* Review any authentication requirements on your server.
If you see the response displayed under “Test Result,” with success status then your webhook is active and configured correctly.
If the test fails:
* Check that your webhook URL is accessible and accepts `POST` requests.
* Ensure SSL (HTTPS) is enabled for secure transmission.
* Review any authentication requirements on your server.