> ## Documentation Index
> Fetch the complete documentation index at: https://docs.phonely.ai/llms.txt
> Use this file to discover all available pages before exploring further.
# Transfer Flow
> Learn how to route callers between flows while keeping the same live call active.
The Transfer Flow block lets your AI agent route a caller from the current flow to one or more sub-flows, without ending the call.
From the caller’s perspective, the transition is seamless, they remain in the same call while the agent switches conversational context behind the scenes.
This block supports multiple destinations, centralized transition logic, and a simpler configuration model for complex routing.
## Key Features
### 1. Multiple Flow Destinations
You can add multiple sub-flows inside a single transfer flow block. Each destination represents a possible routing outcome.
This removes the need for:
* A primary routing block
* Multiple downstream transfer blocks
* Duplicated logic across flows
### 2. Transition Conditions
Transition conditions appear only when more than one destination is configured.
Each destination can have a plain-text condition that describes when a caller should be routed to that flow.
Phonely will use this condition to determine when to route to this flow based on the caller's request, asking clarifying questions if needed. Be as descriptive as possible.
### 3. Global Transition Conditions
Transition logic is now managed globally at the workflow level.
This means:
* Transition conditions are defined once.
* Any updates automatically propagate everywhere they’re used.
### 4. Simplified Exit Logic
The Transfer Flow block:
* Does not inject variables into exit conditions
* Focuses on fast, consistent routing.
* Preserves advanced logic under the global workflow configuratio
## Setup
1. Open your agent in **Agent** **Design**.
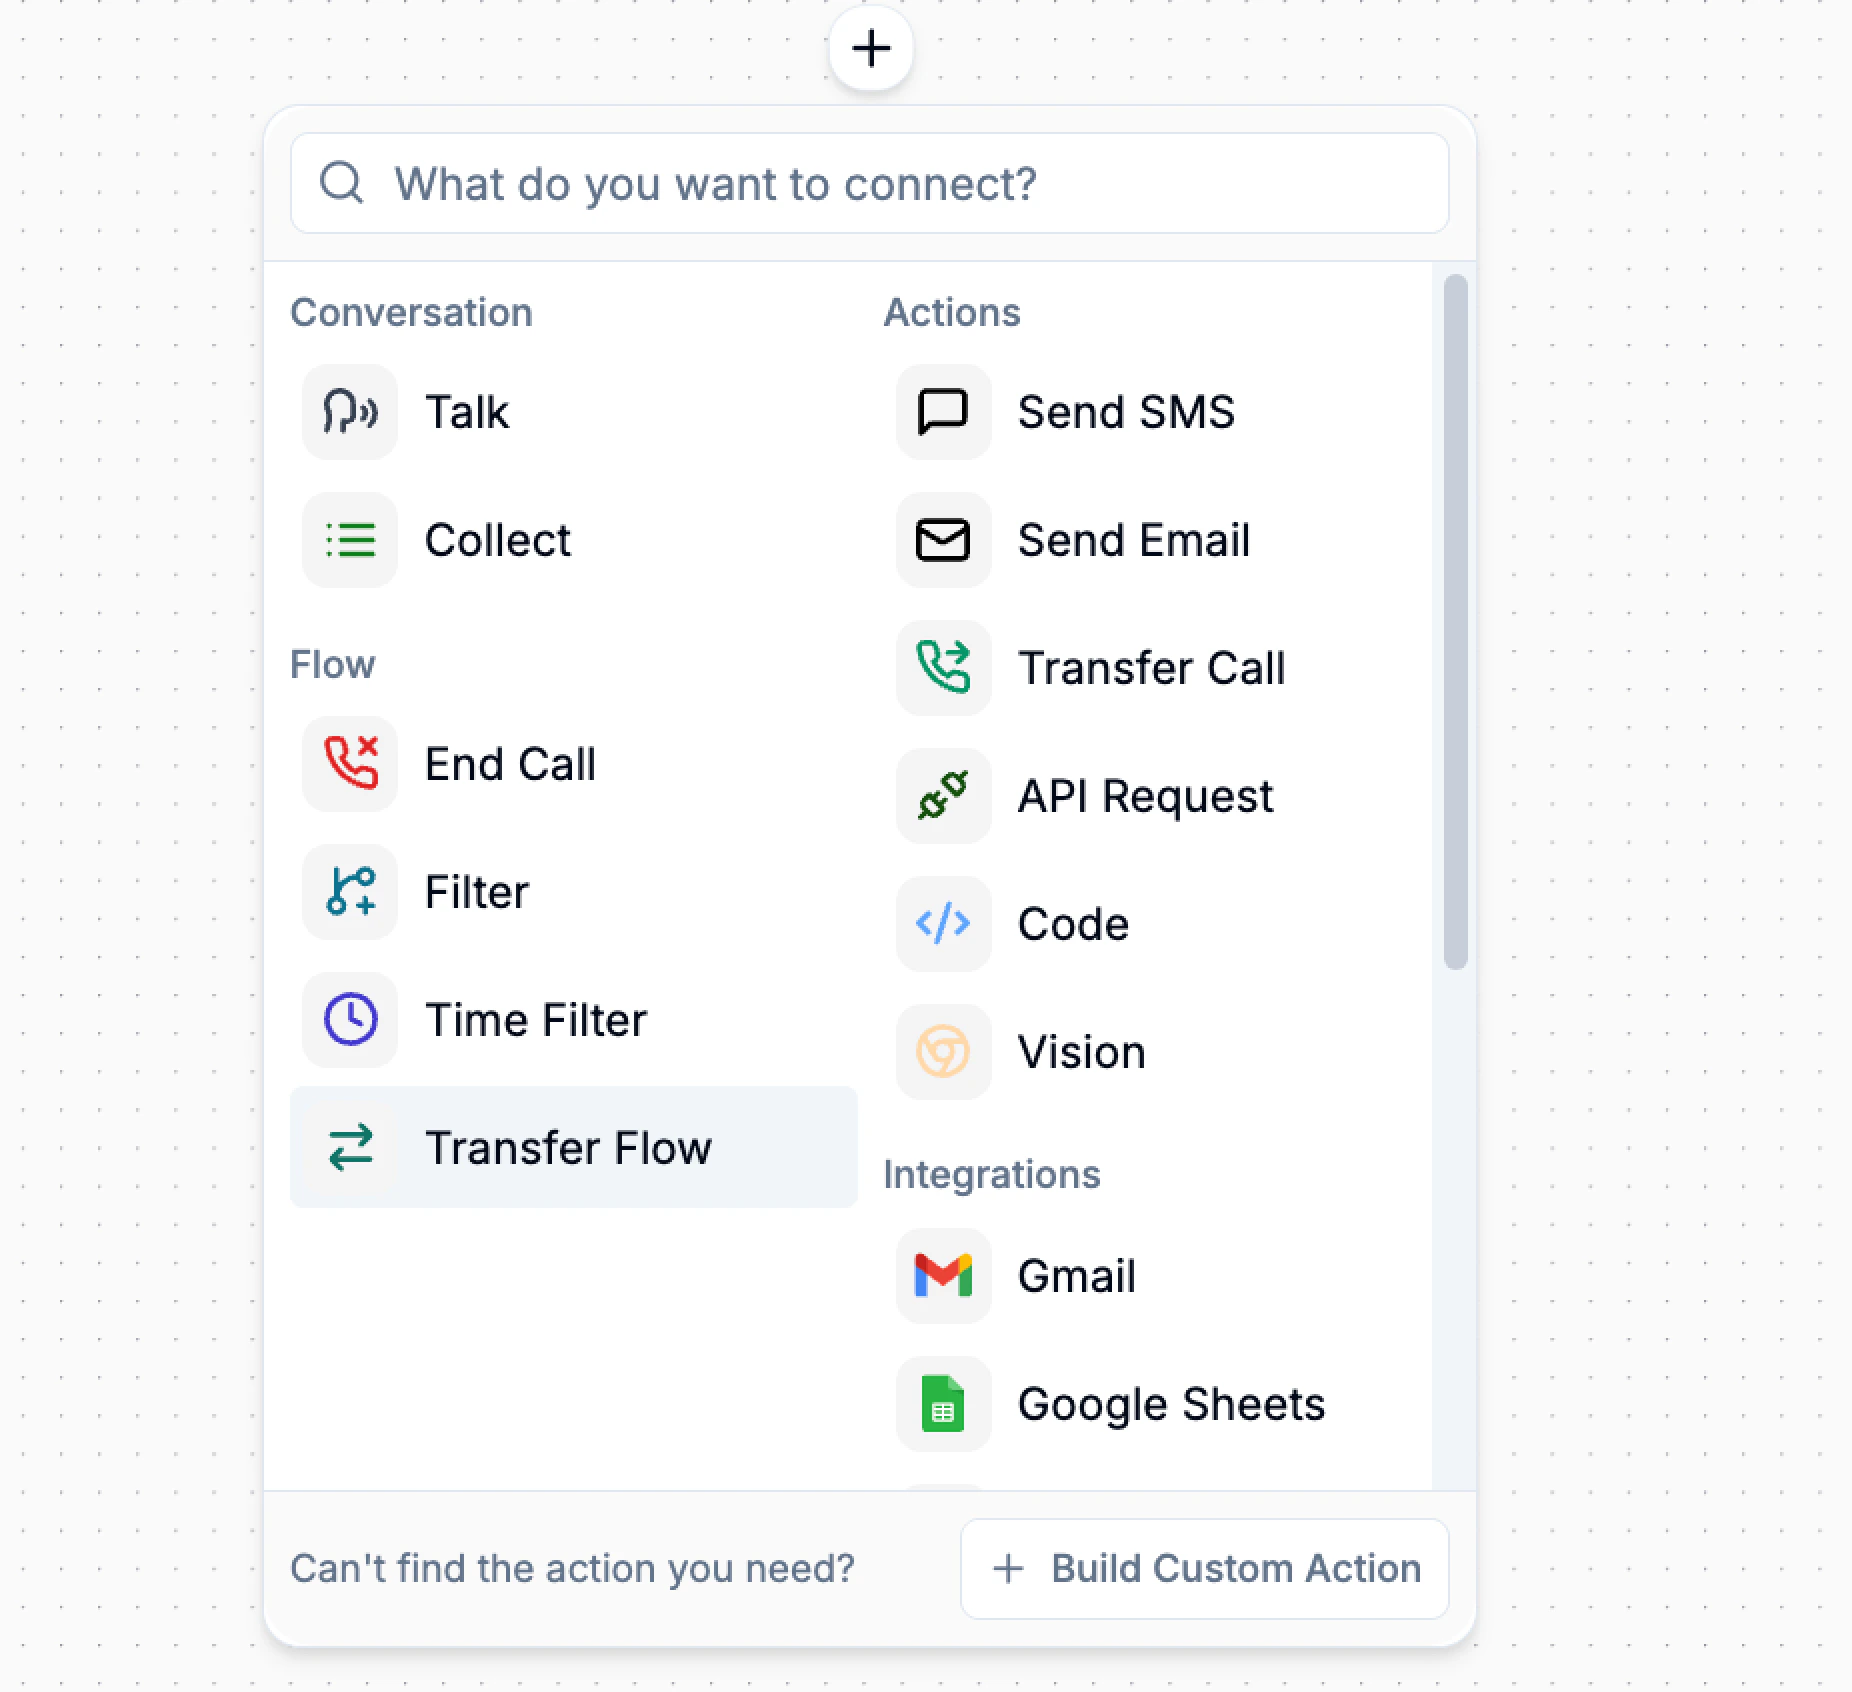
2. Click the **➕** button on the canvas and select Transfer Flow.
 3. Under **Available Sub-Flows**.
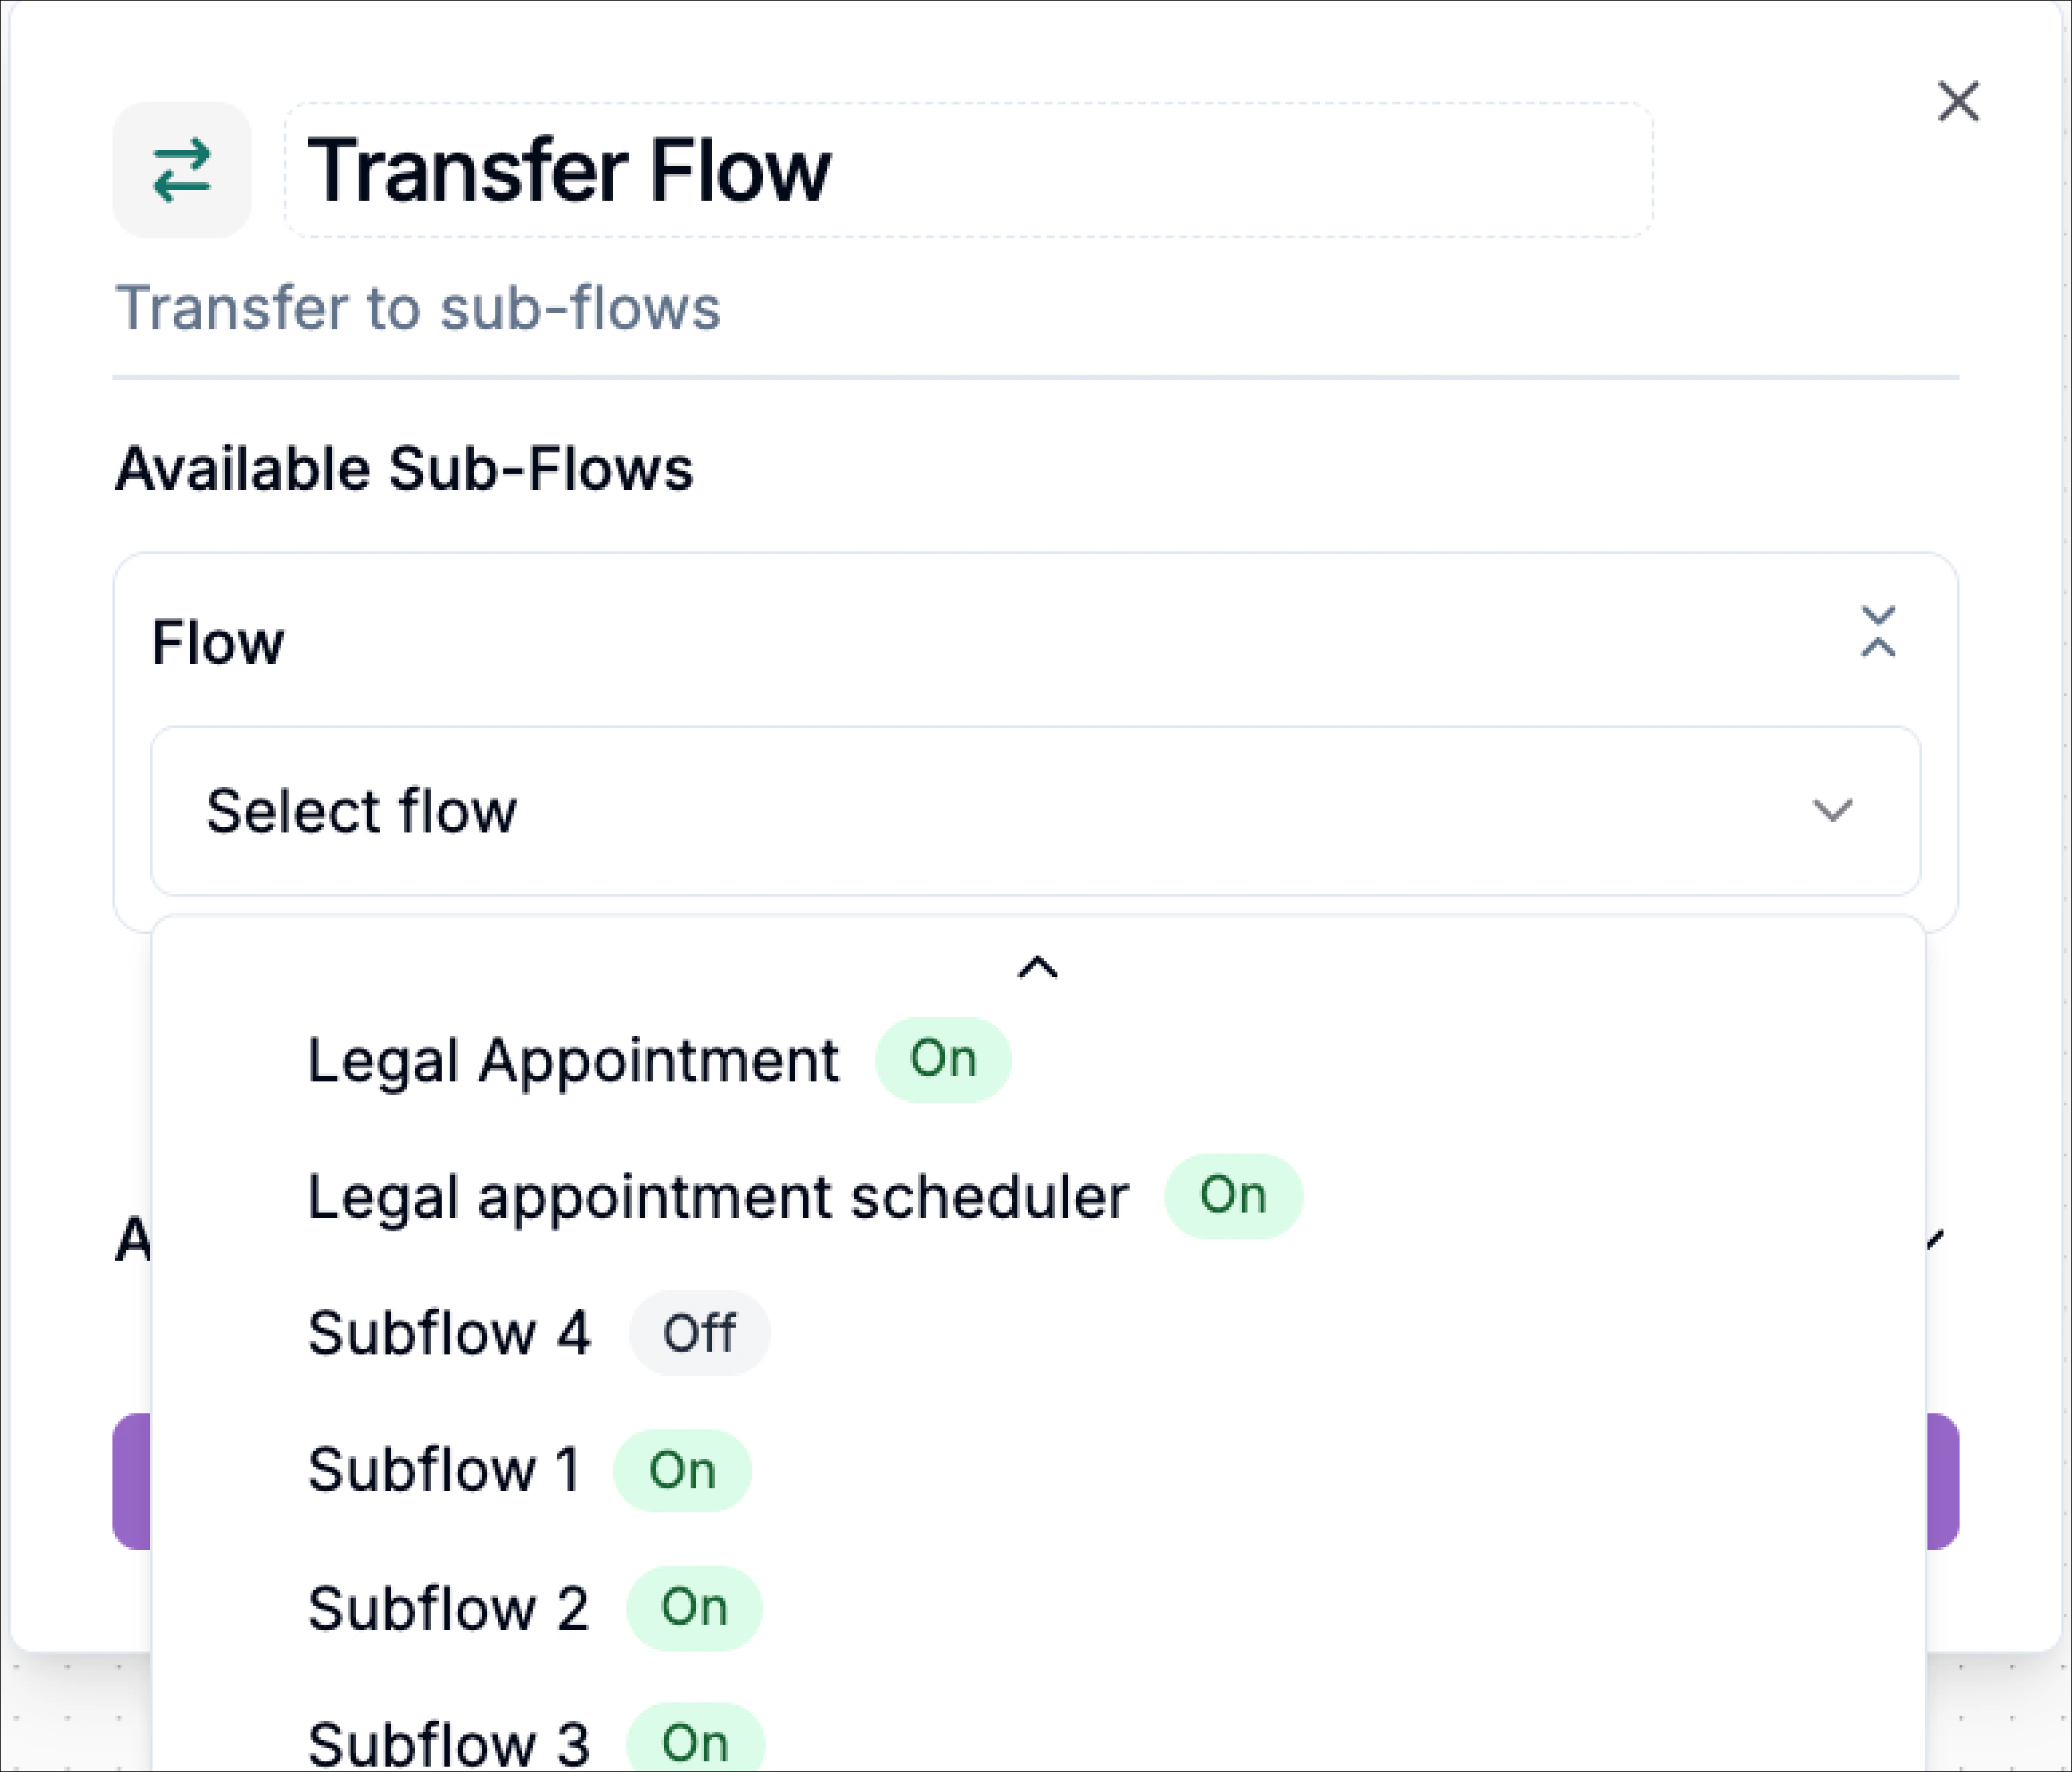
4. Open the **Flow** dropdown.
5. Select the sub-flow you want to route to.
3. Under **Available Sub-Flows**.
4. Open the **Flow** dropdown.
5. Select the sub-flow you want to route to.
 6. To add another possible routing destination with a different subflow, click the **Add Flow Destination** button.
7. Repeat to add multiple destinations if needed. Select the respective subflow for each destination.
6. To add another possible routing destination with a different subflow, click the **Add Flow Destination** button.
7. Repeat to add multiple destinations if needed. Select the respective subflow for each destination.
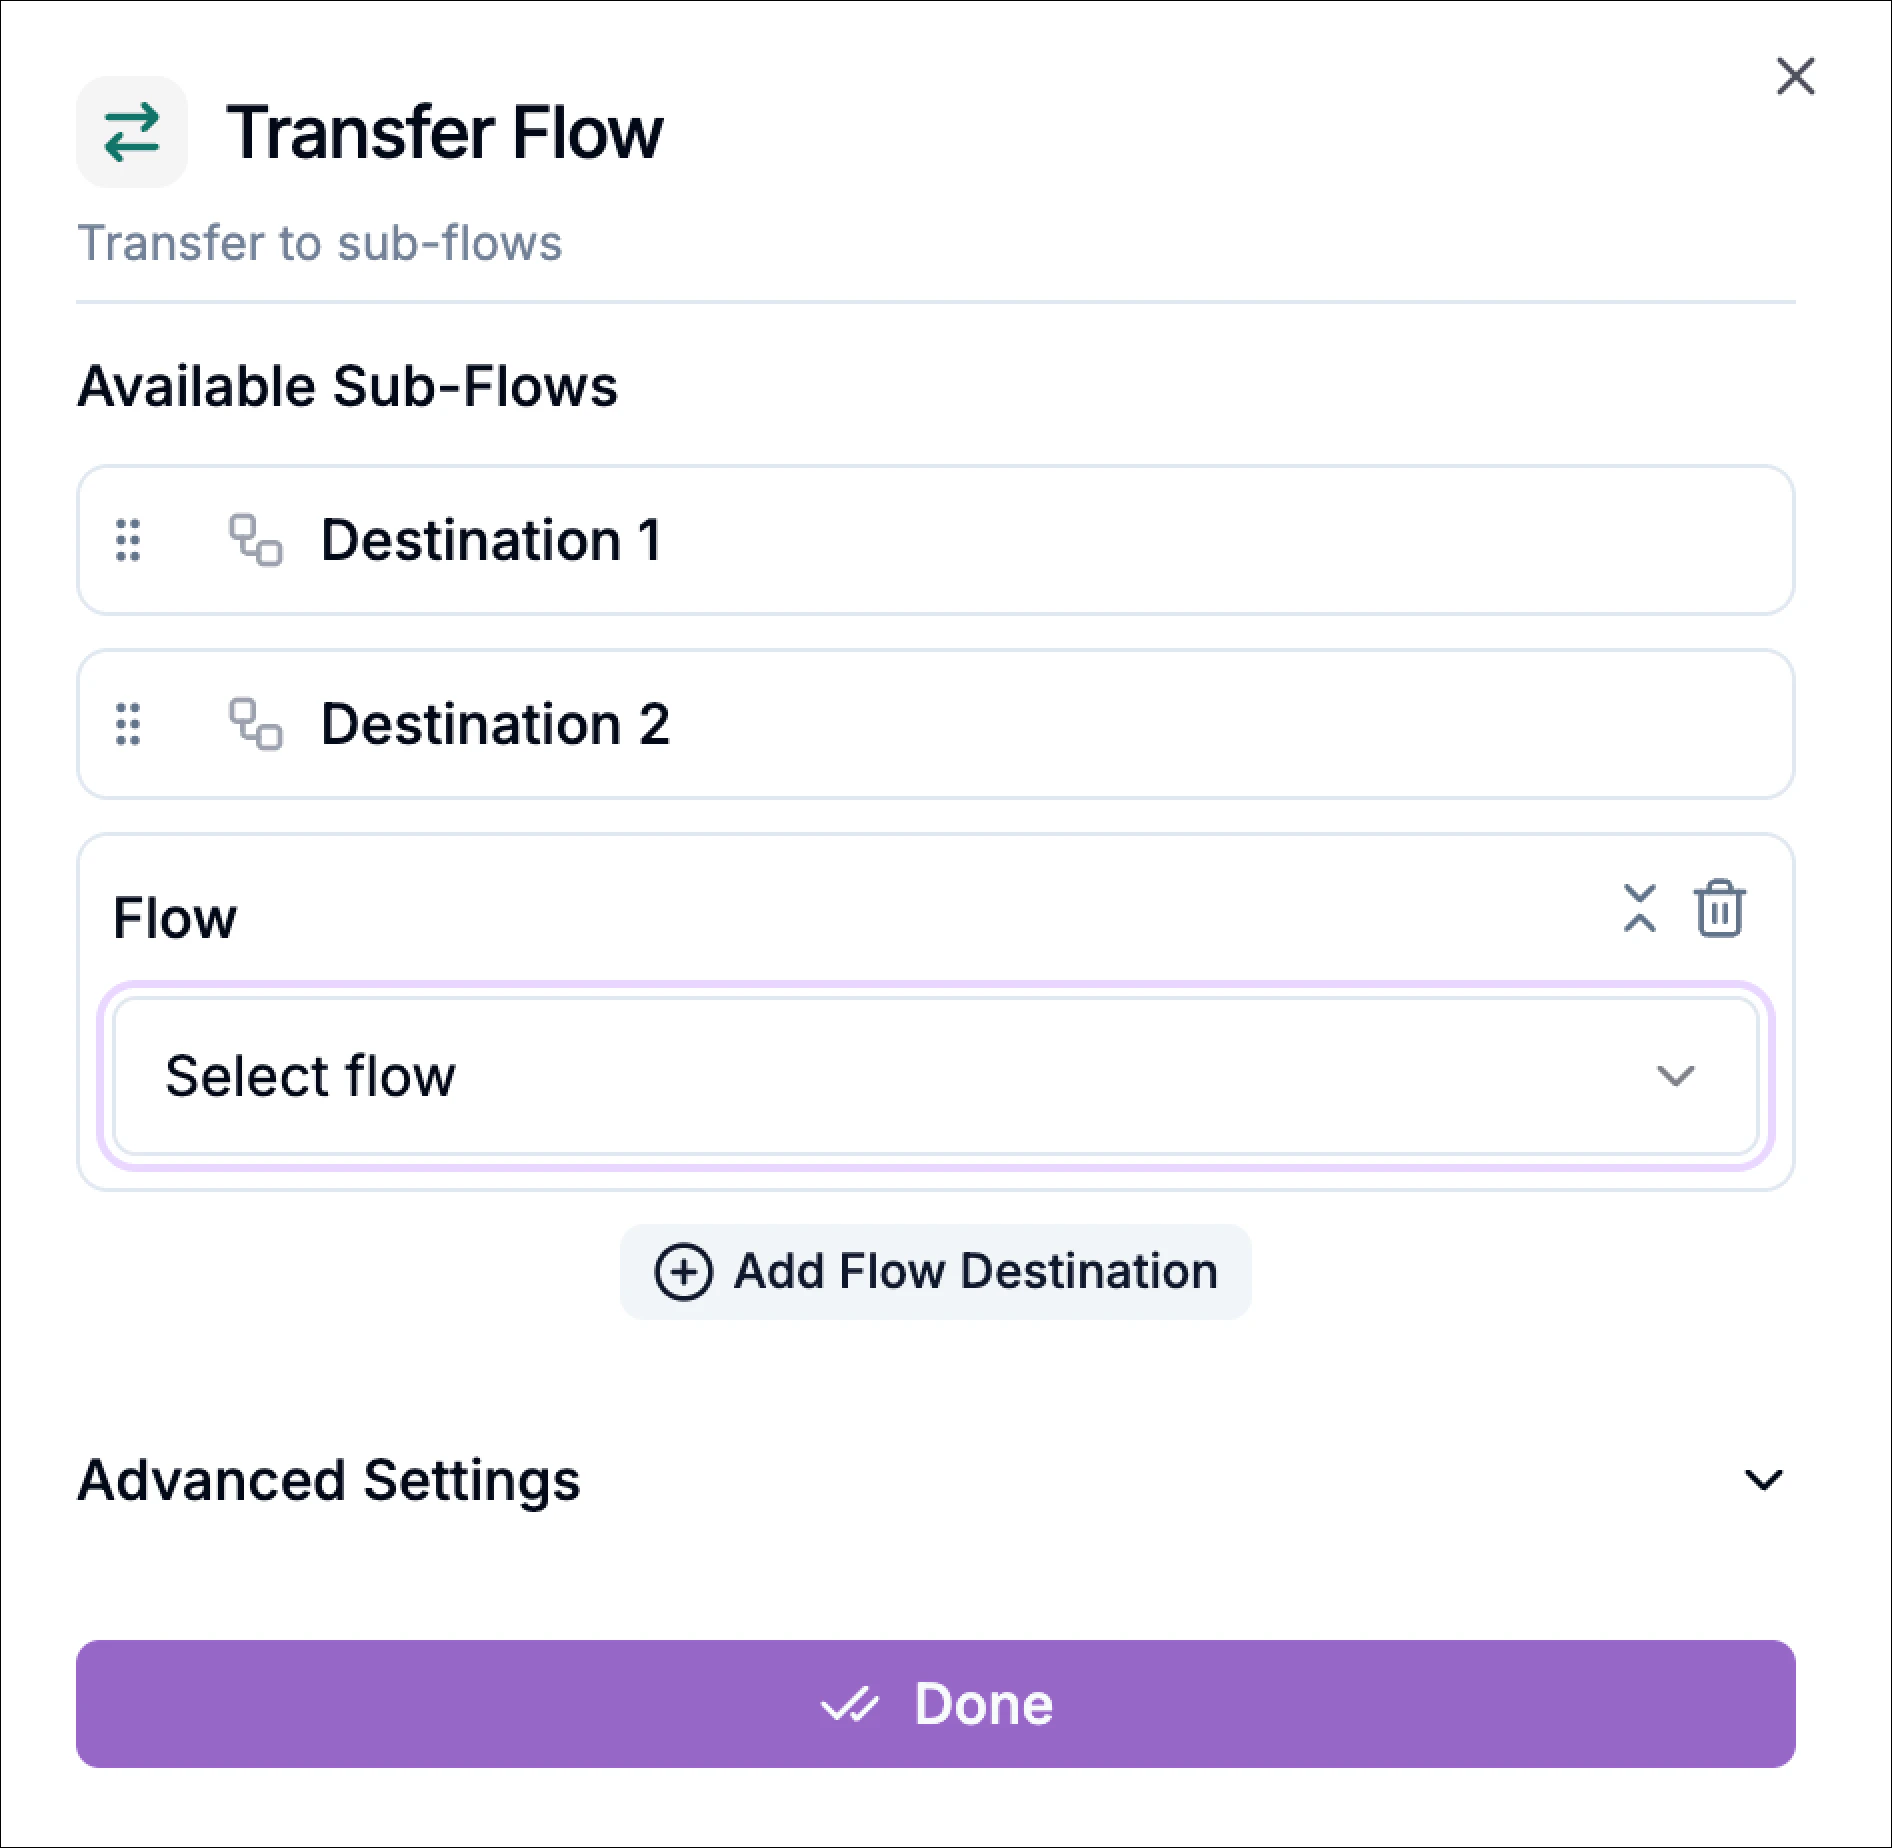 Each destination appears as a separate routing option inside the block.
### Define Transition Conditions
If you configure **multiple destinations**, a **Transition Condition** field appears.
Use this field to describe:
* When the caller should be routed to that destination.
* How the intent differs from other flows.
Each destination appears as a separate routing option inside the block.
### Define Transition Conditions
If you configure **multiple destinations**, a **Transition Condition** field appears.
Use this field to describe:
* When the caller should be routed to that destination.
* How the intent differs from other flows.
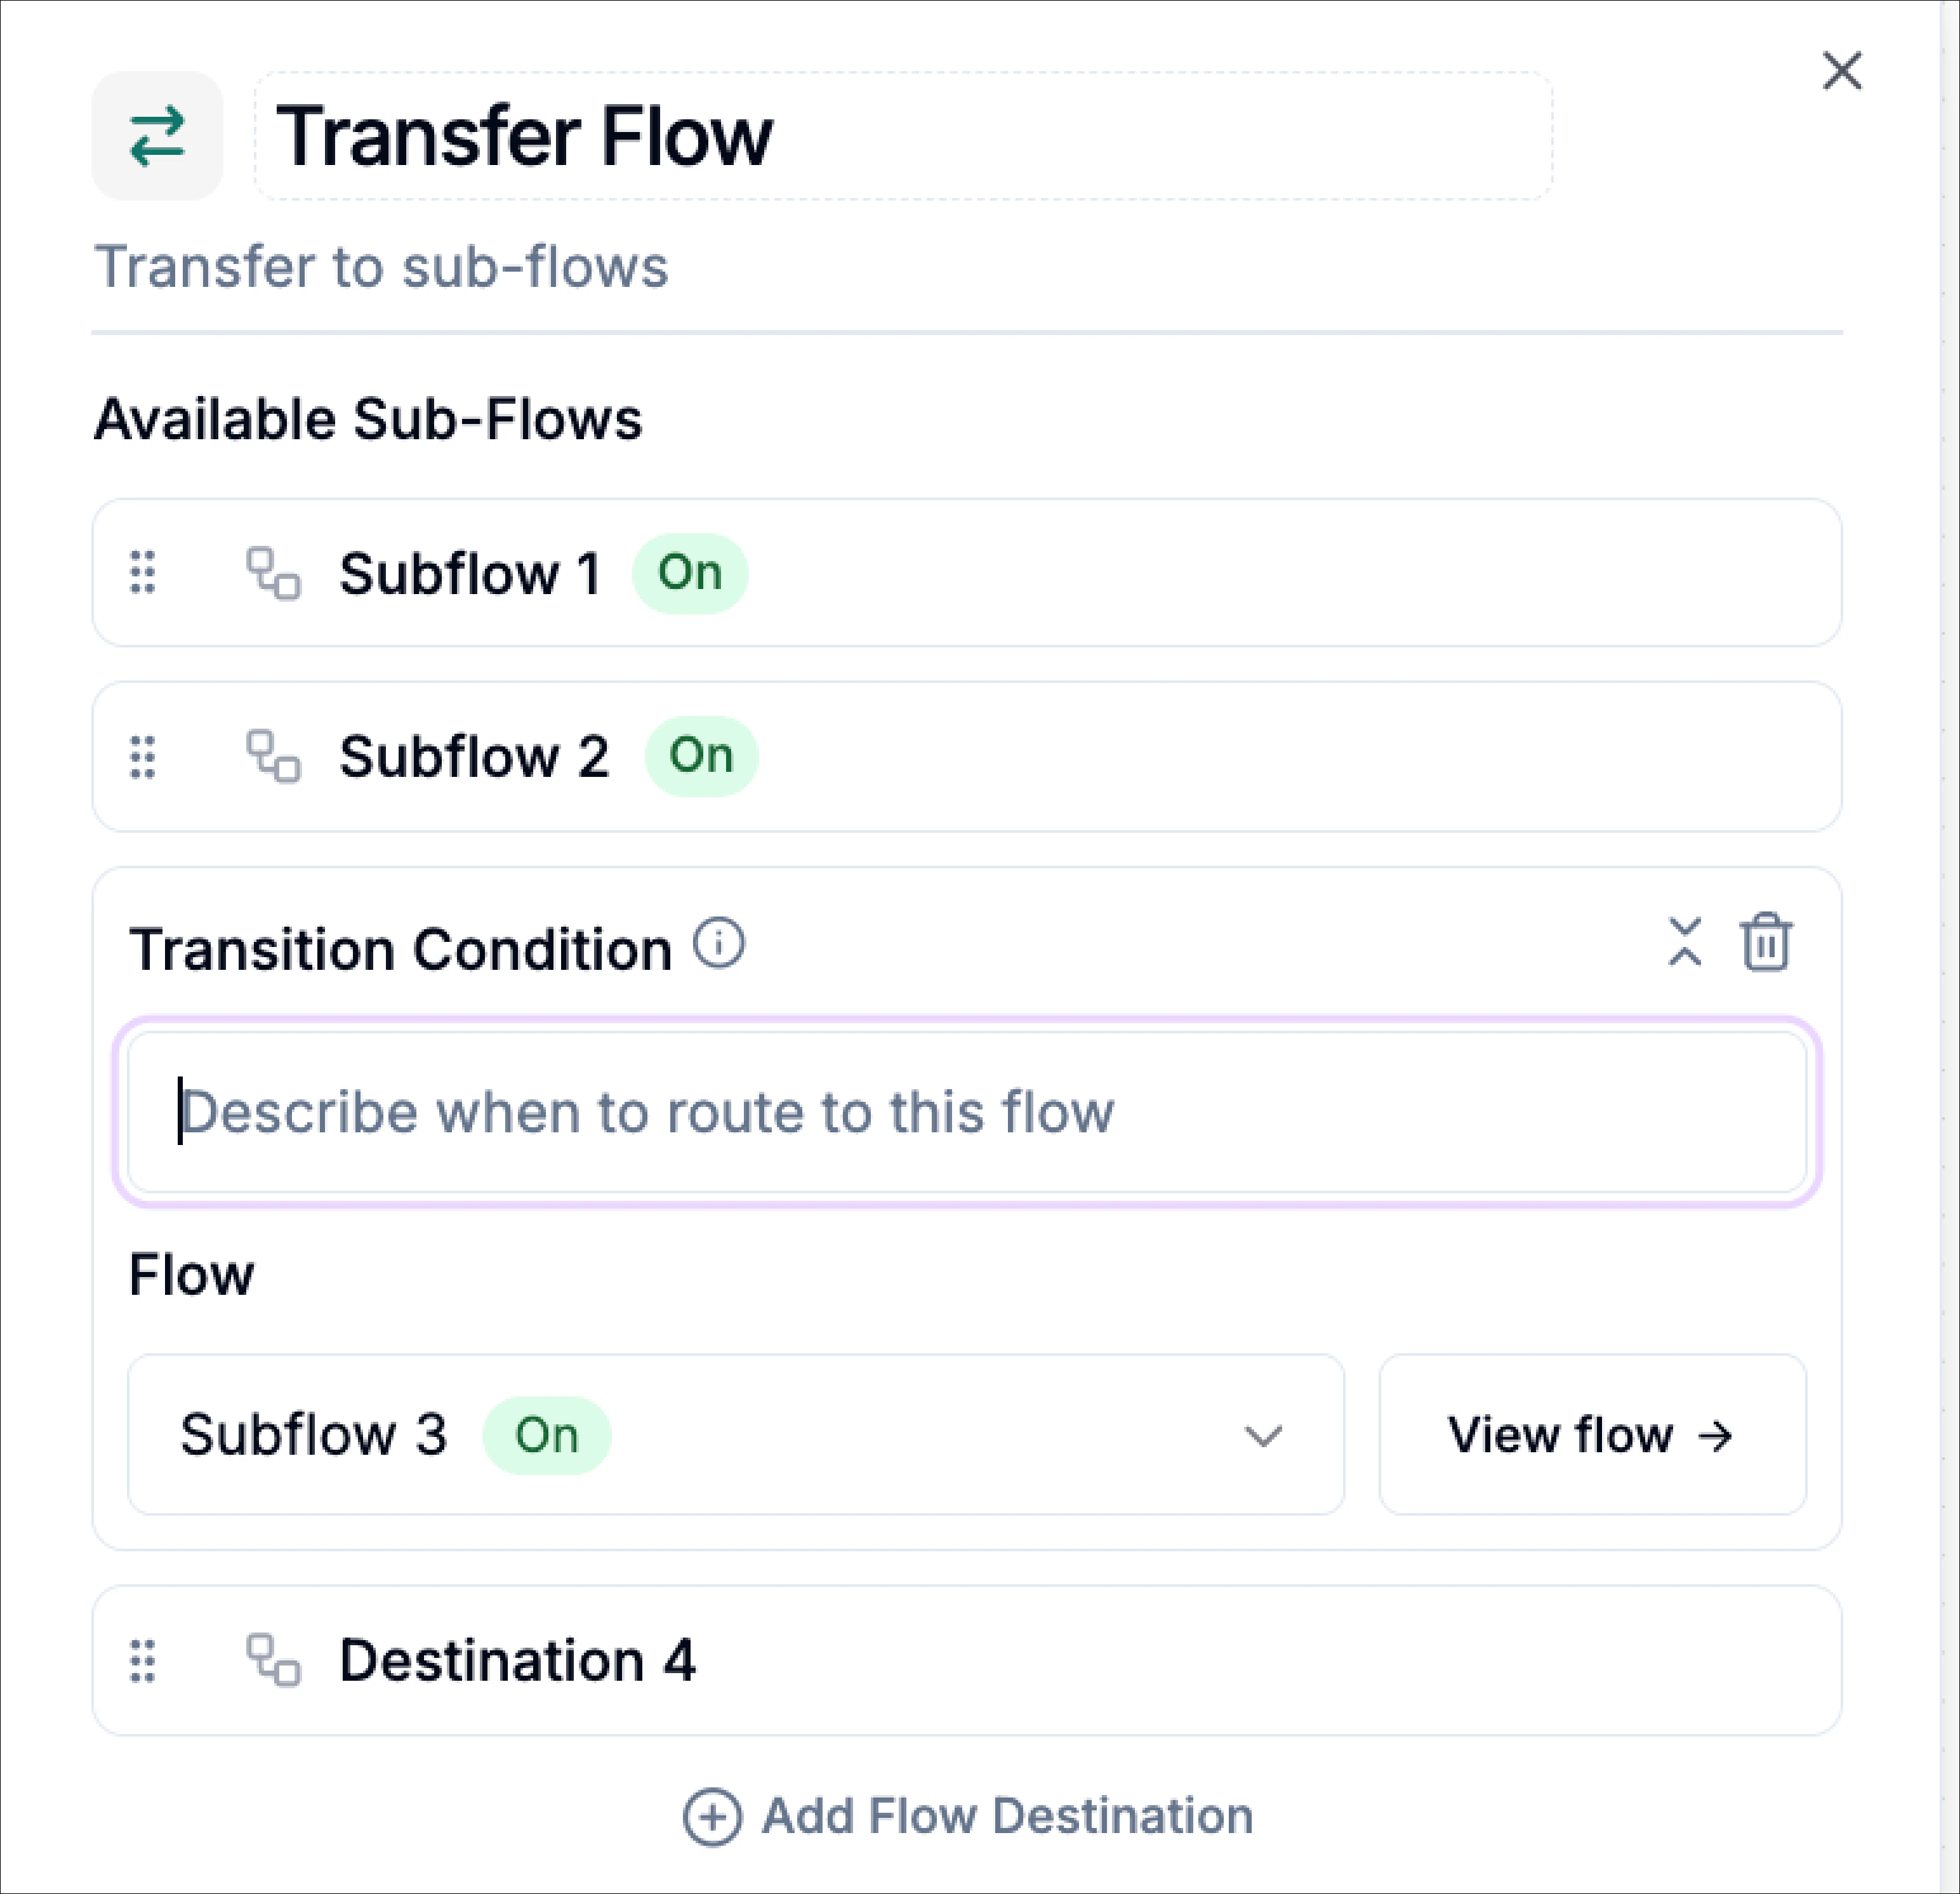 > These conditions connect to the global transition rules defined in your workflow.
### Advanced Settings
#### Interim Message
Enable Interim Message if you want the agent to say something during the transition, such as:
> “Let me connect you to the right place.”
You can also configure:
* Prompt-generated messages or type a fixed message.
* Post-interim message delay.
> These conditions connect to the global transition rules defined in your workflow.
### Advanced Settings
#### Interim Message
Enable Interim Message if you want the agent to say something during the transition, such as:
> “Let me connect you to the right place.”
You can also configure:
* Prompt-generated messages or type a fixed message.
* Post-interim message delay.
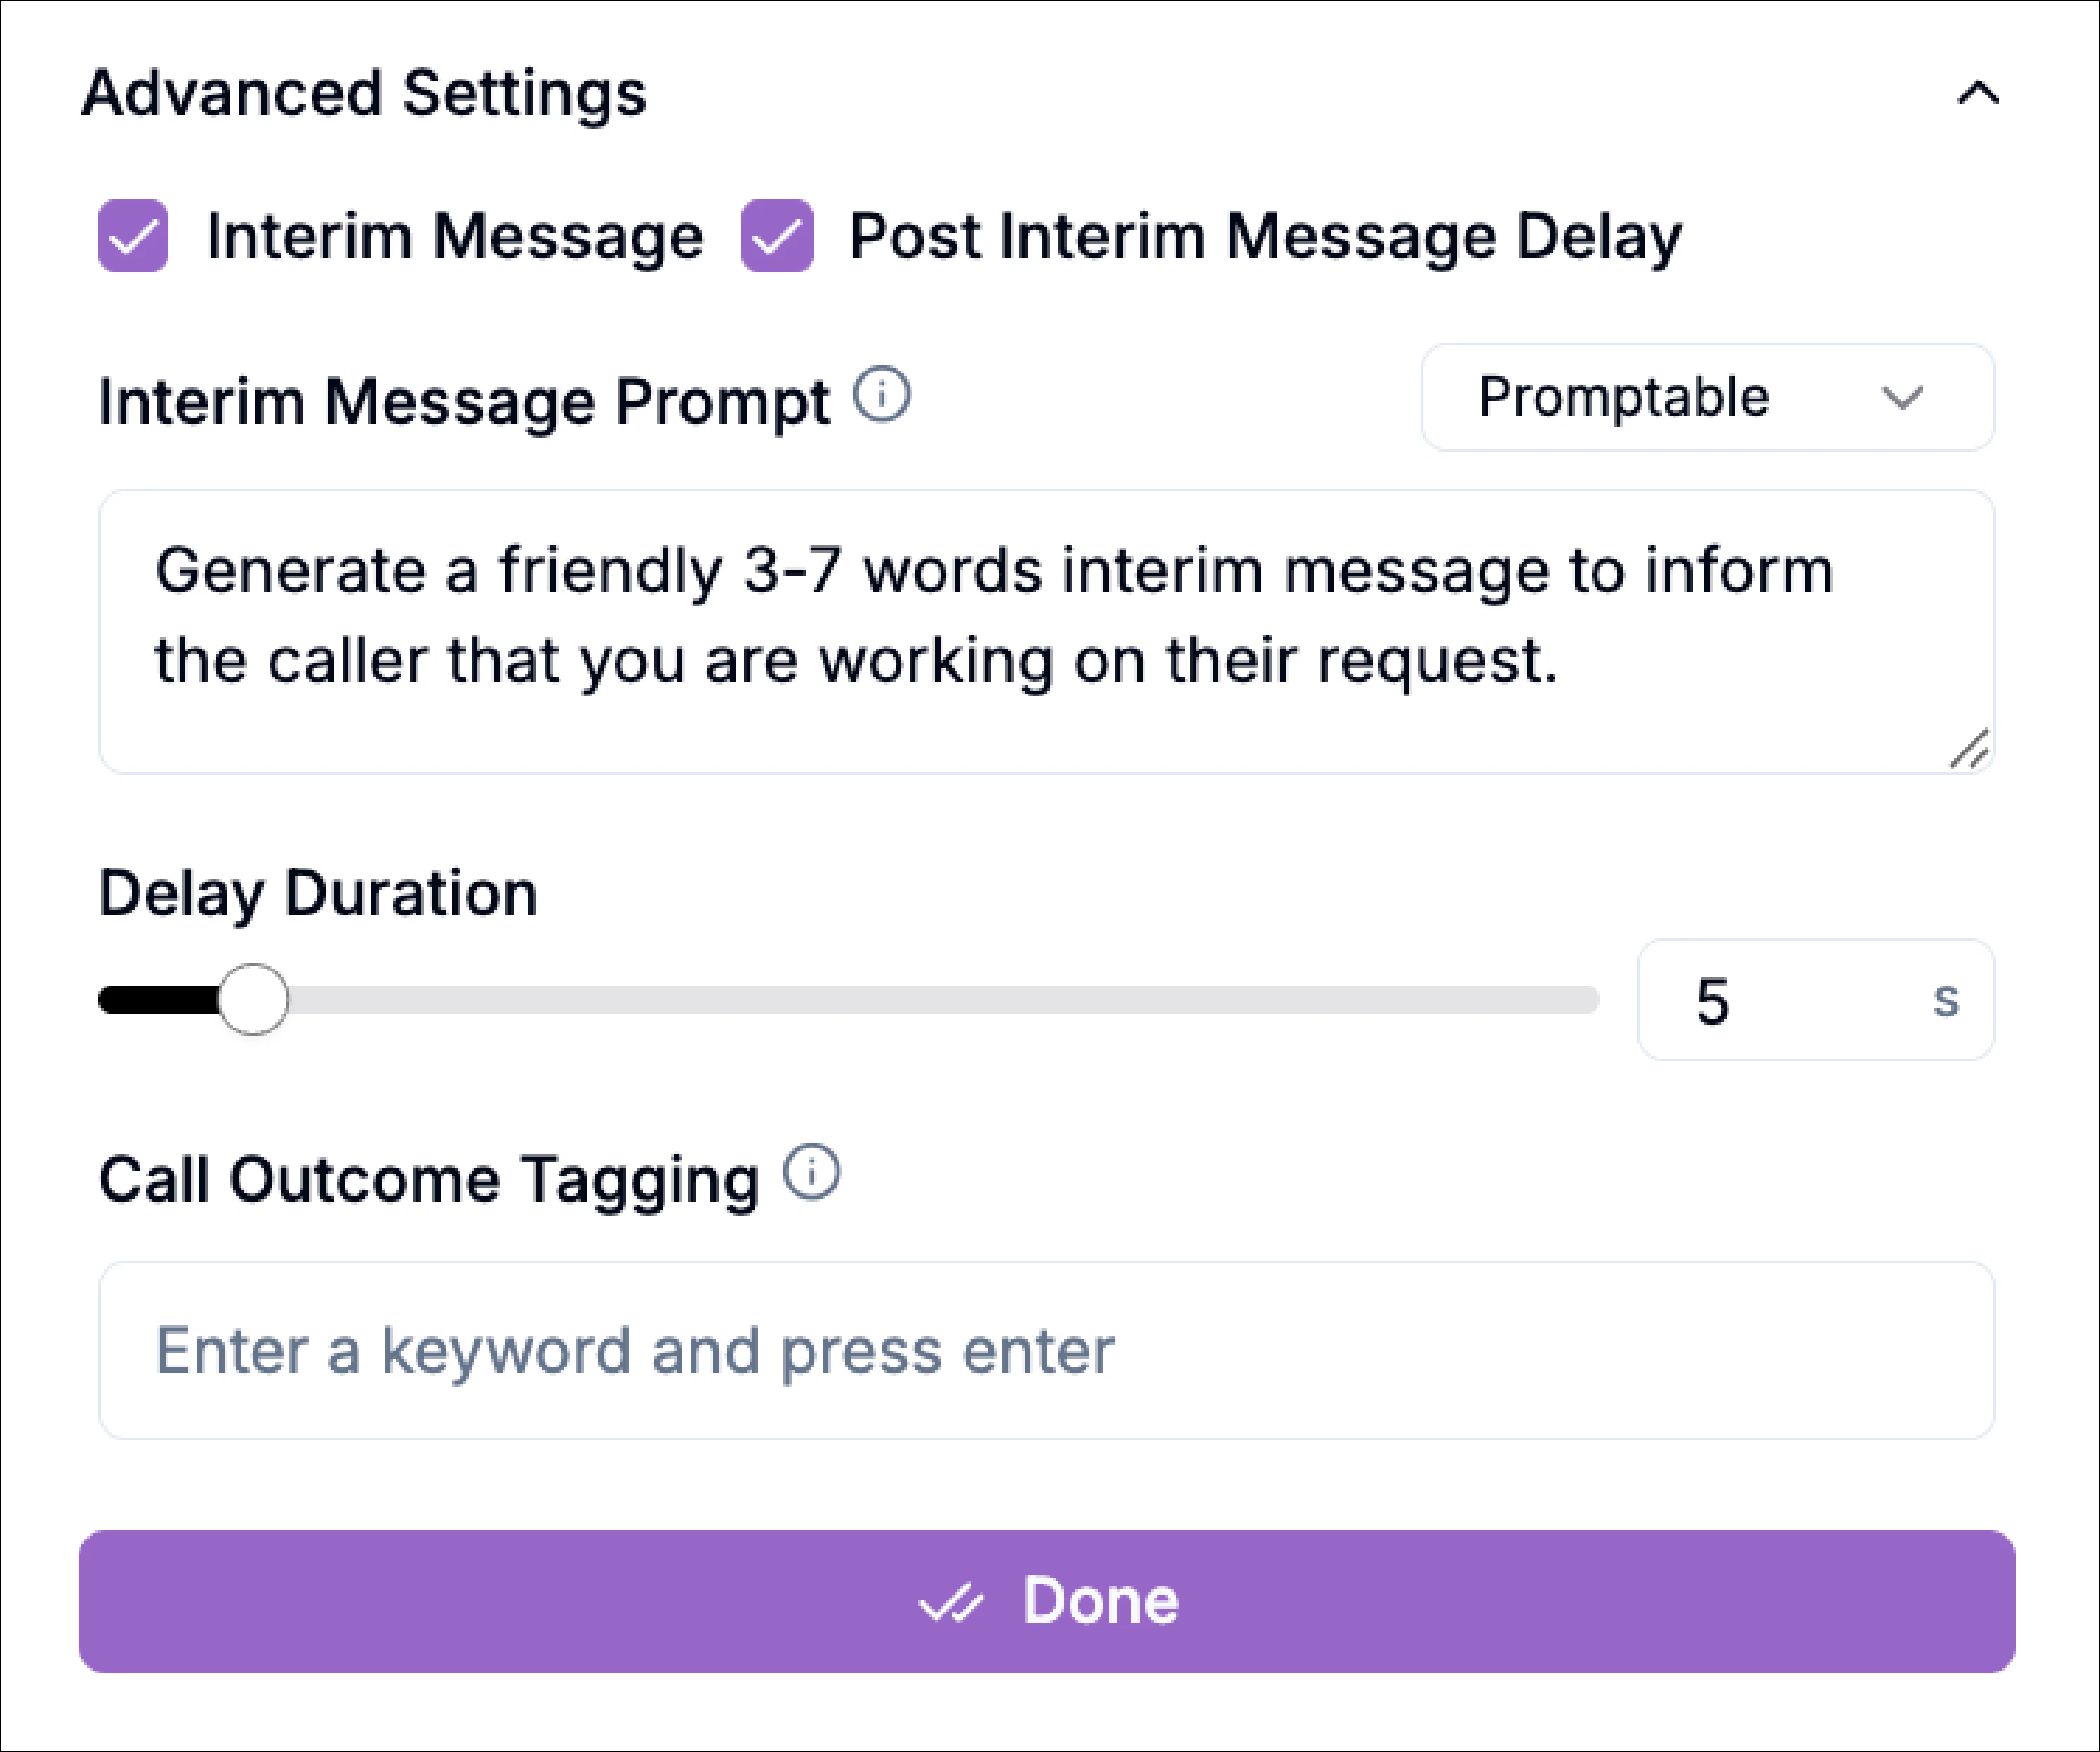 #### Call Outcome Tagging
Add a tag to indicate the outcome of the call for better analysis in the analytics section.
## Save
Click **Done** to finish the setup.
#### Call Outcome Tagging
Add a tag to indicate the outcome of the call for better analysis in the analytics section.
## Save
Click **Done** to finish the setup.