> ## Documentation Index
> Fetch the complete documentation index at: https://docs.phonely.ai/llms.txt
> Use this file to discover all available pages before exploring further.
# Filter
> Route conversation based on conditions and create dynamic conversation paths
The filter block is the routing logic layer in a Phonely call flow. You use it when the next step in the conversation shouldn’t be the same for every caller, because something about the call should change the route.
That “something” can be simple (like whether an email was collected) or more operational (like whether the caller is VIP, the request is urgent, or the caller is trying to reschedule). Instead of writing one long conversational prompt that tries to handle every situation, the Filter block lets you model those situations as explicit routing paths.
The key idea to understand is that Phonely does not route based on individual conditions. It routes based on cases.
Each case becomes a visible output on the canvas that you connect to a different part of your flow. The filter block decides which case output to follow by evaluating the conditions inside each case.
A condition is simply a rule used to qualify a case, such as:
* `caller_email exists`
* `plan_type is equal to "premium"`
* `detected_topics contains "refund"`
* AI match: “caller wants to reschedule an appointment”
In simple terms:
* **Cases define where the call can go.**
* **Conditions define when the call is allowed to take that route.**
When the filter block runs, Phonely evaluates your cases top to bottom, and selects the first case whose conditions are met. If none of the cases match, the call falls through to the Else path.
This ordering matters. If Case 1 is too broad, it can “catch” calls that you intended for Case 2. That’s why filter blocks work best when you structure your cases from most specific to most general, and treat else as your safe fallback.
 ## Use Cases
Here are common scenarios where the filter block is useful:
1. **Routing based on caller type:** Direct callers to different paths depending on who they are. For example, If caller\_type = existing\_customer, route to account manager; otherwise, to sales intake.
2. **Time-based call handling:** Handle calls differently based on time or day. For example, If current\_time is after 6 PM, route to after-hours voicemail; else continue to live agent.
3. **Service level routing**: Serve customers according to their plan or service tier. For example, If plan\_type = premium, send to priority support; if not, route to standard support.
4. **Geographic routing**: Route calls based on caller location or language preference. For example, If caller\_country = USA, connect to US team; if caller\_country = South Africa, route to Cape Town Team.
5. **Priority-based escalation**: Automatically escalate high-priority or urgent cases. For example, If ticket\_urgency = High and customer\_status = VIP, route to sscalation queue.
## How routing works in the Filter block
When a call reaches a **filter** block, Phonely doesn’t evaluate one big “true/false” decision. Instead, it evaluates your **cases in order** and picks the first case that matches.
Here’s the routing behavior to keep in mind:
1. Phonely starts with **Case 1** and checks the conditions inside it.
2. If Case 1’s conditions are met, the call immediately routes to **Case 1’s output path**.
3. If Case 1 does not match, Phonely checks **Case 2**, then **Case 3**, and so on.
4. If **no case matches**, the call routes to the **Else** path.
## Use Cases
Here are common scenarios where the filter block is useful:
1. **Routing based on caller type:** Direct callers to different paths depending on who they are. For example, If caller\_type = existing\_customer, route to account manager; otherwise, to sales intake.
2. **Time-based call handling:** Handle calls differently based on time or day. For example, If current\_time is after 6 PM, route to after-hours voicemail; else continue to live agent.
3. **Service level routing**: Serve customers according to their plan or service tier. For example, If plan\_type = premium, send to priority support; if not, route to standard support.
4. **Geographic routing**: Route calls based on caller location or language preference. For example, If caller\_country = USA, connect to US team; if caller\_country = South Africa, route to Cape Town Team.
5. **Priority-based escalation**: Automatically escalate high-priority or urgent cases. For example, If ticket\_urgency = High and customer\_status = VIP, route to sscalation queue.
## How routing works in the Filter block
When a call reaches a **filter** block, Phonely doesn’t evaluate one big “true/false” decision. Instead, it evaluates your **cases in order** and picks the first case that matches.
Here’s the routing behavior to keep in mind:
1. Phonely starts with **Case 1** and checks the conditions inside it.
2. If Case 1’s conditions are met, the call immediately routes to **Case 1’s output path**.
3. If Case 1 does not match, Phonely checks **Case 2**, then **Case 3**, and so on.
4. If **no case matches**, the call routes to the **Else** path.
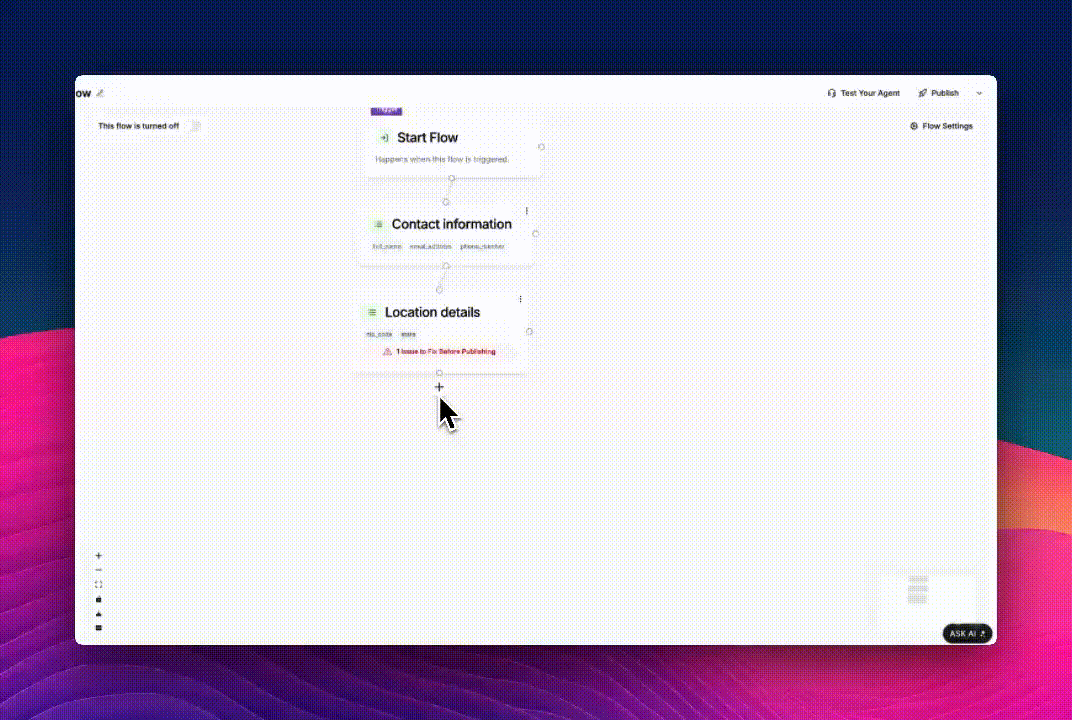
 ## Set Up a Filter Block
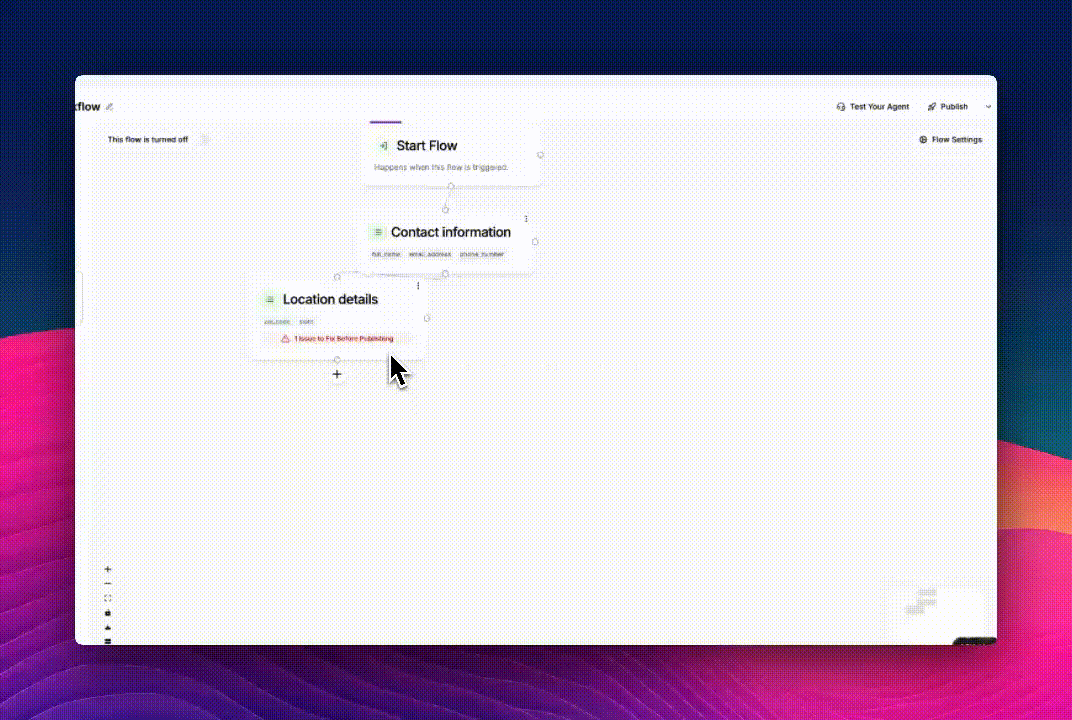
In your flow, click the **“+”** icon after any existing block.
Under **Flow Actions**, choose **Filter**. The Filter block will appear with two output paths: **Case 1** and **Else**.
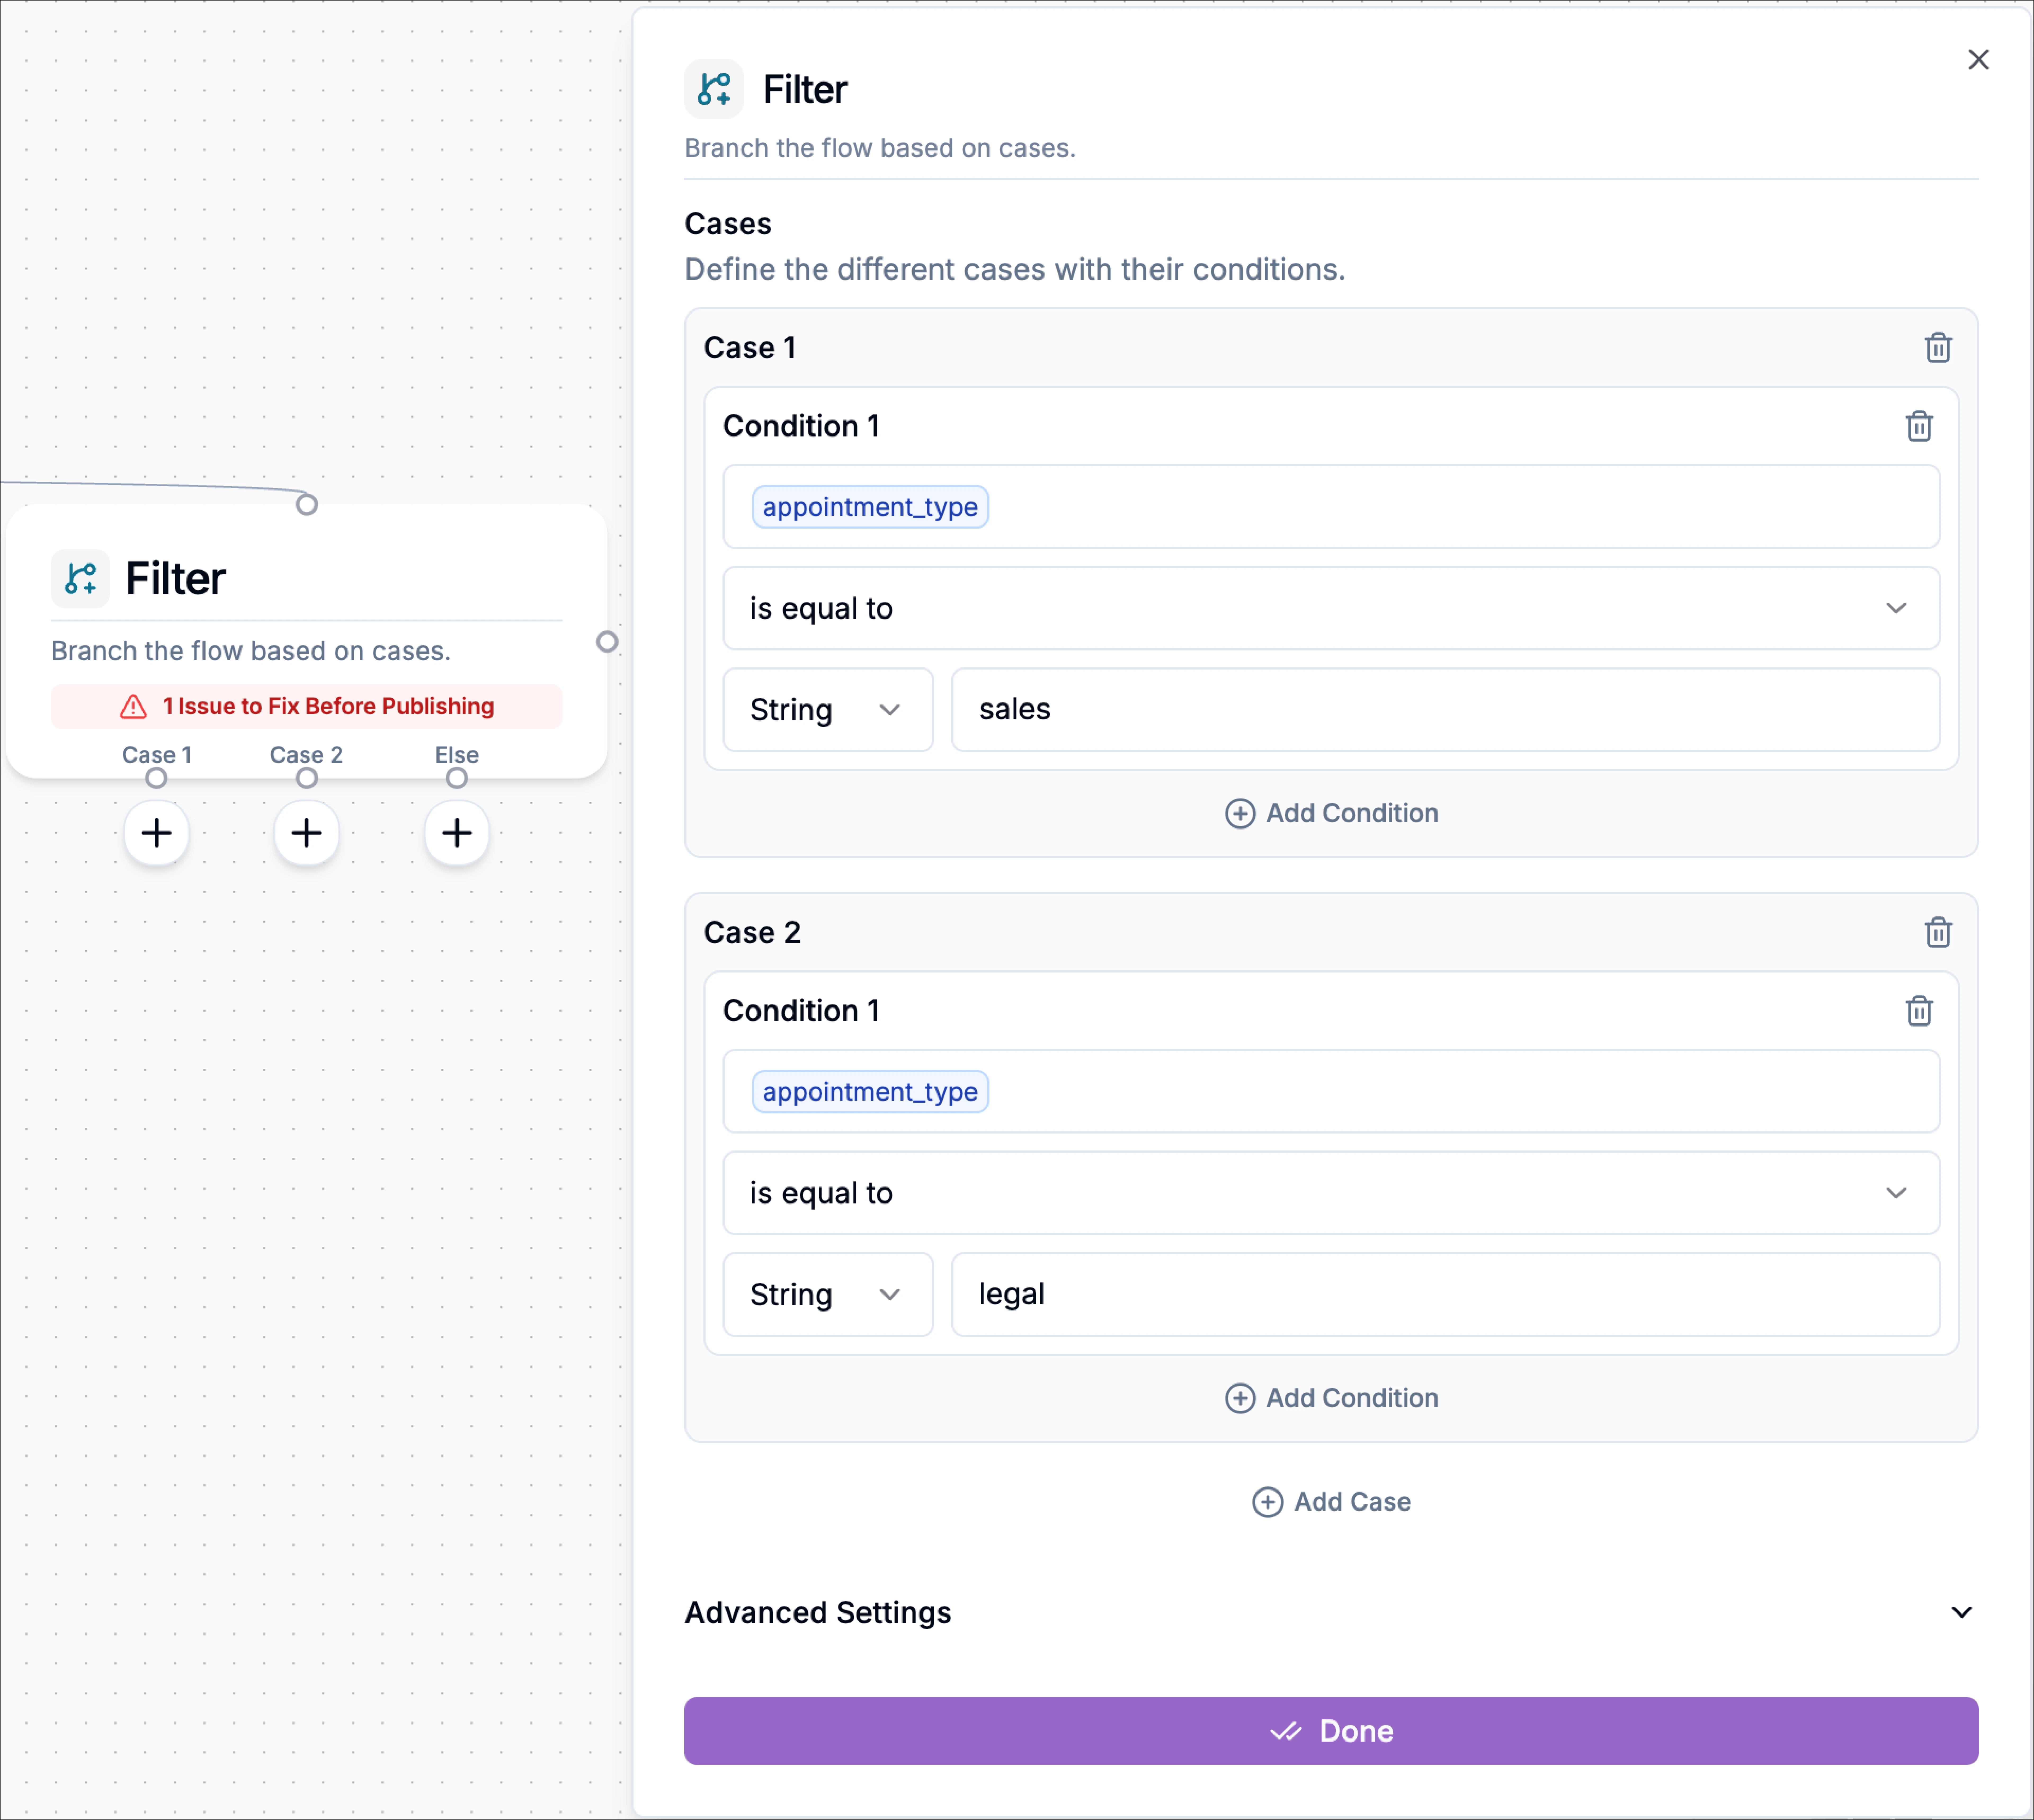
### Create a case (the routing path)
Click the filter block to open the Filter block configuration panel. Under **Cases**, you’ll see **Case 1** by default. A case is the actual route you will connect on the canvas. Think of it as:
> “If this case matches, send the call down this path.”
To add another route, click **Add Case**. This creates a new output path on the canvas (e.g., Case 3)
## Set Up a Filter Block
In your flow, click the **“+”** icon after any existing block.
Under **Flow Actions**, choose **Filter**. The Filter block will appear with two output paths: **Case 1** and **Else**.
### Create a case (the routing path)
Click the filter block to open the Filter block configuration panel. Under **Cases**, you’ll see **Case 1** by default. A case is the actual route you will connect on the canvas. Think of it as:
> “If this case matches, send the call down this path.”
To add another route, click **Add Case**. This creates a new output path on the canvas (e.g., Case 3)
 ### Define Your Conditions inside a case
Each condition is a rule that tells Phonely what to check. Click the filter block to open its configuration panel. Under **Conditions**, click into **Condition 1**.
You’ll see three main fields:
| Field | Description |
| :-------------------------------- | :------------------------------------------------------------------------------------------------------------------------------------------------------------------------------------------------------------------------------------------------------------ |
| **Define Field** | The variable or data point you want to evaluate (e.g., `caller_phone`, `customer_name`, `response`). |
| **Comparison Operator** | Defines how the field is compared, options include:
### Define Your Conditions inside a case
Each condition is a rule that tells Phonely what to check. Click the filter block to open its configuration panel. Under **Conditions**, click into **Condition 1**.
You’ll see three main fields:
| Field | Description |
| :-------------------------------- | :------------------------------------------------------------------------------------------------------------------------------------------------------------------------------------------------------------------------------------------------------------ |
| **Define Field** | The variable or data point you want to evaluate (e.g., `caller_phone`, `customer_name`, `response`). |
| **Comparison Operator** | Defines how the field is compared, options include:
• **exists**
• **doesn’t exist**
• **is equal to**
• **is not equal to**
• **is an array containing**
• **matches condition (AI)**
• **does not match condition (AI)** |
| **Value Type & Comparison Value** | Select the data type (String, Number, or Boolean) and specify the value to compare against. AI-based operators do not require a value type, they evaluate natural-language intent statements. |
### Choose Available Variables
Click inside define field, this opens the available variables panel.
Here you’ll find:
* **Call Variables** – System-generated details like caller ID, phone number, or call metadata.
* **Custom Variables** – Variables you’ve defined manually.
* **Auto-Gather Variables (Beta)** – Prompts the caller at the moment a block needs a value (name, email, date, etc.) no extra Talk block required.
* **Collect Caller Details** – Inputs from Collect or Ask Exactly blocks (e.g., `caller_name`, `caller_phone`).
### Select the Comparison Operator
Click the dropdown that says **“is equal to”** to see other options:
Checks whether the variable has any value. Useful for verifying that earlier blocks captured caller input.
**Confirm caller provided an email**
* Define Field: `caller_email`
* Comparison: **exists**
**True path:** continue to next step (booking, confirmation, CRM lookup)\
**False path:** ask again for email
Why this is useful: Sometimes callers skip input, the transcription misses it, or a previous step didn’t run. This check prevents the flow from continuing with missing data.
Use this when you want a fallback path if a value is missing. True when the variable is empty, null, or was never set.
Caller didn’t provide their name
Condition:
* Define Field: `caller_name`
* Comparison: **doesn’t exist**
**True path:** ask for name\
**False path:** greet caller using their name and continue
This is one of the simplest “polish” filters, your agent can feel smarter by handling missing details gracefully.
Use this when you want exact matching. Best for categories, flags, status fields, or known inputs
**Route premium customers**
Condition:
* Define Field: `plan_type`
* Comparison: **is equal to**
* Value: `premium`
**True path:** route to priority support\
**False path:** route to standard support
**Route based on appointment type**
Condition:
* Define Field: `appointment_type`
* Comparison: **is equal to**
* Value: `dentist`
**True path:** route to Dental scheduling flow\
**False path:** route to general scheduling
Use this when one value is allowed and everything else should go to another path.
**Prevent transfers for everyone except “VIP”**
**Use case:** Only VIP callers should be routed to a human agent; everyone else stays in the AI containment flow.
Condition
* Define Field: `customer_tier`
* Comparison: **is not equal to**
* Value: `VIP`
Paths
* **True path (not VIP):** Continue with AI self-serve flow
* **False path (VIP):** Transfer to live agent / escalation queue
Why it’s useful: Protects your human agent time while still giving VIP customers priority handling.
Used when the variable is a list and you need to check if it contains a specific item.
Escalate “angry customer” calls detected by sentiment + topic tagging
**Use case:** You tag calls that need a softer handoff (e.g., escalation) based on automation rules.
Condition:
* Define Field: `call_tags`
* Comparison: **is an array containing**
* Value: `needs_escalation`
**True path:** Transfer to escalation queue + add outcome tag “escalated”\
**False path:** Continue AI containment flow
Why it’s useful: You can keep your flow simple while using tags as the “signal” to trigger escalation.
Uses AI to evaluate whether the caller’s message or extracted intent semantically\_matches\_ a natural-language condition you define.
* “caller wants to book an appointment”
* “caller is asking for refund”
* “caller needs technical support”
The inverse of the above. True when the caller’s message or intent *does not* match your natural-language condition.
* “caller is not asking about appointments”
* “caller is not requesting order status”.
These AI-powered options are ideal when you want logic based on intent, not exact words, enabling more natural decision-making without manually collecting variables.Choose one that fits your logic.
### Enter the Comparison Value
Under the comparison dropdown, click the small menu and choose the correct type of the value you want to compare against.
| Data Type | When to Use |
| :---------- | :-------------------------------------------------- |
| **String** | For text values like names or words. |
| **Number** | For numeric comparisons like age, amount, or count. |
| **Boolean** | For true/false logic (e.g., `is_verified = true`). |
Then enter your comparison value.
## Add multiple conditions inside the same case (AND vs OR)
A case can contain more than one condition. When you add multiple conditions, you must choose how they combine:
| Logic Option | Description |
| :----------- | :--------------------------------------------------------- |
| **And** | All conditions must be true for the case to match. |
| **Or** | Only one condition needs to be true for the case to match. |
**Example (AND): Verify caller before routing**
* `caller_name exists`
* `caller_phone exists`
Logic: **AND** meaning this case only matches if both values were captured.
**Example (OR): Route to billing**
* AI match: “caller wants a refund”
AI match: “caller is asking about charges”
Logic: **OR** meaning: either signal qualifies for billing.
* And → caller\_name = John **and** caller\_phone = 123456
* Or → caller\_name = John **or** caller\_name = Jane
## Configure Advanced Settings
Here’s what you can adjust advanced settings let you fine-tune what the caller hears while the Filter evaluates cases, and optionally tag the call outcome for reporting.
Scroll down to **Advanced Settings** section. Click to expand.
### Interim Message
Enable **Interim Message** to play a short message to the caller while Phonely processes the filter logic (for example, evaluating conditions or selecting the matching case). This helps avoid awkward silence and makes the experience feel intentional.
You can choose how the interim message is generated:
* **Fixed**: You write the exact message Phonely should say every time. Example: “One moment while I check that.”
* **Promptable**: You provide a prompt and Phonely generates a friendly **3–7 word** interim message based on your instruction. Example prompt: “Generate a friendly 3–7 word interim message to inform the caller that you are working on their request.”
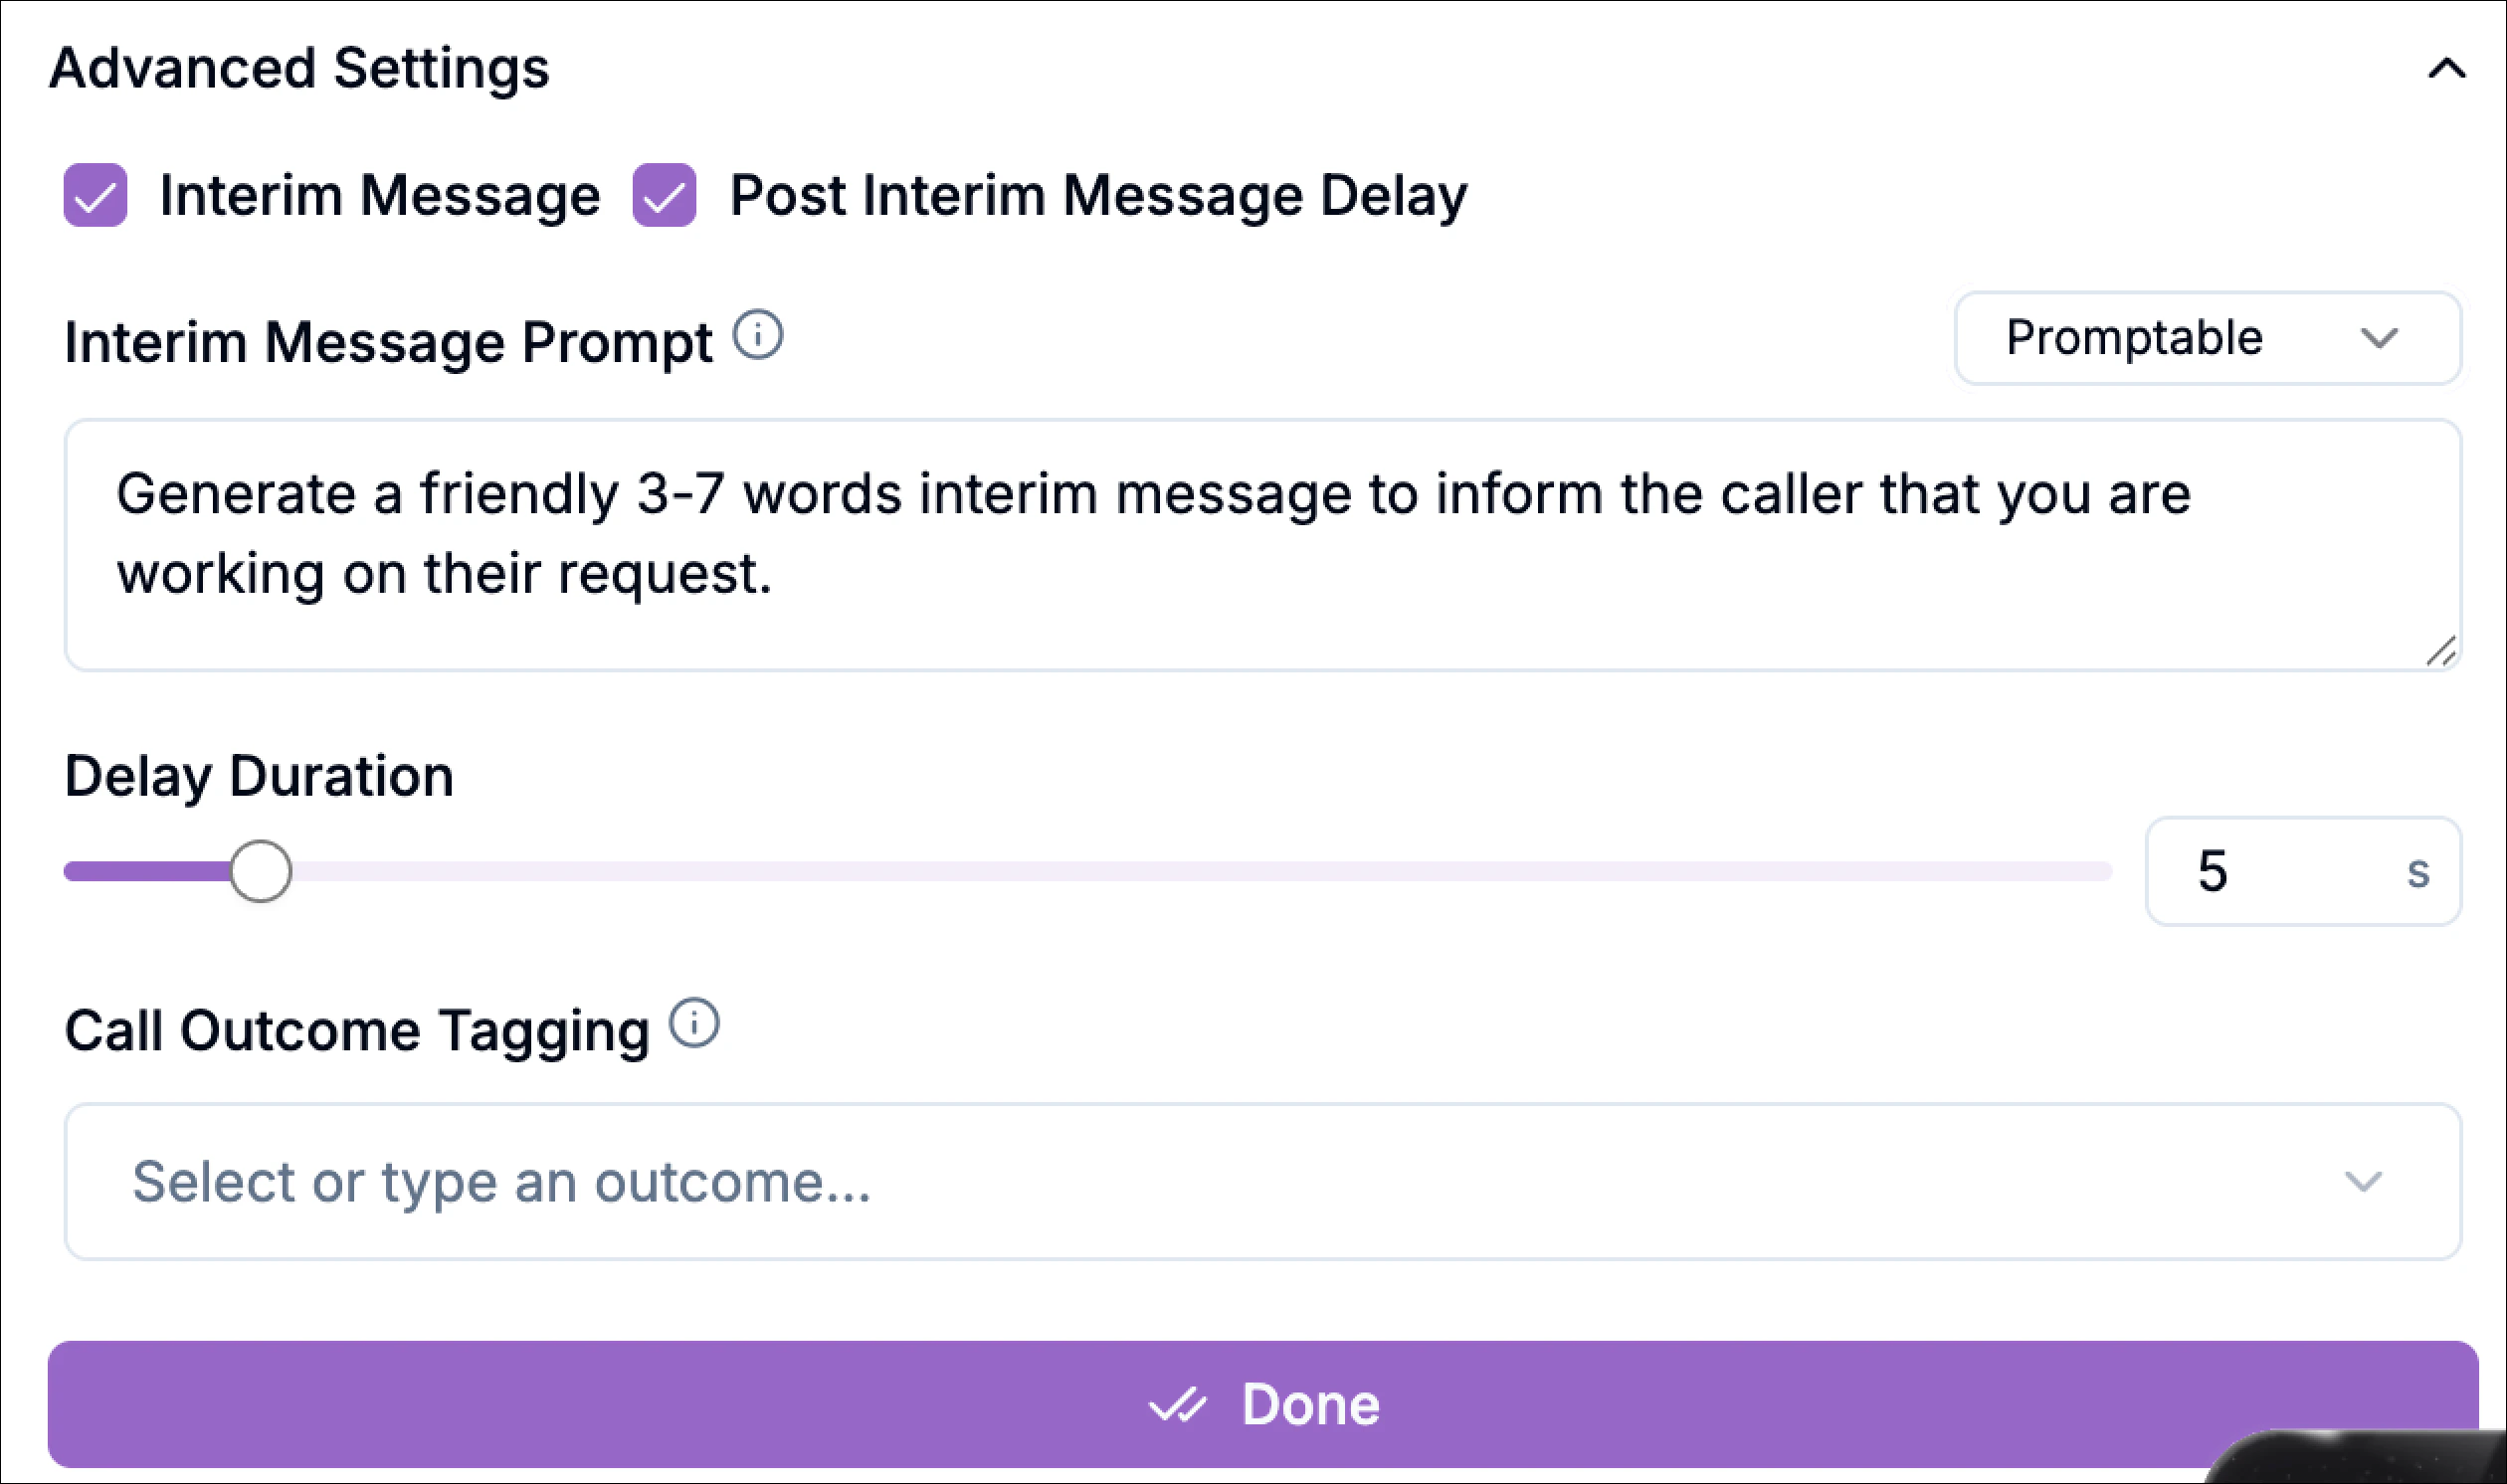 ### Post Interim Message Delay
Enable post interim message delay to add a short wait after the interim message is spoken, before the flow continues to the selected case path. Use the **Delay Duration** slider to set the delay in seconds.
This is helpful when you want the interim message to land naturally (instead of the flow moving immediately into the next block).
### Call Outcome Tagging
Use **Call Outcome Tagging** to label the call at this point in the flow. You can select an existing outcome or type a custom one.
This is useful for analytics because it lets you track how often a specific routing decision occurs (for example, how many calls were escalated vs. handled normally), and later filter/group performance reporting by those outcomes.
Example outcome tags:
* `vip_escalation`
* `billing_routed`
* `missing_required_info`
* `appointment_booking_path`
### Save the Filter
Click **Done** to confirm and exit.
Once done:
* The block shows **True** and **False** outputs.
* Connect the **True** path to actions to perform if all conditions pass.
* Connect the **False** path to fallback or error handling actions.
## Example: Using Variables in Filter Logic
Let’s say your **Collect block** gathered two inputs from the caller:
* `caller_phone`
* `caller_zip_code`
You can then use a filter block to determine which store location the caller should be routed to based on these values.
* **Condition 1:** caller\_phone starts with "+1-312" (Chicago area code).
* **Condition 2:** caller\_zip\_code is equal to "60601" (Downtown Chicago ZIP code).
Set **Logic** to **And**.
**>** If both conditions are true, the flow continues through the True branch, for example, routing the caller to the Chicago Downtown Store or triggering an API Request to fetch store details in that ZIP code area.
**>** If not, the flow follows the False branch, for example, playing a message such as:
> *“Sorry, we couldn’t find a nearby store based on your location. Please check your ZIP code and try again.”*
### Post Interim Message Delay
Enable post interim message delay to add a short wait after the interim message is spoken, before the flow continues to the selected case path. Use the **Delay Duration** slider to set the delay in seconds.
This is helpful when you want the interim message to land naturally (instead of the flow moving immediately into the next block).
### Call Outcome Tagging
Use **Call Outcome Tagging** to label the call at this point in the flow. You can select an existing outcome or type a custom one.
This is useful for analytics because it lets you track how often a specific routing decision occurs (for example, how many calls were escalated vs. handled normally), and later filter/group performance reporting by those outcomes.
Example outcome tags:
* `vip_escalation`
* `billing_routed`
* `missing_required_info`
* `appointment_booking_path`
### Save the Filter
Click **Done** to confirm and exit.
Once done:
* The block shows **True** and **False** outputs.
* Connect the **True** path to actions to perform if all conditions pass.
* Connect the **False** path to fallback or error handling actions.
## Example: Using Variables in Filter Logic
Let’s say your **Collect block** gathered two inputs from the caller:
* `caller_phone`
* `caller_zip_code`
You can then use a filter block to determine which store location the caller should be routed to based on these values.
* **Condition 1:** caller\_phone starts with "+1-312" (Chicago area code).
* **Condition 2:** caller\_zip\_code is equal to "60601" (Downtown Chicago ZIP code).
Set **Logic** to **And**.
**>** If both conditions are true, the flow continues through the True branch, for example, routing the caller to the Chicago Downtown Store or triggering an API Request to fetch store details in that ZIP code area.
**>** If not, the flow follows the False branch, for example, playing a message such as:
> *“Sorry, we couldn’t find a nearby store based on your location. Please check your ZIP code and try again.”*